Why Your Addition Footings Need Rebar Chairs for Proper Support
I’ll be honest—one of the lightbulb moments in my home renovation journey came when I overlooked a tiny detail during footing installation. Picture this: after pouring the concrete, I noticed cracks forming along the edges of my addition, and panic set in. It was a hard lesson that proper support isn’t just about pouring concrete; it’s about ensuring everything stays in place for decades to come. That realization led me down a rabbit hole of research, where I discovered a small but mighty component: rebar chairs. These simple devices make a huge difference.
The Hidden Power of Rebar Chairs in Construction
Rebar chairs are essential in maintaining the proper positioning of rebar within concrete footings. Without them, rebar can shift or sink, compromising the structural integrity of the foundation. I learned that using the right number of rebar chairs—and placing them correctly—can prevent costly future repairs and even safety issues down the line. It’s like reinforcing your home from the ground up, literally. Still, many folks overlook this detail, thinking that just pouring concrete will do. But as many seasoned contractors will tell you, neglecting rebar chairs can lead to cracks and weakening in your foundation over time.
Are Rebar Chairs Really Worth the Extra Effort?
Early on, I made the mistake of skipping the proper placement of rebar during my first attempt at footing work. The result? A foundation that didn’t perform as expected. I wish I had known sooner that these inexpensive supports are worth every penny. According to construction experts, ensuring rebar stays in the correct position is vital for compliance with building codes and longevity. Not taking this step seriously can mean shoring up foundations later, which is always more expensive—and less satisfying—than doing it right the first time.
If your project involves new build or addition footings, do yourself a favor and pay attention to the support system beneath your concrete. A small investment in quality rebar chairs can save a ton of trouble down the road. Ready to learn how to get this right? Keep reading as I walk you through the practical steps of supporting your footing with proper rebar chairs, so your foundation stands the test of time.
**Have you faced issues with footing support in your projects? Drop a comment below—I’d love to hear your experiences.**
Prepare Your Materials and Setup
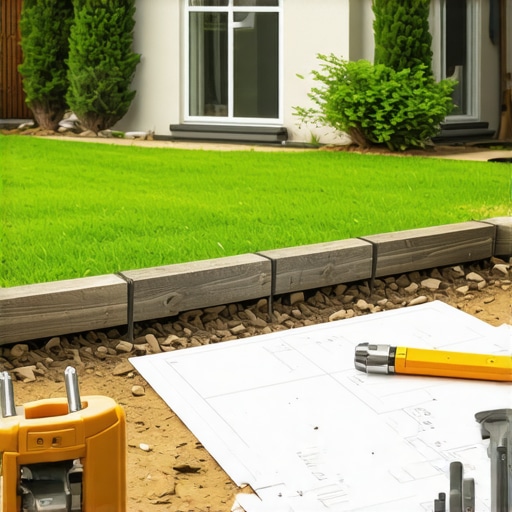
Start by gathering all necessary supplies: quality rebar chairs, measuring tools, and rebar. Ensure your footing form is correctly set and level. Think of this step as laying the groundwork for building a house of cards; each piece must be precisely positioned. During my own project, I double-checked the form’s level and decided to lay out the rebar chairs on a clean, dry surface to prevent slipping, which made placing them much easier and more precise.
Position the Rebar Chairs Correctly
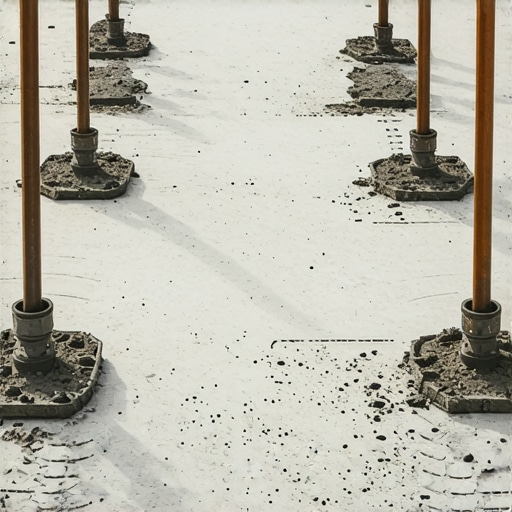
Place the rebar chairs at specified intervals, typically every 18 to 24 inches along the rebar runs, ensuring they support the rebar at the correct height—usually one-third from the bottom of the footing. Use a measuring tape to verify the height and spacing. Think of this as setting tiny scaffolds, holding the rebar steady in its planned position. During my last footing pour, I used a level and a laser line to mark the height on the form, then inserted the chairs accordingly. This guaranteed the rebar stayed in the right place once the concrete was poured, preventing cracks caused by unsupported rebar sagging.
Secure the Rebar in Place
Once positioned, ensure the rebar doesn’t shift during concrete pouring. Tying the rebar with wire at intersections provides stability; similarly, placing chairs just tight enough prevents movement without crushing the rebar. In a recent project, I tightly secured the chairs with rebar tie wire, which proved invaluable when pouring the concrete—nothing shifted, and the rebar remained perfectly aligned. This simple step is like anchoring a tent stake firmly into the ground, making sure everything stays put against unexpected forces.
Verify and Double-Check Before Pouring
After placing all chairs and rebar, step back and review the layout. Walk around the footing and confirm that the rebar is truly at the intended height and spacing. Use a level on the rebar, and check the chair placements against your plan. During my experience, I found a few chairs slightly too high or low, so I adjusted them before the pour. Think of this as a final inspection before launching a rocket—precision here ensures everything functions perfectly later on. This extra diligence saves time and money by avoiding foundation issues down the line.
Apply the Lessons Learned
Remember, skipping or rushing through rebar chair placement is like skipping the foundation of a house—dangerous and costly. Every detail counts, and getting this step right takes only a bit of time but yields a foundation that will stand firm for decades. By following these concrete steps and verifying each position diligently, you set yourself up for a successful project that resists cracking and structural failure. After completing my footing with proper rebar support, I slept easier knowing my foundation had that extra layer of security, and the house would stand strong against time and elements.
When it comes to planning a home addition or embarking on a new build, many homeowners and even some contractors fall prey to misconceptions that can lead to costly mistakes. One pervasive myth is that estimating project costs is straightforward—simply tally supplies and labor. However, the reality involves nuanced variables like site conditions, permit complexities, and unexpected delays. Relying solely on basic estimates without accounting for these factors often results in budget overruns, which could have been mitigated through comprehensive planning, as discussed in top estimating strategies. Additionally, many assume permits are mere bureaucratic hurdles rather than essential safety and code compliance steps. Skipping or rushing permit acquisition can cause severe repercussions, including fines, project delays, or even legal issues, emphasized in permit approval tips. There’s also a dangerous misconception that permits can be expedited easily, but rushing the process without understanding local requirements often leads to rejections, additional fees, and redesigns. An advanced mistake to avoid is underestimating site-specific challenges, such as soil conditions or existing utilities, which can drastically alter project scope and costs. For example, failing to perform thorough site surveys can result in foundation issues or utility conflicts—problems that might only be discovered during construction, causing delays and extra expenses. Experts stress the importance of detailed pre-construction assessments, with comprehensive understanding of permit processes being vital for avoiding pitfalls. So, what about the advanced questions homeowners should ask? One common query is, “How do site conditions influence my permit requirements and project costs?” The answer lies in meticulous planning and consulting local building codes, as well as experts who specialize in navigating complex permitting landscapes. Moreover, studies have shown that projects with thorough preliminary assessments and realistic estimates are more likely to stay within budget and schedule, underscoring the need for due diligence. Are you mindful of these nuanced aspects when planning your next move? Have you ever fallen into this trap? Let me know in the comments.
Invest in Quality Tools for Reliable Maintenance
Maintaining your construction projects over time hinges on having the right equipment. I personally recommend investing in a high-quality digital moisture meter like the Extech MO290. It’s become my go-to device for quickly assessing moisture levels in walls, floors, and foundations, helping me catch potential issues before they escalate. Consistent moisture checks can prevent mold growth, wood rot, and structural damage, saving you significant repair costs down the line. Pair this with a solid cordless drill such as the DeWalt XR FlexVolt, which offers the power and endurance needed for ongoing maintenance tasks around a property.
Another essential tool is a laser distance measurer, like the Bosch GLM50 C. Its precision helps in verifying measurements during inspections, ensuring your structures stay within safe tolerances over time. These technical tools are not just for contractors—they are invaluable for homeowners who want to proactively manage their property’s health. As the trend towards smart maintenance grows, integrating digital tools like moisture sensors that sync with your smartphone is becoming more popular, offering real-time alerts for potential issues.
The Power of Preventative Maintenance Routines
Beyond tools, establishing regular maintenance schedules is crucial. For example, inspecting gutters and drainage systems every season prevents water from seeping into foundations. Booking quarterly check-ups with a professional engineer to review structural elements can extend the lifespan of your build. In my experience, setting reminders on a digital calendar ensures these routines aren’t overlooked. In the future, I predict that AI-driven diagnostics will become standard, providing predictive insights based on data collected from sensors installed in key structural points.
How do I keep my project in top shape over time?
One effective approach involves a layered defense: combining regular visual inspections with technological monitoring. I recommend installing moisture sensors in crawlspaces and basements, which not only alert you to trouble early but also help in making informed maintenance decisions. For detailed guidance on maintenance practices that align with your project’s scope, check out this comprehensive guide. Incorporating these tools and routines can significantly extend the lifespan of your build, ensuring it remains functional and safe for decades. Don’t wait for visible damage—start implementing a proactive maintenance plan today and try one of these smart tools to see immediate benefits.
What I Wish I Knew About Small Details Before Starting
One of the most impactful lessons I learned was that overlooking tiny components, like rebar supports, can lead to significant setbacks. During my first site, I underestimated the importance of proper rebar placement, which resulted in cracks and structural concerns down the line. Now, I double-check every support detail, understanding that these small choices greatly influence durability and safety.
Additionally, I discovered that every permit, no matter how minor it seems, has specific requirements that, if ignored, can halt your project unexpectedly. It’s a reminder that thorough research and understanding local regulations save time and money, bringing peace of mind from the outset.
Estimating costs accurately isn’t just about adding numbers; it’s about anticipating hidden variables like soil conditions or utility conflicts. I learned that well-prepared estimates, enriched by expert insights, prevent budget blowouts and ensure your project stays on track.
Finally, embracing proactive planning rather than reactive fixes transforms a stressful build into a manageable journey. The key is to prepare diligently, verify every support and permit detail, and trust the process, knowing it leads to lasting results.