Why Your Attic Conversion Needs a Headroom Check
It was a chilly morning, and I was staring up at my attic with a sinking feeling. After pouring money, time, and hope into turning that dusty space into a usable room, I realized something was off—badly off. The ceiling was too low. I had ignored the simplest detail that could have made or broken my entire project: the headroom.
< h2 > Your Attic Conversion and The Hidden Danger of Low Ceilings < /h2 >
Converting an attic sounds like a straightforward way to add valuable space to your home. But here’s the kicker: a tiny misjudgment about headroom can lead to costly delays, permit issues, or even the failure of your renovation plans. That was my wake-up call. Many homeowners jump into attic conversions without checking whether they have the necessary clearance, only to discover later that their plans are unviable.
Why does this matter? Well, I learned the hard way that the devil is in the details. If your attic isn’t tall enough, you might need to reconfigure the entire layout, face permit denials, or worse—tear down finished spaces and start over. Absorbing this lesson early can save you from similar frustration.
I promise we’re going to tackle this head-on. Today, I’ll guide you through what you need to know about headroom requirements, avoiding common pitfalls, and ensuring your conversion complies with local codes. Trust me, a simple check today can prevent expensive headaches tomorrow.
< h3 > Is a Headroom Check Really Worth the Hassle? < /h3 >
I’ll admit, I was skeptical at first. I thought, “How much difference can a few inches make?” Turns out, quite a lot. I once made the mistake of assuming my attic was tall enough, only to find out that I needed to reframe the roof, adding weeks and thousands to my budget. It was a lesson in humility. Incorporating proper headroom measurements early is one of the most critical steps, something I wish I had prioritized from the start.
If you’re contemplating an attic conversion, have you already faced unexpected surprises because of headroom issues? If so, you’re not alone. Many homeowners overlook this small but mighty detail, leading to bigger problems down the line. To learn more about how to plan your project effectively, check out < a href="https://constructionedgez.com/adding-value-with-expert-home-additions-a-construction-guide" >this comprehensive guide on home additions< /a >.
Now that we understand why headroom matters, let’s delve into how to make sure your attic is ready for transformation. The first step? A thorough headroom check that sets your project on a solid footing.
Measure Your Space Precisely
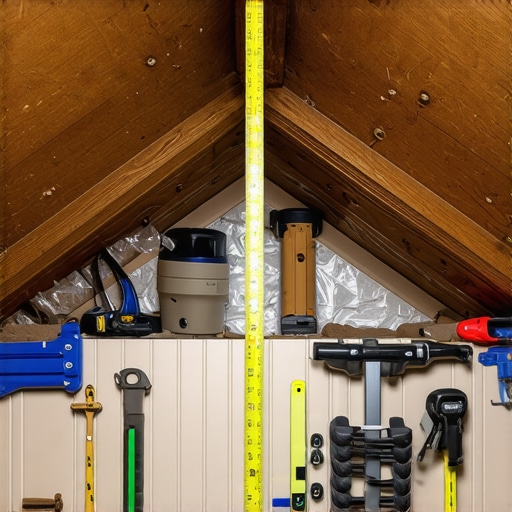
Begin with a physical measurement of your attic’s ceiling height at multiple points using a reliable tape measure or laser distance meter. I once used a laser tool to check different spots in my attic, which revealed variations I hadn’t noticed before. Record the lowest point; if it falls below the required minimum (usually 7 feet), you’ll need to adjust your plan. Accurate measurements here prevent costly surprises later.
Compare Measurements Against Local Codes
Consult your local building codes to verify the minimum headroom height required for habitable spaces. You can find this information on your municipality’s website or by contacting local building departments. Knowing these standards helps you set realistic goals and avoid permit delays. Remember, code requirements can vary broadly, so tailor your expectations accordingly.
Assess Framing and Roof Structure
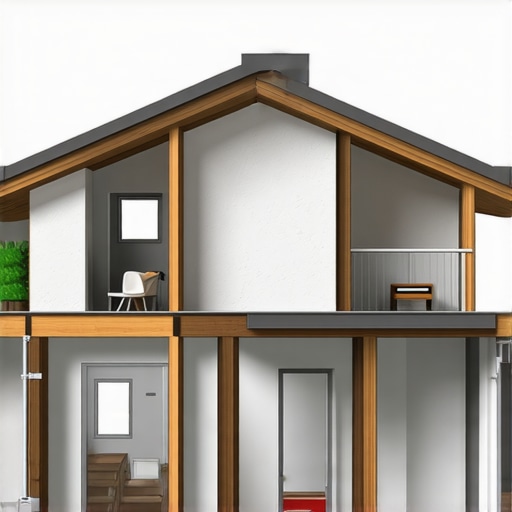
Examine your attic’s framing to determine if structural modifications are necessary. If your headroom falls short, re-structuring might involve raising the rafters, adjusting collar ties, or installing a dormer. I once removed a section of the roof decking and added a small dormer, which provided not only additional space but also natural light. Working with schematic diagrams can clarify the extent of re-framing needed, saving time during construction planning.
Create Detailed Drawings for Modifications
Draft precise plans illustrating any structural changes. Use CAD software or formal sketches to visualize modifications like raising rafters or installing dormers. This helps communicate your ideas with contractors and ensure everyone agrees on the scope. During my project, detailed drawings caught a potential conflict with existing attic supports, enabling me to consult an engineer early and avoid future structural issues.
Estimate Cost Implications Accurately
Determine the additional costs associated with structural modifications by consulting cost-estimating guides or professionals. Use resources like this guide to get a ballpark figure. When I included these costs upfront, I avoided budget overruns and was able to plan for contingency funds effectively. Remember, unanticipated structural work can inflate your budget substantially.
Consult Experienced Professionals
Engage a qualified architect or structural engineer early to validate your plans. Their expertise ensures your modifications meet safety standards and code compliance. During my project, an engineer’s review highlighted a support beam issue I hadn’t considered, preventing potential code violations and future safety concerns. Their input can seamlessly guide your project through the permitting process and sidestep costly mistakes.
Plan for Permits and Approvals
Once your plans are complete, research permit requirements thoroughly. Use resources like this permit guide to streamline the approval process. Submitting accurate plans that clearly demonstrate compliance accelerates approval and helps avoid rejection due to missing or unclear documentation. I submitted my permit application with detailed drawings and supporting calculations, which sped up the approval timeline.
Schedule Timeline and Monitor Progress
Create a realistic construction schedule that accounts for permit approval, structural modifications, and finishing work. Keep track of milestones to ensure timely completion. When I managed my project using a detailed Gantt chart, I identified bottlenecks early—such as delayed inspections—and adjusted my schedule proactively, maintaining momentum without unnecessary delays.
When it comes to estimating costs for new builds and home additions, many homeowners and contractors rely on oversimplified formulas or shortcuts. While these might seem time-saving, they often mask critical nuances that can derail a project. In my experience, the most pervasive myth is the belief that unit prices or previous bids can be directly applied across different projects without adjustments. However, every project has unique factors—site conditions, structural requirements, design complexity—that influence true costs. Blindly trusting generic per-square-foot rates can lead to significant underestimations.
A common pitfall is neglecting the impact of permitting and inspection processes. Many assume permits are straightforward and inexpensive, but complex projects may face hidden costs like special inspections, variance applications, or expedited review fees. As highlighted in this guide, early permit planning and understanding local regulations can prevent costly delays and rework.
Another nuance often missed involves stratifying costs into categories—materials, labor, design fees, contingencies—and understanding their interdependence. For example, a small change in design can exponentially increase framing or foundation costs. Advanced estimators use detailed spreadsheets or software that factor in these variable dependencies, as described in this resource, which emphasizes the importance of granular data collection.
Let’s talk about the ‘Oops’ trap many encounter: underestimating the timeline and its effect on costs. Rushing permits or not accounting for permit approval times can squeeze your budget tight. Delays often lead to increased labor costs, schedule penalties, or contractor lock-in fees. Ensuring you’re aware of permit processing durations—something easily overlooked—is vital. You can find detailed insights in this article.
A deeper question for seasoned planners is: How do you integrate risk buffers without inflating estimates to the point of losing competitiveness? This balance is critical. Industry experts suggest adding contingency percentages based on project complexity, site conditions, and historical data. For instance, a straightforward room addition might require only a 10% contingency, but challenging terrain or historic preservation constraints could warrant 20% or more. Studies in project management, such as those referenced in this guide, confirm that adaptive contingency planning enhances accuracy.
In summary, the real sophistication lies in recognizing that estimates are living documents—subject to change, influenced by myriad factors. An accurate estimate arises from detailed assessment, continuous updating, and risk management, not from lazy calculations or assumptions. Remember, the true cost isn’t just numbers—it’s about anticipating real-world variations. Do you think you’ve fallen prey to any of these pitfalls? Drop your experiences or questions below—I’d love to hear them!
Prioritize Reliable Tools for Ongoing Maintenance
Having the right tools at your disposal is crucial for maintaining the integrity of your home after a renovation. I personally rely on a high-quality digital moisture meter like the Protimeter Surveymaster, which allows me to monitor humidity levels in drywall and framing, ensuring early detection of potential issues such as leaks or mold. Regular inspections with these devices can prevent small problems from escalating into costly repairs, extending the lifespan of your improvements.
Implement Software for Project Tracking and Future Planning
For long-term management, I recommend using project management tools like CoConstruct or Buildertrend. These platforms enable you to keep detailed records of inspections, maintenance schedules, warranties, and future renovation plans. By digitizing this information, I can set reminders for periodic tasks such as checking flashing seals or updating insulation, ensuring that my modifications remain functional and efficient over time. Embracing technology like this is where the industry is heading, with increasingly integrated solutions that predict maintenance needs based on usage patterns.
Stay Updated with Local Codes and Trends
Building codes and best practices evolve, so staying educated is vital. I subscribe to industry newsletters and review updates from sources like the constructionedgez.com blog, particularly their sections on permit requirements and code changes. Regularly consulting these helps me adapt my maintenance routines—such as verifying if my vapor barrier meets the latest standards or if new insulation techniques could enhance my home’s energy performance.
Regularly Schedule Professional Inspections
While DIY inspections are helpful, I always schedule annual check-ups with licensed inspectors or structural engineers. They can identify issues like hidden framing weaknesses or foundation settlement that aren’t visible to the untrained eye. Their expertise saves me from unexpected failures—especially as my home ages—and ensures compliance with current safety standards. As noted in experts suggest, proactive maintenance reduces long-term costs significantly.
Predict Future Maintenance Needs
The trend in home addition projects is leaning heavily toward predictive maintenance, powered by IoT sensors and smart home systems. For example, installing smart moisture sensors in basements or under deck surfaces can alert me to potential water intrusion before visible damage appears. Taking this proactive approach aligns with industry forecasts and prepares your home for the future, saving money and stress.
If you’re ready to push your maintenance routine further, try integrating a moisture meter like the Protimeter with a smart home system. This combination offers real-time monitoring and alerts, truly keeping your long-term improvements in top shape.
Three Breakthroughs That Changed How I Approach Home Additions
First, I realized that no matter how confident I felt, confirming structural details like headroom early on saved me from costly surprises. Second, understanding that detailed, accurate estimates require more than just quick calculations taught me to invest time in granular data. Lastly, my biggest lightbulb moment was realizing that engaging experienced professionals not only ensured safety but also optimized costs and timelines, a lesson I wish I’d embraced sooner.
My Toolbox for Tackling Attic Projects and Budgets
For structural assessments, I trust the Estimating Home Additions guide, which offers step-by-step procedures tailored to modern projects. When it’s time to navigate permits, I’ve found this permit guide invaluable for streamlining approvals. For cost estimating, I rely on these industry-standard techniques that help me accurately budget without surprises. Lastly, I keep my project on track using expert insights from this comprehensive resource.
Embracing the Future of Home Renovations and Estimating
The journey of transforming a space isn’t just about plans—it’s about foresight and precision. Every project offers an opportunity to learn and adapt, turning mistakes into mastery. My encouragement to you: dive into your home addition or attic conversion with confidence, knowing that thorough preparation and expert guidance make all the difference. Remember, your dream space is within reach when you combine knowledge with action. What specific challenge are you facing in your home project right now? Share your story below—I’d love to hear and help!