Why Your Deck Addition Might Require a Soil Compaction Test
I remember the moment clearly—my excitement about expanding my backyard with a new deck was quickly overshadowed by a sense of dread when I heard the words, “You might need a soil compaction test before we pour the concrete.” Suddenly, what seemed like a straightforward project felt complicated, and I wondered, “Is this really necessary for a simple deck?” That realization was a lightbulb moment for me, and if you’re planning a deck addition, it might be for you too.
Why Soil Conditions Can Make or Break Your Build
As someone who loves DIY projects and has navigated the permitting process firsthand, I can tell you that ignoring soil stability can lead to serious problems down the line. Soil compaction testsare not just bureaucratic hurdles—they’re a vital step to ensure your new deck is safe, durable, and compliant with local building codes. Poor soil can settle over time, causing uneven surfaces, cracking, or even structural failure. Trust me, the cost and hassle of fixing these issues later are often far higher than the initial testing.
In fact, the United States Geological Survey highlights how crucial proper soil assessment is for construction safety and longevity. It’s like giving your project a health check—making sure the ground beneath is up to the task before you lay the foundation.
Have You Faced This Problem?
Did you ever start a project without realizing that soil testing might be needed? Maybe your contractor skipped it, or you simply overlooked it in the planning stages. If so, you’re not alone. Many homeowners and builders underestimate soil’s role, only to regret it later when issues surface. That’s why understanding when and why you need these tests can save your project from delays and extra costs.
So, what are the signs that your site might be a candidate for soil testing? And how do you know if it’s worth the extra step? Well, that’s what I’ll help you figure out next.
If you’re feeling uncertain about the permit requirements or want to make sure your project stays on track, I recommend reviewing the essential steps for permit approval and next steps for site assessments. For detailed guidance, check out permits for new builds and understanding permit processes.
Start with a Site Assessment and Soil Testing
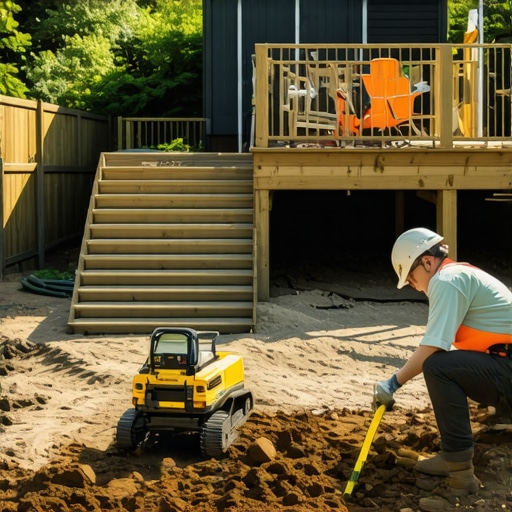
Years ago, I faced a muddy patch in my backyard during a DIY deck build. To prevent future settlement issues, I hired a geotechnical engineer to perform a soil compaction test, which revealed loose, unsettled soil. This step is crucial because it informs whether you need soil stabilization or special footing designs. To do this yourself, contact a licensed geotechnical firm through their website to schedule the test. Ensure they collect samples from multiple points across your site for accurate analysis. Once you get the report, review the soil’s bearing capacity and stability; if it’s weak, you’ll need to plan for deeper footings or soil reinforcement.
When it comes to new builds and home additions, many homeowners operate under assumptions that can lead to costly mistakes. One widespread myth is that permits are merely bureaucratic hurdles rather than essential safeguards. In reality, rushing to skip or overlook permit processes can result in fines, delays, or even having to undo work that wasn’t approved—costing you much more than the permit fee itself. A common oversight is believing that accurate estimates are just about getting the bottom line right; however, the devil is in the details. Small errors or assumptions can cascade into significant budget overruns, especially with hidden costs like [site accessibility improvements](https://constructionedgez.com/how-to-account-for-site-accessibility-in-your-new-build-quote) or unforeseen foundation needs.
### Why Do So Many Estimating Mistakes Persist?
A key nuance often missed is that estimates should include a contingency for unexpected issues—something many overlook. For example, soil conditions frequently seem straightforward but can hide moisture problems or unstable ground that require specialty reinforcement. Including a contingency—typically 10-20%—can save you from being blindsided. Additionally, many underestimate material escalation, especially in volatile markets, leading to significant budget shortfalls when prices surge unexpectedly. As I’ve detailed in [estimating home additions](https://constructionedgez.com/estimating-home-additions-a-step-by-step-guide-for-2025), precise estimation involves not just initial quotes but continuous updates and risk assessment.
### The Danger of Relying Solely on Contractor Quotes
Another tricky area is trusting contractor estimates blindly. Contractors often aim to be competitive, but their quotes may omit hidden line items like permit fees or latent site preparation costs. An example is the infamous **permitting surprise**, where sites with complex zoning or easements trigger additional review fees or require redesigns. That’s why verifying your estimates with a detailed review, and sometimes consulting a third-party estimator, can prevent budget-busting surprises. You might also consider [learning how to verify contractor discounts](https://constructionedgez.com/how-to-verify-contractor-discounts-on-bulk-material-purchases) to ensure you’re getting fair pricing.
### Why You Should Question the Norm: A Deep Dive
Is it better to submit an initial permit application that’s a bit conservative or one that tries to maximize allowable features? Sometimes, pushing the limits can lead to rejection and subsequent rework, which costs time and money. It’s often more strategic to design within the parameters that streamline approval processes, such as meeting local [fire-resistance requirements](https://constructionedgez.com/why-your-hardscape-plan-needs-a-separate-drainage-permit) or zoning setbacks. Advanced homeowners even engage in pre-application discussions with local permitting offices—that’s what I recommend for capitalizing on nuanced, often overlooked rules, reducing delays and avoiding costly redesigns.
### What’s the Hidden Cost of Permitting Delays?
Many underestimate the financial impact of permit delays—these can extend project timelines by weeks or months, inflating labor costs and delaying occupancy. A study from the *National Association of Home Builders* confirms that permit delays are among the top factors increasing project costs. Furthermore, unpermitted work can result in penalties or forced removal of completed work—not to mention the legal risks. That’s why understanding detailed [permit approval tips](https://constructionedgez.com/permit-approval-tips-for-seamless-home-additions) and early engagement with local authorities are crucial steps in the planning process.
**Have you ever fallen into this trap?** Let me know in the comments. Knowing the nuances and avoiding these common pitfalls can save you sizeable headaches and money, turning what seems like a straightforward project into a success story.
Keep Your Builds Running Smoothly with the Right Tools
When it comes to maintaining the progress and quality of your construction projects, having the right tools is non-negotiable. From software that simplifies estimating to equipment that ensures long-term durability, selecting the proper gear can save you time and money. Personally, I rely on advanced project management software like Procore because it streamlines communication among team members and keeps track of permits and inspections efficiently. It’s become an indispensable part of my workflow, especially when navigating complex permit requirements, which you can learn more about here.
For on-site maintenance, I recommend investing in a durable laser level and a laser distance measurer. These tools drastically improve accuracy during inspections and repairs, reducing costly errors. My go-to laser level is the DeWalt DW088K because of its reliability and clear laser beam, especially when working on larger spans or vertical surfaces. This investment ensures that your foundations, framing, and siding are precise, aligning with best practices outlined in the latest estimating guidelines.
How do I maintain my tools over time?
Regular maintenance is key to longevity and performance. For electronic devices like laser levels and measuring tools, clean the lenses after every use and store them in protective cases to prevent damage. Mechanical tools, such as drills and saws, benefit from lubrication and periodic calibration. Check manufacturer recommendations for specific maintenance cycles, which can often be found in their user manuals or on their official support websites. A small investment in routine upkeep can extend their lifespan significantly, ensuring they remain reliable for future projects.
As the industry evolves, new tools like drone inspections and AI-based estimating software are becoming more prevalent. In the future, integrating these technologies could become standard, further improving project precision and efficiency. For example, expert insights suggest that adopting AI tools soon will be essential for staying competitive.
If you haven’t already, try incorporating a digital inventory management app to track equipment usage and maintenance schedules. This proactive approach can prevent unexpected breakdowns and delays, making your projects more resilient and scalable. Need help selecting the best tools for your next build? Reach out through our contact page.

Embarking on a new build or home addition can be both exciting and complex, but my personal journey taught me invaluable lessons that truly transformed how I approach these projects. Here are some insider insights I wish I had known from the start, which can save you time, money, and headaches.
The Hardest Lesson I Learned About Permits and Soil Tests
- Delaying soil testing might seem harmless initially, but discovering unstable soil after pouring the foundation can lead to costly repairs or delays. A simple soil compaction test can reveal issues early, saving you from surprises later.
- Skipping or rushing permit approvals might speed up the process temporarily, but it often results in fines, work stoppages, or needing to redo permitted work. Engaging early with local authorities and understanding permit nuances is key.
- Estimates without accounting for soil stabilization or unforeseen site prep often fall short. Always incorporate a contingency for site-specific challenges—this proactive step can make or break your project’s budget.
My Arsenal of Trusted Resources for Smooth Building
- Procore Project Management Software: It’s my go-to for streamlining communication, document storage, and tracking permits. It keeps everything organized, reducing miscommunication that leads to delays.
- Contacting a Licensed Geotechnical Engineer: For soil testing, I trust professionals who can provide precise reports on soil stability and bearing capacity, guiding appropriate foundation design.
- Local Permitting Offices’ Online Portals: Staying updated with specific local requirements and tips helps prevent common submission errors, especially when dealing with site-specific nuances.
Your Next Step Starts Today
Armed with these lessons and resources, you’re better prepared to navigate the sometimes tricky road of new builds and home additions. Remember, attention to detail in early planning—like soil testing and permit strategizing—can save you thousands and prevent project derailments. The key is to stay proactive, informed, and adaptable. Every successful build begins with those small but crucial initial steps.
Have you ever underestimated the importance of soil testing or permit planning? Share your experiences below—your insights might help others avoid common pitfalls. Let’s build smarter, together!