Why Your Sunroom Needs a Separate HVAC Zone
I vividly remember the first summer after I finished building my sunroom. The outdoor heat was relentless, turning what should have been a peaceful retreat into a stuffy, uncomfortable space. Despite having a full HVAC system servicing the main house, I learned the hard way that my sunroom’s temperature swings were a relentless nuisance. It wasn’t until I installed a dedicated HVAC zone that I finally got relief—and I want you to experience the same.
Understanding the Temperature Tug-of-War in Sunrooms
Sunrooms are wonderful—they flood your home with natural light and give you a glorious view of your backyard. But that glass enclosure also makes them infamous for temperature struggles. During summer, they trap heat like a greenhouse, pushing your air conditioning to its limits, and in winter, they can turn chilly, draining warmth from the rest of your home. The result? Uneven comfort and higher energy bills.
Here’s the thing: standard HVAC systems are designed to regulate the temperature of your entire home uniformly. When it comes to sunrooms, this approach just doesn’t cut it. The unique exposure and insulation levels mean your system has to work overtime, leading to inefficiencies and frustration.
In my early days of homeownership, I fought this battle daily. I’d crank up the AC, only to find my sunroom still warmer than a summer day in July. Or worse, in the winter, I’d find myself bundled up because the heater couldn’t keep up. That’s when I realized I was making one common mistake—trying to control multiple comfort zones with a single thermostat.
According to a study published by the U.S. Department of Energy, customizing climate zones within your home can improve energy efficiency by up to 30%, which is a win worth fighting for. (You can read more about this in their comprehensive resource on home zoning systems.)
Have you faced similar issues where your sunroom remains either too hot or too cold, despite your best efforts? It might be time to think about a dedicated solution.
The good news is, there’s a straightforward fix that doesn’t require tearing down walls or expensive remodels. Let’s explore how creating a separate HVAC zone for your sunroom can bring the comfort you’ve been yearning for—and why it’s a wise move for your home’s efficiency.
Identify the Optimal Location for the Zone Controller
Start by choosing a central spot in your home, preferably near your existing HVAC system’s main ductwork. During my project, I initially hesitated to mount the new zone controller in the attic, thinking it would be inconvenient. However, I found that placing it close to the main furnace simplified wiring and maintenance. This placement ensures efficient control and easy access for future adjustments or troubleshooting.
Determine the Zone’s Ductwork and Vent Requirements
Next, plan the duct modifications needed to isolate your sunroom. Think of the duct system as a water supply; you want to divert flow precisely where it’s needed. I used a combination of dampers and new duct runs to create a dedicated pathway to the sunroom. To avoid over-engineering, I measured the existing ducts’ airflow and matched the damper sizes accordingly, ensuring adequate heating and cooling without overloading your system.
Install Zone Dampers and Dampening Controls
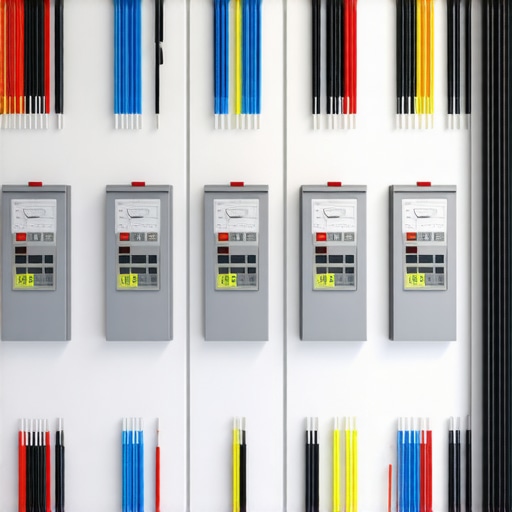
Install motorized dampers at the connections to your sunroom. These act like gates controlling airflow—opening and closing based on thermostat signals. During my experience, I faced some initial wiring issues, which caused the dampers to malfunction. Reading the manufacturer’s wiring diagram carefully and labeling each connection saved me hours of troubleshooting. Once installed, I tested the dampers with a multimeter to verify functionality before proceeding.
Configure the Thermostat and Control System
Set up a dedicated thermostat in your sunroom, ideally with programmable features. I chose a smart thermostat that allows remote control and scheduling, enhancing convenience. Connecting it involved linking it to the zone controller using a low-voltage wire circuit. During installation, I tested different temperature setpoints and observed the dampers activating correctly, ensuring the zone regulates temperature independently from the rest of the house.
Integrate the System with Existing HVAC Equipment
Finally, connect the new zone to your main HVAC system’s control board. This step requires precision to prevent system conflicts. I paid close attention to the wiring terminologies and configurations listed in the manufacturer’s guide. After initial configuration, I turned on the system and monitored it for several cycles, confirming that the sunroom maintained a consistent temperature without affecting other zones.
Throughout this process, I also kept abreast of local building codes and HVAC regulations to ensure compliance. If you’re unfamiliar with wiring or duct modifications, consulting a licensed HVAC technician is advisable. You can learn more about the permit process involved in installing an additional HVAC zone in this comprehensive guide.
When it comes to new build projects and home additions, many homeowners and even some professionals fall prey to misconceptions that can derail timelines and budgets. One pervasive myth is that tackling permits and estimating can be straightforward if you follow a standard checklist. However, in my experience, the real challenge lies in understanding the intricate nuances that often go unnoticed. For example, everyone emphasizes getting permits early, but few appreciate how local regulations and unique site conditions can significantly alter approval processes. If you overlook these subtleties, you risk costly delays and rework.
Another common mistake is relying solely on initial estimates without accounting for hidden costs. Many underestimate the complexity of site preparation, utility hook-ups, or unexpected structural modifications. According to a recent industry study, nearly 65% of project budgets expand beyond initial quotes due to unanticipated factors, highlighting the importance of thorough contingency planning. To avoid this trap, it’s crucial to dive into detailed cost assessments and understand historical deviations, such as those discussed in the comprehensive guide on estimating costs for new builds.
A fundamental misconception revolves around the simplicity of estimating timelines. The myth suggests that schedules are linear and predictable. In reality, permits, inspections, and approvals often introduce unpredictable delays. Advanced projects require proactive communication with authorities, understanding permit requirements, and anticipating possible hurdles. For instance, navigating permit requirements for additions in 2025 involves understanding evolving codes, which are covered extensively in the guide on streamlining permit acquisition.
**Why do so many underestimate the importance of site-specific factors?** Many overlook elements like soil condition, existing utilities, or environmental constraints, which can drastically change project scope and costs. For example, building near wetlands or on expansive clay soils might require specialized foundation work, leading to delays and surprises. It’s vital to conduct thorough site assessments and factor these into your initial planning.
Finally, a crucial nuance often missed is the role of local zoning and setback rules. Even minor miscalculations here — like misjudging a setback or overlook a historic district restriction — can halt permits altogether. Ensuring compliance requires close review of local zoning laws, which are subject to change and fine-tuned through resources like the complete guide to permitting for new builds and additions.
Have you ever fallen into this trap? Let me know in the comments, and remember that mastering these nuanced aspects can make or break your project’s success. To deepen your understanding, explore more about the permit process and effective estimation techniques through trusted industry guides.
Invest in Quality Tools for Long-Term Success
Having the right tools at your disposal can make all the difference when it comes to maintaining your build, especially for additions and renovations. I personally swear by a high-quality digital multimeter, like the Fluke 117, which provides precise readings for electrical troubleshooting and ensures your wiring remains safe and compliant over time. This tool helps prevent dangerous faults that could compromise your project’s integrity.
Why a Digital Multimeter is a Must-Have
Regular checks of electrical systems can catch issues early, saving you costly repairs later. I use my multimeter to verify circuit voltages, resistance, and continuity, ensuring that all electrical components function correctly. For more complex setups, a thermal imaging camera like the Fluke Ti400 offers the ability to spot hidden hotspots in electrical panels or HVAC systems, preventing potential failures before they happen.
Establish a Routine Maintenance Schedule
Consistency is key. I recommend setting quarterly reminders to inspect HVAC filters, sealing leaks around windows and doors, and checking plumbing for leaks or corrosion. Simple tasks like cleaning debris from drainage systems or inspecting insulation can extend the life of your building components.
Software Tools to Track Your Maintenance
Digital maintenance logs are invaluable. I rely on software like Evernote or dedicated project management apps such as CoConstruct to keep detailed records of inspections, repairs, and upgrades. These logs help identify recurring issues and inform future upgrades, making your building more resilient over the long haul.
Plan for Future Growth and Adaptability
Thinking ahead about scalability ensures your investment remains valuable. For instance, when installing additional circuits, using modular wiring systems allows for easier expansion. Also, incorporating smart home integration—like remote thermostats or automated leak detection—can significantly streamline ongoing maintenance and adapt your space to changing needs.
Where Will Trends Take Us?
The future points toward increased automation and IoT integration in maintenance tools. Imagine smart systems that predict failures before they occur, based on data analytics. As these technologies become more affordable, adopting them can significantly reduce downtime and maintenance costs, giving you peace of mind and preserving your project’s value.
How do I maintain these systems over time?
Regular calibration and updates are crucial. For example, smart thermostats need firmware updates, and sensors should be recalibrated every year to ensure accuracy. Building a relationship with a trusted technician, or subscribing to maintenance plans, guarantees that your systems stay in top shape. Don’t forget to consult regulatory guides, such as the permit and inspection resources, to stay compliant with evolving standards.
Finally, I highly recommend trying out advanced tools like thermal imaging cameras or integrated smart home systems. These investment-worthy gadgets pay for themselves by reducing maintenance costs and preventing disasters. Start small: upgrade your inspection toolkit gradually to enhance your control over the building’s health and performance.
The Hidden Lessons That Changed My Approach to New Build and Additions
One of the biggest surprises I encountered was realizing that meticulous planning alone isn’t enough. I once believed that following standard checklists would guarantee smooth permit approvals, but I learned the hard way that each site has unique nuances—soil conditions, local zoning nuances, and historical restrictions—that can derail even the best-laid plans. Recognizing these hidden variables early can save you time and money.
Another revelation was the underestimated complexity of permit processes. Initially, I thought submitting a standard application was sufficient, but I discovered that engaging directly with local authorities and understanding their evolving requirements can streamline approvals significantly. Building relationships and understanding the permit landscape turned out to be as critical as the design itself.
Finally, I learned that effective estimation requires more than initial quotes. Hidden costs—like utility upgrades, unforeseen soil stabilization, or compliance modifications—can balloon budgets if not anticipated. I’ve found that maintaining a robust contingency fund and continually updating estimates based on site-specific insights helps keep projects on track.
My Go-To Resources for Smarter Building and Planning
- ConstructionEdgeZ’s Guide to Permitting: This comprehensive resource demystifies the permit process, especially useful for navigating local regulations and avoiding common pitfalls. I trust it because it’s filled with real-world insights and updated regularly.
- Estimating Costs for New Builds: A step-by-step guide that has transformed my budgeting approach. Its detailed breakdowns and case studies help me foresee hidden expenses before they take shape.
- Consultation with Local Building Departments: Establishing direct contact with municipal offices has saved me significant time. Their firsthand knowledge of site-specific issues prevents costly reworks down the line.
- Specialized Software Tools: Platforms like BuildCalc or CoConstruct enable precise tracking of budgets, schedules, and permits. I rely on these to keep everything transparent and manageable throughout the project lifecycle.
Your Next Step Toward Construction Confidence
Embarking on a new build or addition project is an exciting journey, but knowing these insider lessons can make all the difference. Embracing the nuances of permitting and estimation ensures your project is not just a dream but a well-managed reality. Remember, every site has its own story—learning to read those stories can turn potential setbacks into opportunities for success.
Which of these hidden challenges have you encountered before? Share your experience below—I’d love to hear how you navigated it. And for more expert insights, don’t hesitate to explore the comprehensive guides available at ConstructionEdgeZ.