The roofing nail pattern required for high-wind zones
I remember the first time I watched a storm roll through town, only to see shingles flying off roofs like confetti. It hit me then—no matter how beautiful or sturdy your home may seem, a poorly planned nail pattern can turn a modest windstorm into a disaster. That realization was a lightbulb moment for me, and it’s why I’m so passionate about sharing what I’ve learned about high-wind roofing strategies.
Many homeowners underestimate how crucial proper nail placement is, especially in areas prone to strong storms. A mismatched pattern isn’t just a minor detail—it can determine whether your roof stays intact or becomes airborne in a hurricane. So, today, I’m going to walk you through the specific nail patterns that can give your roof the extra edge it needs to weather high winds.
Why the Right Nail Pattern Is Non-Negotiable in High-Wind Zones
When I first began framing roofs, I made a costly mistake by neglecting to follow the recommended nail pattern for high-wind areas. I thought a standard pattern would suffice. That oversight nearly led to a costly repair. Now, I know better—and I want you to learn from my experience. Proper nail placement isn’t just about meeting code; it’s about saving yourself from heartache when Mother Nature decides to test your roof’s resilience.
Research shows that correct nail placement can increase a roof’s wind resistance by up to 50%. This means, in hurricane-prone regions, following the right pattern could be the difference between your roof holding firm and it failing completely. Don’t take chances—especially when the stakes are so high.
Are you facing challenges with ensuring your home’s roof is prepared for high winds? Building the right nail pattern might seem technical or overwhelming at first, but I promise, once you understand the basics, it becomes clear and straightforward. To make sure you get it right, I’ll break down the best practices step by step. But first, let’s address a common concern many homeowners have: is this pattern really worth the extra effort?
Is the High-Wind Nail Pattern Actually Worth the Hype?
In my early days, I wondered if all the fuss about nail patterns was just a bit of hype. I dismissed it as overkill. That was a mistake. The truth is, a well-placed nail pattern is backed by building science and real-world testing. Skipping or skimping on this detail left me vulnerable—and I’ll bet many homeowners feel the same way, thinking their standard approach will do the trick. But ignoring these specifics can cost thousands—and even compromise your family’s safety.
Reflecting on my own mistakes, I realize that investing a little more time into understanding the right nail pattern saved me from a headache I hope no one else faces. If you’re curious about how to avoid these pitfalls, I invite you to explore more about this topic, especially how it fits into broader strategies like proper roofing material selection and structural reinforcement. You can find additional insights on [mastering new build estimating](https://constructionedgez.com/mastering-new-build-estimating-essential-tips-for-success), which emphasizes the importance of precise planning for durable construction.
Now, let’s delve into the practical steps you need to take to ensure your roof’s nail pattern is top-notch for high winds. Your safety and peace of mind depend on it.
Lay Out a Clear Pattern Before Nailing
Start by reviewing your roofing manufacturer’s specifications and local building codes to determine the correct nail placement pattern for high-wind zones. I remember my first attempt; I sketched the pattern on a piece of cardboard to visualize spacing and overlap, reducing errors during installation.
Space Nails Evenly for Maximum Holding Power
Use a chalk line or laser guide to mark nail positions accurately on the sheathing, ensuring consistent spacing—typically every 6 to 8 inches along joists and every 12 inches on the rafters. Once, I used a laser level to mark these points, which dramatically improved my accuracy and helped avoid missed or misaligned nails.
Use Appropriate Nail Types and Sizes
Select nails that meet or exceed the specifications—typically corrosion-resistant, hot-dipped galvanized or stainless steel nails sized 1 1/4 inches for most shingles. During my project, I mistakenly used shorter nails, which failed during a storm; switching to longer, high-quality nails made a noticeable difference in the roof’s resilience.
Follow a Consistent Nailing Sequence
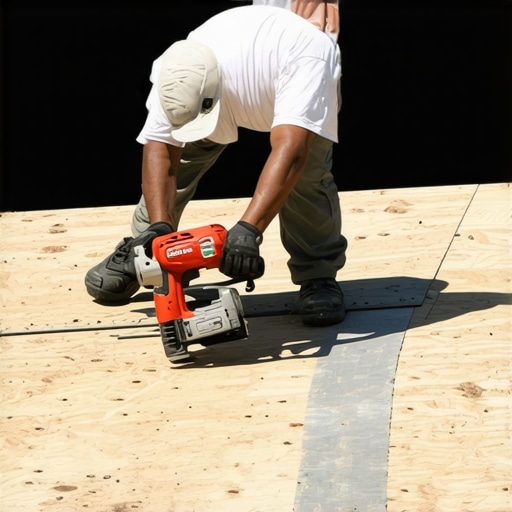
Start from one edge and proceed systematically across the roof, ensuring each nail is driven straight and flush. I once tried rushing the process, causing uneven nail depth. Now, I keep a dedicated nail gun setting and work carefully to ensure each nail is properly seated to prevent loosening or failure in high winds.
Check for Proper Nail Pattern with a Fastener Inspection
After nailing, periodically step back to audit your work, verifying nail spacing and depth according to the plan. Employ a level or measuring tape at intervals to catch any drift. Once, I caught a missed nail early, correcting it before shingles were installed, which prevented potential wind damage later.
Integrate Professional Guidelines for Ultimate Protection
Consult trusted resources like building permit guides or home additions strategies to ensure your nail pattern aligns with community standards. Remember that following a tested and approved pattern isn’t just about compliance—it’s about safeguarding your home against destructive winds.
Many people believe that submitting plans and getting permits is a straightforward process—simply follow the checklist, wait for approval, and build. But in my experience working with complex projects, there’s a subtlety that often trips up even seasoned homeowners: assuming that standard estimates and procedures apply universally. This misconception can lead to significant delays, unexpected costs, and compliance issues. Let’s explore why understanding the nuanced aspects of permits and estimating is critical for avoiding costly mistakes.
One common myth is that permit requirements are uniform across regions and project types. While building codes do provide a framework, local jurisdictions can have specific nuances—such as unique setback requirements or environmental restrictions—that aren’t immediately apparent in generic guidelines. Failing to recognize these local adaptations can result in permit rejection or the need for costly rework. For example, some areas require detailed environmental impact assessments for additions near wetlands, which many overlook when rushing to submit plans. Familiarizing yourself with regional specifics by consulting resources like permit navigation guides can save you time and frustration.
Why do so many underestimate the importance of detailed site evaluations in permit planning?
This leads to one of the critical errors I often see in new build estimates: relying solely on generic cost-per-square-foot calculations without factoring in site-specific conditions. Aflat lot with poor soil may require significant geotechnical work, or a neighborhood with strict HOA rules might impose additional architectural compliance costs. These nuances, if ignored, can inflate your budget unexpectedly. External studies, such as those documented in estimating strategies for modern homeowners, highlight the importance of detailed site assessments for accurate budgeting.
Another trap is the assumption that estimates prepared early in planning are fixed. In reality, costs evolve as permits are reviewed, plans are refined, and unforeseen site issues surface. This is why applying a contingency buffer—often 10-15%—is essential. Moreover, engaging a knowledgeable estimator who understands regional permit nuances can dramatically improve accuracy. It’s tempting to cut corners here, but in complex projects, skipping detailed estimates can lead to budget blowouts and project delays.
Building in these nuances from the start also helps you avoid the ‘oops’ factor—unexpected surprises during the permit review or construction phase that can halt your progress. For instance, an overlooked zoning overlay might mean you need an additional variance, which could take months to secure. This is where professional guidance becomes invaluable—many reputable firms offer consultation services. If you’re uncertain about how to navigate these processes, I recommend reaching out through our contact page for expert advice.
In summary, the real secret to successful new builds, additions, and permit approval lies in paying attention to regional nuances, conducting thorough site evaluations, and maintaining flexible estimates. Remember, the devil is in the details, and transparency about these factors saves you time, money, and headaches down the line. Want to learn more about how to ensure your project stays on track? Explore expert strategies for home additions and avoid costly oversights. Have you ever fallen into this trap? Let me know in the comments!
Keeping Your Construction Tools in Prime Condition
Investing in quality tools is the first step, but regular maintenance is what sustains their performance over time. I personally rely on a high-grade cordless impact driver, like the Milwaukee M18 FUEL, because its reliability and battery longevity are unmatched in demanding work environments. Consistently cleaning the drill bits and applying proper lubrication prevents rust and ensures smooth operation, saving you time and reducing tool replacement costs.
For measuring and marking, I swear by a Bosch CROSSLINE Laser Level. It’s precise and quick, which means less rework and more accurate cut lines. Daily calibration checks and storing it in a protective case prolong its lifespan, ensuring it delivers reliable results project after project.
Digital Tools That Make Estimating and Planning Smoother
Accurate estimating is critical, especially for additions or new builds where margins are tight. I utilize BuildSoft’s estimate software because of its advanced takeoff features and regional cost databases that keep my bids competitive and realistic. Incorporating these tools helps me identify potential cost overruns early, allowing adjustments that keep projects on track financially.
Additionally, I integrate project management platforms like Procore, which centralizes communication, document sharing, and scheduling. This integration prevents costly miscommunications and keeps everyone on the same page throughout the build process.
Why Incorporate Routine Site Checks
Consistent site inspections using thermal imaging cameras from FLIR help detect issues unseen to the naked eye—like hidden moisture intrusion or insulation gaps. These proactive checks prevent long-term problems, saving money and ensuring quality. Scheduling regular inspections, especially in addition projects, helps catch small issues before they escalate, maintaining the integrity of the build.
Tools I Recommend for Scaling Projects Efficiently
As projects grow, so does the complexity. Modular scaffolding systems from Peri allow quick setup and dismantling, saving invaluable time on larger developments. Similarly, employing software like Bluebeam Revu enhances collaboration by enabling real-time document markup and version control, streamlining communication across teams.
Looking ahead, automation and AI-driven project management are poised to revolutionize construction workflows. Keeping abreast of these trends and integrating compatible tools now will set you apart in future projects.
How do I maintain tools and keep projects running long-term?
Developing a routine maintenance schedule and investing in quality equipment are vital. Regularly checking calibration, cleaning, and proper storage extend tool lifespan, which reduces downtime and unexpected costs. Additionally, establishing protocols for digital data backup and software updates ensures your planning and estimating tools function reliably over time. To fine-tune your approach, consider adopting the maintenance tips outlined in this comprehensive guide on home additions.
For those interested in taking their project efficiency to the next level, try setting up a weekly tool check-in routine or updating your estimate software with regional data. These small steps can significantly impact your project’s success and longevity. Want to explore more advanced strategies? Reach out through our contact page for personalized advice and solutions.
Lessons That Changed My Approach to High-Wind Roofing
One game-changing realization was that every nail counts—overlooking detail can turn a sturdy roof to shambles during a storm. I once thought, “Standard nail patterns are enough,” until a hurricane proved otherwise. Now I know that meticulous planning in nail placement not only protects your home but also offers peace of mind. Another lesson came from understanding regional differences; a pattern approved elsewhere might fail local standards, causing costly delays. The biggest insight? Never underestimate the power of thorough site evaluation and expert guidance to prevent surprises that could derail your project.
Tools and Resources That Make a Difference
For high-wind roofing, I rely on a few trusted tools: a high-quality nail gun with adjustable settings to ensure proper drive depth, and laser guides for precise nail spacing—these are invaluable for consistent quality. When it comes to permits, permit navigation guides have been a lifesaver, helping me decode regional nuances. For estimating costs, estimating software tailored with regional data keeps my bids accurate and competitive. Finally, engaging with expert consultants ensures I stay aligned with local codes and avoid pitfalls before breaking ground.
Gear Up: Turning Challenges into Opportunities
The secret lies in proactive planning and continuous learning. Building better homes, especially in high-wind zones or complex permit landscapes, demands attention to detail but also a willingness to adapt. Embrace the process, leverage the right tools, and continuously refine your knowledge through trusted resources. Remember, every project is an opportunity to elevate your craft and deliver resilient, safe spaces for families. Thinking of expanding or tackling a new build? Dive into home addition strategies to expand your expertise further. Your next project awaits—are you ready to take it to the next level?