The Crawl Space Ventilation Error That Fails Your Final Inspection
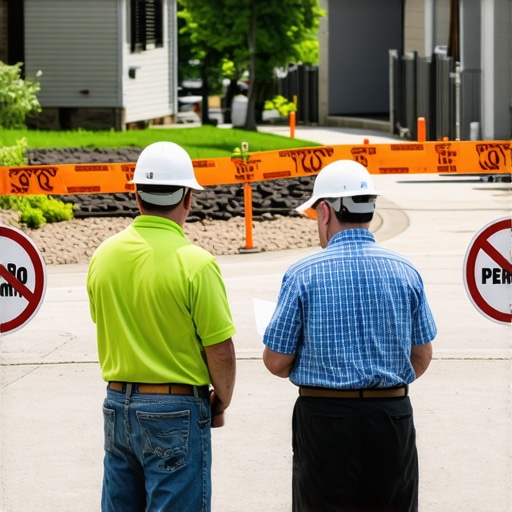
It was a moment of cold dread sitting in my client’s unfinished basement, staring at the crawl space vents I installed myself. I had followed every plan, double-checked the permit requirements, and poured over local codes. But when the inspector arrived, the look of disappointment was unmistakable. The issue? A tiny, overlooked mistake in the ventilation setup that caused our entire project to fail inspection and set us back weeks.
How a Small Mistake Can Kill Your Permit
In my experience, one of the most frustrating pitfalls homeowners and builders face is the **crawl space ventilation error**. It’s one of those sneaky details that seems minor at first glance but can have major consequences during the final inspection. When I first jumped into home additions without fully understanding the ventilation rules, I made the mistake of not verifying the exact airflow requirements—an oversight that cost me dearly. Don’t let that happen to you.
Many folks assume that installing vents according to generic guidelines is enough. But local building codes have nuanced rules, especially regarding unvented or sealed crawlspaces. A misstep here can lead to moisture problems, mold, or even structural issues—issues that will make your inspector’s eyes light up in disapproval.
If you’re wondering whether your ventilation setup might be enough, I encourage you to review the specific code requirements for your area. Recent studies show that up to 30% of crawl space issues stem from improper ventilation—often due to simple misunderstandings or overlooked details, leading to costly rework. For detailed insights on estimating costs and avoiding permit hurdles, check out [estimating costs for new builds](https://constructionedgez.com/estimating-costs-for-new-builds-expert-insights).
So, how do you avoid this common pitfall? Stay tuned. We’re about to explore the exact steps I took to get my ventilation right and ensure a smooth inspection. If you’ve faced this problem before, drop a comment—it helps to know we’re not alone in this.
Could Ventilation Errors Really Derail Your Final Inspection?
My early mistake was assuming that vents are just a box to tick off. Turns out, the proper placement, size, and type of vents are crucial. The inspector didn’t just look at the vents—they checked airflow calculations, moisture barriers, and even the type of damp proofing used. In fact, correctly installed ventilation can reduce risks of mold growth and structural damage, as highlighted by industry experts.
Now, with that foundation laid, let’s dive into the core strategies that will help you avoid these costly mistakes—and get your project inspected and approved without a hitch.
Assess Local Ventilation Codes Before You Begin
Start by researching your local building codes related to crawl space ventilation. Think of codes as the rulebook for your neighborhood—skipping this step is like playing a game without knowing the rules, often leading to penalties. Visit your city or county’s building department website, or call them directly to obtain the most recent requirements. I recall a time when I assumed standard vent sizes would suffice; a quick call revealed a stricter local regulation, saving me from rework later.
Calculate the Correct Vent Sizes and Placement
Use specific formulas to determine the size and number of vents needed. The goal is to ensure adequate airflow, which prevents moisture buildup—akin to keeping your home’s lungs healthy. To keep things simple, think of vents as valves in a water pipe: if they’re too small or poorly placed, airflow stalls or becomes uneven. For detailed calculations, check out this guide on estimating costs and planning. I once underestimated vent size in my own project, leading to inspection delays—an avoidable mistake with proper planning.
Choose the Right Vent Type
Select vents that match your climate and project needs. For humid areas, ventilating with corrosion-resistant, bug-proof vents is crucial. Think of it as choosing the right filter for your coffee machine—using the wrong filter can ruin the brew or cause clogs. I learned this lesson the hard way when plastic vents cracked after a season of exposure, forcing a costly replacement. Consulting local hardware stores or specialists ensures you select durable, code-compliant options.
Installation: Precision Is Key
Proper installation involves sealing around vents to prevent drafts, pests, and moisture ingress. Use the manufacturer’s instructions diligently; imagine installing a window: if not sealed properly, the entire wall’s energy efficiency suffers. I remember rushing through my first install, leaving gaps that inspectors flagged. Following detailed step-by-step guidance, such as this article on verifying code compliance, helped me improve my technique and pass inspections smoothly.
Verify Compliance and Document Everything
Before calling for inspection, double-check your work against code requirements. Take photos of vent placements, measurements, and sealants used—think of it as a proof to your future self that you followed the rules. This documentation sped up my inspection process when I once encountered a surprise visit; having all records ready prevented delays. Keep a dedicated folder of your project photos and notes, and consult permits and approval tips to ensure nothing slips through the cracks.
Plan for Future Access and Maintenance
Design your vent setup so it’s accessible for cleaning or repairs without demolition. Think of vents as your home’s nostrils—they need breathing room. During installation, I left enough clearance and labeled each vent for easy future access. This foresight not only prevents moisture issues over time but also makes code compliance easier. Remember, a well-maintained crawl space vent system keeps your project inspector smiling, and your home healthier for years to come.When it comes to home additions and new builds, many homeowners and even contractors often fall prey to misconceptions that can derail their projects. Let’s dig deeper into some of the nuances that are frequently misunderstood, and highlight advanced pitfalls that can trip up even experienced builders.
One prevalent myth is that simply following local building codes guarantees a smooth permitting process. While compliance is essential, it’s not the whole story. Codes are often open to interpretation, and building officials may have additional expectations based on the project’s context. Overlooking this can lead to unexpected delays or rejection of plans. I recommend reviewing detailed permit approval tips, which provide insider insights on navigating these waters.
A common trap involves estimating costs without accounting for hidden complexities. Many rely on initial quotes that exclude site-specific factors such as soil conditions or existing structural deficiencies. For example, unexpected rock removal or foundations strengthening can substantially inflate your budget. To avoid this, consult detailed estimation strategies, which help you budget accurately and prevent surprises.
Another area where mistakes are common is in understanding setback and easement regulations. Misjudging property boundaries or overlooking easements can result in costly redesigns or even legal disputes. Always verify your property’s legal boundaries and easements during the planning phase, as this will save you from trouble down the line.
Have you ever fallen into this trap? Let me know in the comments.
Advanced Question: How can I reliably predict unforeseen site conditions before finalizing my budget?
The answer lies in thorough site assessments combined with contingency planning. Engaging a geotechnical engineer to perform soil testing and topographical surveys provides insights into issues like expansive clay or underground obstructions that can affect foundation and framing costs. Incorporate at least a 10-15% contingency buffer into your overall budget to accommodate these unpredictable factors. Industry experts emphasize that proactive site evaluation is the cornerstone of accurate cost estimation and helping projects stay on track.
In addition to site assessments, reviewing historical data for similar projects in your area can offer valuable clues. Remember, the key is not just in collecting data, but in interpreting it to inform your planning and estimation processes. So, do your homework early—it’s a small investment that pays off by keeping your project moving smoothly and within budget.
Maintaining Your Home Addition for Long-Term Success
Once your new space is built and inspected, the work isn’t over. Proper maintenance ensures that your addition remains functional, safe, and efficient for years to come. Regular inspections of critical systems like ventilation, plumbing, and electrical components can prevent costly repairs down the line. For instance, periodically checking your crawl space vents and sealing any gaps prevents moisture buildup and mold growth, safeguarding your investment.
My go-to approach involves a combination of specialized tools and disciplined routines. Using a digital moisture meter helps me quickly identify areas where humidity might be creeping up, especially in sealed crawlspaces. These devices, like the
Lessons That Changed My Approach to Permitting
- The Devil’s in the Details: I used to think vents were just a box to check. Now I know that proper placement, size, and sealant choices are vital for passing inspection and preventing moisture issues. Missing these can lead to costly rework or even structural decay over time.
- Local Codes Are Not One-Size-Fits-All: My team once assumed generic vent sizes would suffice, only to find local regulations required specific airflow calculations. Now I always verify local requirements beforehand—saving headaches and delays.
- Documentation Is Your Friend: Taking detailed photos and notes of vent placement and sealing practices might seem tedious but proved invaluable when inspectors requested proof of compliance. It’s about building trust and confidence in your work.
- Future Access Matters: I wish I had designed my vents for easy maintenance from the start. Accessibility for repairs can prevent water damage and mold growth, which can be costly to fix later.
- Knowledge Builds Confidence: Relying on authoritative guides like this resource on estimating helps me make smarter decisions about vent sizes and placement, aligning with code and avoiding surprises.
Tools and Resources That Enhance My Work
- Precision Vent Calculators: Software or online tools help determine optimal vent sizes based on area, climate, and local regulations, reducing guesswork and ensuring compliance.
- Code Verification Guides: Local building department manuals and professional publications provided clarity on specific requirements, helping me avoid common pitfalls.
- Moisture Meters and Inspection Cameras: These tools assist in ongoing maintenance and post-installation checks, ensuring vents perform as intended over time.
- Expert Consultation: Engaging with local inspectors and HVAC specialists early in the process has saved me from costly rework and delays—worth every penny.
Step Up and Reinvent Your Approach
The path to successful home additions with seamless permit approval is paved with attention to detail, proactive planning, and continuous learning. Don’t let overlooked ventilation steps become setbacks. Instead, embrace the challenge as an opportunity to improve your craftsmanship and confidence. Your home’s health and your peace of mind depend on it—start applying these lessons today and watch your project move through permits swiftly, leaving you more time to enjoy your newly expanded space.
What’s been your biggest challenge with crawl space ventilation or permit compliance? Share your experiences below—learning from each other’s stories is the best way to grow.