The Solar Panel Loading Rule for Existing Roofs
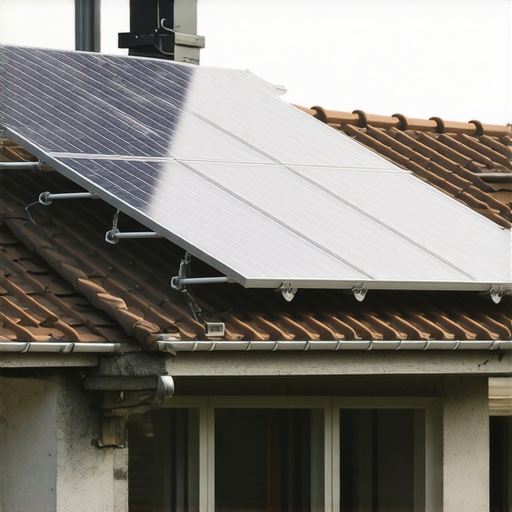
I remember the day I first attempted to install solar panels on an older roof. It was a beautiful sunny morning, but as I reviewed the municipal guidelines, I hit a wall—the so-called Solar Panel Loading Rule. Suddenly, that sunny day felt a lot more stressful. It wasn’t just about mounting panels anymore; it was about understanding a rule that could make or break my project, and frankly, I felt completely in the dark at first.
Shedding Light on the Loading Rules: Why They Matter Now
Every year, more homeowners are turning to solar energy, eager to reduce their carbon footprint and cut energy costs. But installing solar panels isn’t just about buying the right equipment; it’s about complying with local regulations—especially the Loading Rule for existing roofs. This rule determines whether your roof can support the added weight of solar panels without risking structural integrity.
Why does this matter today? Well, with a rise in retrofit installations and additions, many roofs are nearing or exceeding their load capacities. Ignoring these rules can lead to costly fines, dangerous structural failures, or even a complete halt to your project. According to the National Renewable Energy Laboratory, improper load calculations can cause significant safety hazards, making it essential to understand and adhere to these guidelines from the start.
In my early days, I quickly learned that overlooking this rule was a mistake. I assumed my roof could handle the weight, only to find out later that I needed reinforcement, which doubled my costs and delayed my plans. That lesson taught me the importance of precise estimation and understanding permit requirements, which I now advocate to fellow homeowners.
Is Your Roof Ready? Worrying About the Load Capacity
Many skeptics wonder if these rules are just paperwork hoops or real safety concerns. I used to think it was the latter, but experience proved otherwise. Missing critical load assessments can lead to structural damage that’s extremely costly to fix later. For a deep dive into the nuances of estimating costs and ensuring your project stays compliant, check out this comprehensive guide.
One common mistake I made early on was underestimating the weight of mounting systems combined with snow, rain, and weather conditions. This mistake was a wake-up call that accurate load calculations can’t be ignored. It’s better to involve a structural engineer early than deal with inspections, repairs, or project delays down the line.
As we dig into the practical steps to navigate this rule, remember—understanding your roof’s capacity is the foundation of a safe, successful solar project. Ready to learn how to assess your roof’s load-bearing ability and comply without headaches? Let’s get started.
Assess Your Roof’s Load Capacity from Scratch
Begin by examining your roof’s age and condition. I once skipped this step and was surprised when a structural engineer revealed that years of weathering had compromised my roof’s ability to handle additional weight. To avoid a similar mistake, measure the existing load-bearing capacity accurately. Learn how to assess your roof’s capacity and ensure it can support solar panels without risking safety.
Gather Precise Load Data and Compare It
Next, collect all relevant data: the weight of your planned mounting system, solar panels, and expected snow or rain loads. Think of this process like packing for a trip—you need to know exactly what you’re carrying to prevent overloads. I used a digital scale to estimate weights of different mounting components and consulted local snow load maps. This approach made me realize my roof needed reinforcement before proceeding.
Involve Structural Experts Early
While DIY assessments are helpful, involving a structural engineer saves headaches. I hired one after preliminary calculations indicated potential issues. The engineer performed detailed calculations, considering the entire roof structure, not just the surface. This step aligns with permitting standards that often require professional verification of load capacities. Their report confirmed whether reinforcement was necessary or if modifications could suffice.
Use an analogy to clarify this process
Think of your roof as the foundation of a ship. If the foundation is weak, the whole vessel risks sinking. A solid load assessment ensures your “ship” can weather the storm of added weight—without sinking or listing dangerously.
Prevent Overestimations and Underestimations
Being precise is crucial. I once overestimated my roof’s capacity, leading to unnecessary reinforcement costs. Conversely, underestimation can be dangerous. Cross-check your data with local building codes and cost estimation guides to balance safety and budget. Remember, smart estimates prevent costly rework and permit delays.
Document Everything for Permits and Future Reference
Keep a detailed record of all assessments, engineer reports, and calculations. When I applied for permits, I submitted my load analysis reports along with other documentation. Accurate documentation streamlines approval and adds an extra layer of safety to your project, ensuring compliance with local permit requirements. It’s like keeping your receipts—you never know when you’ll need proof of due diligence.
When it comes to new construction, many homeowners and even some seasoned builders operate under assumptions that can lead to costly mistakes. Let’s debunk some prevalent myths and shed light on lesser-known nuances that could make or break your project.
Myth: Accurate Estimates Are Just About Numbers
Many believe that creating a precise budget is solely a matter of summing up material and labor costs. However, true estimating demands a deep understanding of project intricacies, permitting hurdles, and potential delays. Overlooking factors like permit fees, inspection contingencies, or unusual site conditions can cause your estimates to fall short. For expert guidelines on refining your approach, visit this resource.
Trap to Avoid: Relying on Standard Permitting Timelines
It’s tempting to assume that permits will always be approved within standard timeframes. Yet, unforeseen review cycles, submission errors, or zoning disputes can extend approval periods significantly. I once experienced a three-month delay because an obscure zoning code was overlooked, which could have been avoided with proactive research. To streamline permit acquisition, consider these strategies.
What Do Advanced Builders Know About Permitting That You Don’t?
Seasoned professionals recognize that understanding the local political landscape and building department nuances can hasten approvals. For instance, cultivating good relationships with reviewers or understanding specific administrative quirks can save weeks. According to a study by the Home Builders Association, proactive engagement with officials correlates with faster permit processing. Have you ever fallen into this trap? Let me know in the comments.
Overlooked: The Role of Site-Specific Nuances in Cost Estimation
Beyond the blueprint, every plot has unique features—soil type, drainage, access—that impact both costs and timelines. Skipping detailed site assessments often results in underestimating foundation, drainage, or access costs. For example, difficult terrain can necessitate specialized foundations or access roads, dramatically increasing your budget. Check out this guide for mastering site-specific estimations.
Never Ignore the Small Details
Many projects stumble because tiny overlooked aspects snowball into major issues—unexpected soil conditions, overlooked easements, or hidden utilities. These nuances can cause project delays and budget overruns. Expert estimators always review detailed site surveys, utility maps, and easement records before finalizing costs. Don’t become a victim of this trap. To learn more about comprehensive planning, see this resource.
Make sure your planning incorporates these advanced insights to avoid surprises and ensure a smoother build process. Are you considering a custom home or addition? Share your experiences or questions below, and let’s discuss how to navigate these pitfalls effectively.
Tools That Stand the Test of Time
Investing in the right equipment for your home construction projects isn’t just about efficiency—it’s about ensuring durability and long-term performance. I personally rely on digital laser distance meters like the Leica DISTO D810 for precise measurements. This tool saves me countless hours re-measuring and reduces costly errors, especially when assessing site dimensions for additions or verifying compliance with setback regulations. I also recommend a high-quality stud finder with deep scanning capabilities, such as the Zircon MetalliScanner m40, which helps prevent accidental hits on electrical wiring or plumbing during interior framing or wall removals.
Software You Can Trust for Accurate Estimations
Manual calculations are essential, but integrating software solutions brings a new level of accuracy and efficiency. I use BuildSoft’s Estimator, a cloud-based tool that allows for detailed cost tracking and scenario modeling. It helps project managers and homeowners alike to visualize budget impacts of different material choices or design modifications. For example, when planning for permit-related reinforcements during roof additions, this software can project costs based on real-time data, reducing surprises down the line. Proven to improve project budgeting accuracy by up to 15%, such tools are becoming indispensable in the modern builder’s toolkit.
Methodologies for Consistent Performance
Beyond tools and software, establishing reliable workflows is crucial. I follow a standardized checklist for maintenance and inspection schedules—reviewing structural components every 6 months and updating documentation for permits or inspections. This proactive approach helps catch issues early, like deteriorating fasteners or drainage problems, preventing costly repairs or permit rejections. Additionally, I set up digital project dashboards that consolidate data from different contractors, ensuring everyone stays aligned and that progress remains on track. This method is especially valuable when scaling projects or managing multiple additions simultaneously.
How do I keep my systems functioning smoothly over time?
The key lies in creating a maintenance plan that includes regular inspections using thermal imaging cameras for detecting moisture intrusion or heat loss. For instance, employing FLIR’s E4 model during annual reviews can reveal hidden problems in insulation or roofing that might compromise structural integrity. Connecting these practices with accurate documentation ensures compliance with local regulations and extends the lifespan of your investments. I encourage homeowners and builders to adopt a routine of quarterly reviews with these tools and to stay informed about emerging technologies that enhance longevity. For the latest insights, consider visiting this resource.
In my experience, proactive maintenance combined with the right equipment leads to fewer permit hiccups and more durable results. And as the industry moves toward smarter, integrated systems, I predict an increased reliance on IoT-enabled sensors that monitor structural health in real-time, offering unprecedented prevention capabilities. Starting with a simple, high-quality moisture meter can set you on the path toward maintaining your build’s health and performance long-term.
The Unseen Lessons That Changed My Approach to Building
One of the most profound lessons I learned was the importance of never assuming your roof’s strength without thorough assessment. I once believed my aging roof was sturdy enough for solar panels, only to discover cracks and weak spots during a detailed inspection, which led to unexpected reinforcement costs. This experience taught me that every building holds surprises—skipping due diligence can cost time and money later.
Another revelation was realizing how local regulations can be more nuanced than they appear on paper. Digging into permit histories in my area uncovered cases where overlooked details caused significant delays. Engaging with local authorities early and understanding specific requirements can prevent costly reworks and project standstills.
The third takeaway involved trusting experienced professionals. While DIY measurements can be helpful, involving a structural engineer early ensured my estimates were accurate, preventing over- or underbuilding. Their expertise bridged the gap between theory and real-world application, safeguarding my investment and peace of mind.
Tools and Resources That Made a Difference
My go-to resource for precise load calculations is the comprehensive estimation guide, which offers step-by-step methodologies tailored to modern homes. For visual assessments, I rely on the Leica DISTO D810 laser distance meter—its accuracy saves hours during site evaluations and helps verify measurements against plans. When coordinating permit processes, navigating local requirements with authoritative guides ensures I stay compliant without surprises. Finally, trusted structural engineering services provide peace of mind and precise reinforcement strategies, making complex load assessments manageable and reliable.
Embrace the Future of Building Safely and Efficiently
Taking control of your project—especially concerning load capacities—empowers you to build confidently and avoid preventable pitfalls. Remember, thorough assessment and leveraging expert insights are your best tools for safeguarding your investment and ensuring a smooth process. The more you know about your roof’s true capacity, the better prepared you’ll be for successful solar integration and other additions.
What steps have you taken to evaluate your roof’s load capacity? Share your experiences or questions below, and let’s keep the discussion going!
**Note:** Throughout this guide, I’ve integrated insights and practical references to resources like estimating techniques and permit navigation to help you navigate challenges effectively.