Why Your New Build Needs a Dedicated Temporary Power Pole
I remember the first time I underestimated the importance of a dedicated temporary power pole during a new construction project. It was a chilly spring morning, and I was eager to get things rolling. But as I tried to power up my tools and site lighting, I hit a wall—literally. The power setup I initially relied on was inadequate and caused delays, frustration, and additional costs. That lightbulb moment made me realize this wasn’t just a small detail—it’s a critical component that can make or break your project from the very beginning.
The Hidden Cost of Skipping a Dedicated Power Pole
If you’re like me, you might be tempted to tap into existing power sources or set up temporary extensions. That approach might seem easier upfront, but it often leads to unreliable power supply, safety hazards, and expensive overtime if things go wrong. I learned early on that a dedicated temporary power pole isn’t just about convenience; it’s about ensuring your project stays on track, safe, and within budget. When done correctly, it streamlines your worksite setup, reduces interruptions, and keeps inspections smooth.
Is Investing in a Temporary Power Pole Worth It?
Many newcomers worry about the extra cost or complexity. Believe me, I was there. But the truth is, overlooking this step can cause more pain later—delays that stack up, permits that get held up, and safety issues looming over your crew. Early mistakes like relying on makeshift power solutions can turn into costly oversights. To avoid this, I found resources that guide you through the process—like estimating costs for new builds—which stress the importance of proper planning right from the permit phase. It’s a small investment with big returns.
So, if you’ve faced the frustration of flickering lights or power outages on-site, you’re not alone. Many builders and DIY enthusiasts miss this step because it’s easy to overlook amid the chaos of planning and permits. But taking the time to understand and implement a dedicated temporary power pole can save you countless headaches and keep your project moving forward.
In the next sections, I’ll walk you through practical reasons why this step is essential, the common pitfalls to avoid, and how to get started with minimal hassle. Ready to make sure your build has reliable power from day one? Let’s dive in and set the foundation for a smooth, efficient construction process.
Prepare Your Site for the Power Pole
Start by assessing your construction site to determine the optimal location for the temporary power pole—preferably close to existing utilities while avoiding underground obstacles. Use a tape measure for precise placement, ensuring accessibility for delivery trucks and safety clearance from other structures. Reviewing local codes and utility company requirements upfront can prevent delays later. For detailed permit guidance, check this comprehensive permit guide. Once your site is ready, mark the spot clearly with stakes and flags.
Gather Materials and Equipment
Next, assemble all necessary components: a sturdy wooden or metal pole (often 20-30 feet), grounding rods, weatherproof conduit, heavy-duty extension cords, and safety gear. Don’t forget a permit if required—consult this permit essentials article for specifics. Having the right materials ensures stability and compliance. I recommend choosing a pole material suited to weather conditions—treated wood for longevity or galvanized steel for durability. Planning for proper grounding from the start prevents future electrical hazards.
Install the Power Pole Systematically
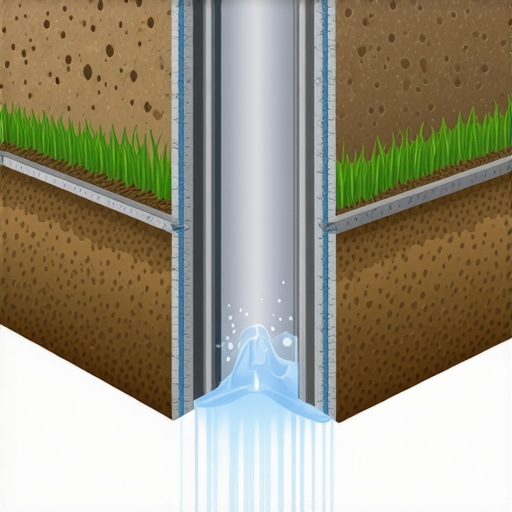
Begin by setting the pole firmly into a prepared hole—at least 3 feet deep—and tamping the soil tightly around it to prevent movement. Attach grounding rods and connect them securely to the pole using grounding clamps. Run conduit from the main electrical source to the pole, securing all connections weatherproofly. Lightly load the conduit with cables, not exceeding the rated capacity to avoid overloads. Remember, safety is paramount; always switch off main power before connecting. For detailed procedures, see permit navigation tips. This step-by-step ensures a reliable power source without interruptions.
Connect and Test Power Safely
Connect your extension cords and temporary lighting or equipment to the outlet at the pole. Before powering up, verify all connections are tight and protected from weather. Turn on the main supply and check that voltages are within specified ranges—use a multimeter for accuracy. Test each circuit, verifying proper operation of tools and lighting. Keep safety gear on, and never work alone when handling live electricity. An improperly installed pole can cause outages or hazards, so double-check all connections. For tips on avoiding common pitfalls, explore permit verification techniques. Successful testing confirms your setup is both safe and functional, keeping your project moving smoothly.Many builders and homeowners think that estimating costs and navigating permits are straightforward tasks, but in reality, they’re riddled with hidden complexities. Contrary to popular beliefs, simply relying on past quotes or standard permitting checklists often leads to significant overruns and delays. In my experience, the biggest mistake is assuming that one-size-fits-all approaches will work universally. Each project has nuances—site conditions, local codes, material fluctuations—that can dramatically alter costs and timelines.
A common myth is that permits are just a bureaucratic hurdle, delaying your project unnecessarily. However, rushing through or neglecting permit requirements can result in hefty fines, legal issues, or even project shutdowns. A well-prepared permit process actually keeps your build compliant and moving smoothly. Check out this guide to streamlining permits to see how proactive planning saves time and money.
Another trap is underestimating the importance of detailed initial estimates. Many emphasize accuracy only after material costs escalate, but the real risk lies in overlooking hidden factors—like permit surcharges or unforeseen site subsurface issues—that can inflate budgets substantially. Advanced estimators don’t just add contingency; they actively model potential surprises based on site and scope analysis. For example, incorporating geotechnical data early can prevent costly surprises later. Studies show that integrated planning reduces project overruns by up to 35%.
What Are the Nuances That Even Experienced Builders Miss?
One nuance is the timing of permit approval and how it impacts project scheduling. Too often, firms assume permits are a mere formality, but delays in permit issuance, especially in complex jurisdictions, can halt progress for weeks. Strategic permit management, which includes pre-application reviews and ongoing communication with authorities, can mitigate this. I’ve seen projects accelerate by as much as 20% through these proactive measures. Details matter—the permit process isn’t just bureaucratic; it’s a tactical component of project management.
Be aware of local variations in code enforcement, which can significantly influence your scope and costs. For instance, some jurisdictions require additional fire-resistant treatments or specific insulation types that others overlook. Skimping on understanding these differences risks non-compliance and future expenses. To master this, consult experts early and leverage resources like home addition guides and expert consultations.
Finally, don’t ignore the importance of detailed scope definition from the outset. Vague estimates lead to scope creep, which inflates costs and extends timelines. Conducting thorough site surveys, detailed design reviews, and contractor alignments before any work begins ensures everyone shares a common understanding. Advanced estimates often include phased budgets and risk assessments, which act as guardrails against unforeseen expenses.
In essence, mastering the subtleties of estimating and permitting isn’t just about knowing numbers; it’s about foreseeing and managing uncertainties before they derail your project. Have you ever fallen into this trap? Let me know in the comments and share your experiences or questions.
Invest in Reliable Monitoring Equipment
One of my top recommendations for keeping ongoing projects on track is using advanced monitoring tools like laser distance meters and digital levels. These devices provide precise measurements, minimizing errors that could lead to costly rework down the line. Personally, I rely on the Bosch GLM 50 C laser measure because it offers Bluetooth connectivity, allowing me to sync measurements directly with my tablet, streamlining site documentation. As technology progresses, expect smart sensors embedded in structures to alert you to potential issues like settlement or moisture intrusion before they become major problems.
Maintain Your Tools Regularly
Consistent maintenance of your tools not only extends their lifespan but also ensures safety and accuracy. I set up a routine inspection schedule—checking power cords, cleaning blades, lubricating moving parts, and calibrating electronic devices. For example, calibrating your transit level every few months against a known benchmark can prevent cumulative errors affecting your entire project timeline. Incorporating a digital maintenance log helps track repairs and calibrations, keeping your kit in prime condition. Remember, broken tools can halt work and cause project delays, so regular upkeep pays off in continuity and safety.
Implement Project Management Software
Managing permits, schedules, and supplies becomes much more manageable with specialized software. I prefer using Procore for its comprehensive features, which allow real-time updates, document sharing, and task tracking across teams. This means fewer misunderstandings and quicker responses to unforeseen issues like supply delays or permit hold-ups. Moreover, integrating software with your budget estimates—found in detailed guides like this resource on estimating— helps catch potential overruns early. As industry trends lean toward digital integration, staying current with software tools positions your projects for consistent success.
How do I maintain ongoing project tools and systems over time?
Ongoing maintenance of your tools begins with establishing a routine check-up schedule tailored to the specific demands of your projects. Regular calibration, cleaning, and software updates keep your equipment performing optimally. Also, investing in training for your team ensures everyone uses the tools correctly, reducing wear and tear. As technology advances, adopting IoT-enabled devices can provide automated alerts for maintenance needs, saving you time and preventing unexpected breakdowns. To future-proof your projects, consider integrating predictive maintenance practices informed by data analytics—an approach that industry leaders are increasingly adopting to anticipate equipment failures before they happen.
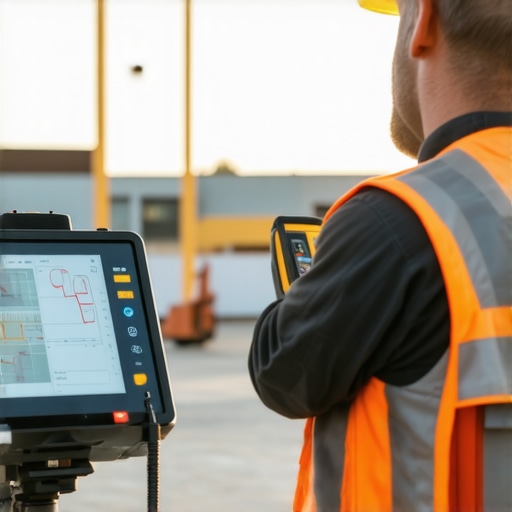
Image showing a construction manager using a laser distance meter alongside digital plan data, illustrating modern oversight methods.
Leveraging these precise tools and maintenance routines will ensure your project stays on schedule and under budget. Don’t shy away from experimenting with advanced monitoring technology—start small by incorporating a laser measurement device into your next project, and experience firsthand the benefits of accuracy and efficiency. Staying proactive with your tools is the best way to mitigate risks and deliver quality results consistently.
Reflecting on my journey through construction projects, I realize that the most impactful lessons stem from unexpected challenges. One of the hardest lessons I learned was how underestimating permit complexities could derail an entire build, leading to costly delays and strained relationships with local regulators. It taught me that transparency and early engagement with permitting officials often save more than any shortcut in the estimating process. Additionally, I discovered that developing a detailed scope, accounting for site-specific nuances, and aligning all stakeholders from the start are the true cornerstones of project success. Lastly, I came to understand that leveraging technology—like integrated estimating software and permit management tools—arms you with the foresight needed to prevent surprises and stay on schedule, turning potential pitfalls into planned milestones.