The Concrete Slump Test Your Contractor Should Never Skip
It happened on a sweltering summer afternoon. I was overseeing a home addition project, eager to see progress. Suddenly, I noticed the fresh concrete didn’t look right — it was too stiff, difficult to work with. My heart sank. Later, I learned that this simple mistake could’ve been avoided with a quick, crucial test. That was my lightbulb moment: I realized how vital the concrete slump test truly is.
Why Ignoring the Slump Test Can Cost You Big Time
Many homeowners and even some contractors underestimate the importance of performing a concrete slump test. It’s not just a box to check; it’s a vital step that ensures the consistency and workability of the concrete mix, which directly impacts the strength and durability of your build. When this test is skipped or rushed, it’s like building a house on shaky ground — it might hold for a while, but eventually, problems surface.
From minor cracks to major structural failures, the consequences of poor concrete quality can be severe. I’ve seen projects where overlooked slump test results led to uneven floors, cracking walls, and even foundation settling issues. Early in my career, I made the mistake of assuming all concrete mixes are the same. That oversight cost me and my clients unnecessary repairs and expenses.
According to the American Concrete Institute, “The slump test is an ASTM standard method that measures the concrete’s workability, helping to predict how concrete will perform in the structural setting” (ACI, 2022). That tiny test — done in just minutes — can save you from costly mistakes later.
Are you sure your contractor is conducting this essential test on every pour? If not, you might be risking your project’s integrity. Let’s dive into what the slump test involves, and how you can ensure it’s done correctly, so your build stands the test of time.
Prepare for Accurate Slump Testing
Before pouring concrete, gather all necessary tools such as a slump cone, tamping rod, and a ruler. Select a sample batch of concrete from the mixer, ensuring it represents the mix used in your project. Wear gloves and safety gear to handle the concrete safely. This initial preparation sets the foundation for reliable test results, much like preparing ingredients before baking a cake ensures a consistent outcome.
Perform the Test Step-by-Step
Fill the Cone in Layers
Place the slump cone on a flat, damp surface. Fill the cone with concrete in three layers, each about one-third of the cone’s height. After each layer, tamp it 25 times with a tamper, moving in a uniform manner to avoid air pockets. This layered approach ensures the concrete settles evenly, akin to filling a jar carefully to avoid air gaps.
Strike off Excess and Lift
Once the cone is filled and tamped, level the surface with a straightedge, removing any excess. Carefully lift the cone vertically without lateral movement, allowing the concrete to slump naturally. Observe the amount it subsides, which indicates the concrete’s workability. Think of it as a quick release—like letting go of a spring-loaded toy to see how far it extends.
Interpreting the Results Effectively
The key is to measure the vertical distance the apex of the concrete falls from the top of the cone. If the slump is too low, the mix might be too stiff for proper workability, risking cracks or weak spots. If it’s too high, the concrete could be overly watery, causing segregation. In my experience, a slump of 4-6 inches typically suggests a good balance for structural projects, but always refer to local standards. For larger pours, recheck multiple samples to ensure consistency, just like tasting multiple spoons of soup for flavor uniformity. Regularly performing these tests during the pour helps prevent issues such as uneven curing or surface cracking, which can compromise integrity over time.
Ensure Consistent Testing Conditions
Temperature, humidity, and mixing time influence slump results significantly. Conduct tests at the same time of day and under similar conditions as your pour. Use the same equipment and techniques to maintain consistency. If a test result deviates from the expected range, consult your concrete supplier or adjust your mix design accordingly. Remember, a reliable slump test is like a compass for your construction quality—they guide you towards a durable, long-lasting structure. For more insights on project planning and estimation, check out how-to estimate costs.When it comes to estimating the cost and scope of additions, permits, or new builds, many assume that a straightforward calculation based on square footage or unit prices is enough. However, this approach often leads to underestimations and unexpected expenses. **Let’s dig deeper** into a critical nuance that even seasoned contractors sometimes overlook: accounting for variable site conditions and permit complexities that fluctuate wildly between projects.
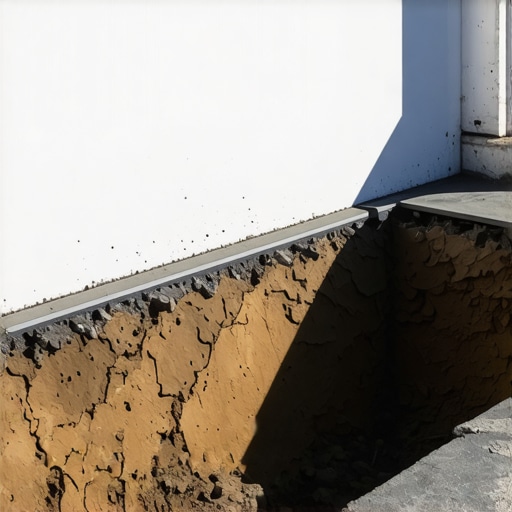
Contrary to popular belief, estimates should not be static or solely based on initial drawings. The real challenge lies in the unpredictable elements—soil quality, existing utility configurations, and local code enforcement variances—that can drastically alter the scope. For example, a project on a compacted gravel foundation may seem simple, but if soil testing reveals poor compaction or contamination, additional stabilization or excavation becomes necessary, skyrocketing costs.
**A common myth** is that permits are a fixed cost easily added at the end. In reality, permit requirements can be opaque—certain jurisdictions demand extensive documentation, environmental assessments, or even archaeological surveys that inflate timelines and budgets. *Have you ever been caught off guard by permit hold-ups?* Knowing the intricacies of the permit process, as outlined in guides like understanding permit processes, can help you account for these hidden layers.
The *oops factor* in estimation is failing to include contingency buffers for these unpredictable elements. Industry standards recommend allocating at least 10-20% of the total budget for unforeseen issues, but I often see projects where this isn’t done, leading to the infamous budget blowout. For detailed strategies, review top estimating strategies to sharpen your foresight.
**Ever wondered why some estimates are off by a large margin even with detailed plans?** It’s often because hidden site conditions and permit nuances aren’t factored in adequately. Proactively addressing these facets requires experience—and a willingness to ask deeper questions during planning. For instance, dirt tests and environmental reviews can reveal surprises that might set your project back by weeks or thousands of dollars.
Don’t let these hidden nuances trip you up. Do your due diligence early, collaborate with knowledgeable professionals, and always plan for the unexpected. It’s this level of detailed foresight that distinguishes a good estimate from a great one. To streamline your process further, explore step-by-step estimation guides tailored for modern projects.
**Have you ever fallen into this trap?** Share your experience below, and let’s learn from each other’s surprises in estimating and project planning.
Keeping Your Construction Systems in Top Shape
Maintaining the integrity of your build over time requires more than just initial planning; it demands the right tools, consistent oversight, and strategic adjustments. I personally rely on a combination of high-quality measurement devices and project management software to keep everything on track. Using laser distance meters like the Leica Disto has revolutionized how I verify dimensions during framing and inspections, saving time and ensuring precision.
Equally vital is implementing a robust maintenance schedule. That means regularly inspecting foundation drainage, roof flashings, and sealants, especially after severe weather. To streamline this process, I recommend integrating software such as Buildertrend or CoConstruct, which allows for scheduled reminders, documentation, and team collaboration—all accessible via smartphones in the field. These tools help catch potential issues early, reducing costly repairs down the line.
Tools That Define Future Building Excellence
Looking ahead, the trend is shifting towards automation and data-driven decision-making. Drones equipped with thermal imaging are now invaluable for inspecting hard-to-reach areas and identifying insulation or moisture issues that might otherwise go unnoticed. Moreover, Building Information Modeling (BIM) systems are becoming integral for long-term planning, enabling precise visualizations and clash detections that facilitate maintenance planning well before the first brick is laid.
In my practice, I’ve started using BIM software like Navisworks to simulate long-term scenarios such as water runoff, electrical load management, and material durability assessments. These simulations not only inform better initial decisions but also guide maintenance strategies over the lifespan of the structure. The ability to predict potential failures—backed by data—is a game-changer for sustainable building practices.
How do I keep my building functioning seamlessly over time?
The key to long-term success is adopting a proactive mindset involving scheduled inspections and leveraging technology. Incorporate advanced testing methods, such as using moisture meters to monitor for hidden leaks or vapor barriers (per expert moisture testing tips), to catch problems before they escalate. Establish routine checklists, much like a pilot’s pre-flight inspection, to ensure all systems—from HVAC to plumbing—are operating within optimal parameters.
Invest in training your team on the latest tools. For example, mastering the use of drone inspections or BIM models can dramatically reduce unforeseen repairs. Remember, the true benefit lies in building a resilient structure that withstands the test of time and minimizes ongoing maintenance costs. In fact, a study by the National Association of Home Builders emphasizes that integrated digital tools can reduce maintenance costs by up to 30% over a building’s lifespan.
Start by trying out a thermal imaging drone on your next project’s roof or basement to get a comprehensive view of potential issues. Small steps like these can lead to large savings and a more predictable maintenance plan. Want to learn more about integrating these tools into your workflow? Reach out via our contact page for expert insights and tailored recommendations.
What I Wish I’d Known Earlier About Estimating and Permits
One of the most profound lessons I learned is that meticulous planning and testing upfront save endless headaches later. For example, performing detailed soil tests prevented my team from facing unforeseen foundation issues, which can be a nightmare if overlooked. I also discovered that clear communication with local authorities about permit requirements streamlines the process, avoiding costly delays. Trust me, the small effort invested in understanding permit nuances, like reviewing permit procedures, pays dividends in your project’s timeline and budget.
My Go-To Arsenal for Accurate Cost and Scope Control
Over the years, I’ve built a toolkit that truly elevates my estimating confidence. Software like CostX helps me create detailed, realistic budgets that flag potential overruns early on. For on-site measurements, I rely on laser tools such as the Leica Disto, which ensures precision without the delay of manual tape measures. And when I need a deep dive into project planning, I turn to comprehensive estimation guides that keep me ahead of the curve. These resources have been pivotal in reducing surprises during construction and maintaining client trust.
Building Resilience: Beyond the First Pour
The journey doesn’t end when the concrete is poured; it’s just the beginning. Regular inspections using moisture meters and thermal imaging help me identify potential issues early, preventing costly repairs down the line. I also advocate for integrating digital management tools like Buildertrend, which keeps everyone on the same page and ensures ongoing maintenance tasks are scheduled proactively. Embracing these strategies ensures the longevity of your build and peace of mind for years to come.