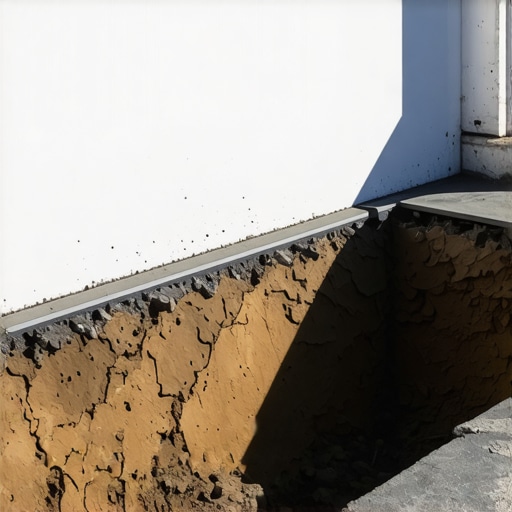
The Specific Excavation Depth Required for Long Island Egress Window Installation
The Specific Excavation Depth Required for Long Island Egress Window Installation
Hello, I’m Ronald Mayer, Creative Consultant at Long Island Egress Pros. For nearly seven years, I have worked within the unique construction landscape of Nassau and Suffolk Counties, helping homeowners transform dark, unsafe basements into vibrant, code-compliant living spaces. When we talk about Long Island egress window installation, the conversation usually starts with the window itself – the glass, the frame, and the energy efficiency. However, as any seasoned professional will tell you, the success or failure of an egress system isn’t found in the window; it’s found in the ground.
The excavation depth is perhaps the most misunderstood and underestimated component of a basement egress project. On Long Island, “digging a hole” is rarely as simple as it sounds. Between our varying soil compositions – ranging from the sandy plains of the South Shore to the rocky glacial moraines of the North Shore – and our notoriously high water tables, the depth of your excavation determines whether your basement stays dry and your family stays safe. In this guide, we will break down the exact “magic numbers” required by code and the technical realities of digging on the Island.
An egress window is more than a source of natural light; it is a life-saving exit. According to the International Residential Code (IRC), any finished basement with a bedroom must have an emergency escape and rescue opening. This opening must provide a net clear area of at least 5.7 square feet. But to get that window into your foundation, we have to go deep. Before you pick up a shovel or hire egress window contractors, you must understand the permit processes for new building projects and how they dictate the geometry of your dig.
II. The “Magic Numbers”: IRC and Long Island Code Requirements
When performing a basement egress window installation, we are bound by both the IRC and specific local amendments across Nassau and Suffolk. There are three primary “magic numbers” that dictate the depth and scale of the excavation.
1. The 44-Inch Rule (Sill Height)
The IRC is very clear: the bottom of the window clear opening (the sill) can be no more than 44 inches above the finished floor. This ensures that a child or an elderly person can reach the window to escape during an emergency. This measurement is the starting point for determining our excavation depth. If your basement floor is deep underground, your window sill will be deep, which in turn means your exterior excavation must go even deeper.
2. The 9 Square Foot Rule (Well Area)
The window well – the structure that keeps the dirt away from the window – must have a minimum horizontal area of 9 square feet, with a minimum horizontal projection and width of 36 inches. This isn’t just a suggestion; it’s the space required for a firefighter in full gear to descend into the well or for a resident to climb out. If the well is deeper than 44 inches (which is common on Long Island), a permanent ladder or steps must be installed, which further impacts the excavation footprint.
3. The Drainage Depth (The “Over-Dig”)
This is where many egress window installers fail. You cannot simply dig to the bottom of the window. To prevent the “aquarium effect,” where your window well fills with water during a Nor’easter, the excavation must extend significantly below the window sill to accommodate a drainage bed. We typically look for a minimum of 12 inches of “over-dig” filled with clean stone to facilitate proper drainage. For more complex setups, refer to the egress rule for basements that don’t have bedrooms to see how requirements change based on room usage.
III. Long Island’s Unique Geology: Sandy Soil vs. High Water Tables
As a Long Island egress window contractor, I’ve seen how our local geology dictates the difficulty of a project. Long Island is essentially a giant sandbar left behind by retreating glaciers, but that sand isn’t distributed evenly.
The South Shore Challenge
In towns like Massapequa, Babylon, and Lindenhurst, the soil is incredibly sandy. While sand is excellent for drainage, it is terrible for structural stability during an excavation. When we dig for a Long Island egress window installation on the South Shore, we have to be extremely careful about “sloughing” – where the sandy walls of the hole collapse inward. Furthermore, the water table on the South Shore can be as shallow as 3 or 4 feet. If we dig too deep, we hit water. In these cases, we must implement specialized drainage solutions.
The North Shore and the Glacial Moraine
Moving toward the North Shore – places like Huntington, Port Jefferson, and Glen Cove – the soil turns into a dense mix of clay and “Long Island potatoes” (large glacial rocks). Here, the excavation depth is limited not by water, but by physical obstacles. Digging a 4-foot-deep hole might require heavy machinery or jackhammers to break through boulders. Regardless of the soil, we always have to consider the foundation weeping tile rule for high-water tables to ensure the basement remains dry after the window is installed.
IV. The Anatomy of the Dig: Step-by-Step Excavation
A professional egress window installation company doesn’t just start swinging a pickaxe. The excavation is a surgical process. Here is how we at Long Island Egress Pros approach the “Anatomy of the Dig”:
- Utility Marking (Call 811): Before a single inch of soil is moved, we must identify gas, water, and electric lines. On Long Island, many older homes have buried oil tanks or old cesspools near the foundation. Hitting one of these can turn a $5,000 project into a $50,000 nightmare.
- The Primary Cut: We excavate a hole that is wider and deeper than the final window well. If the window well is 36″ x 36″, the excavation is often 48″ x 48″ to allow for backfilling and structural reinforcement.
- The 12-Inch Over-Dig: As mentioned, we dig approximately 12 inches deeper than the bottom of the window well frame. This space is the “sump” of the window well.
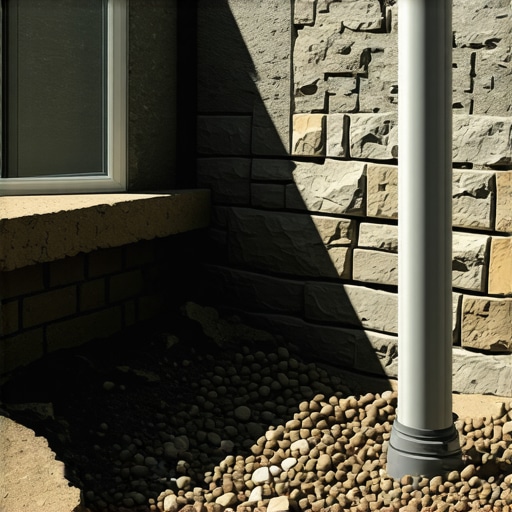
- The Drainage Layer: We fill that bottom 12 inches with ¾” clean crushed stone. This stone acts as a reservoir, holding water during heavy rain while it slowly percolates into the soil or is diverted to the home’s footing drains.
Many “cheap” quotes from uncertified egress window installers skip this over-dig. They set the well directly on the soil. When the first heavy rain hits, the water has nowhere to go but through the window and into your finished basement. This is why having a temporary drainage plan during construction is vital.
V. Drainage Requirements: Preventing the “Basement Aquarium”
The excavation depth is inextricably linked to drainage. On Long Island, we deal with “flash flooding” during summer storms. If your excavation isn’t deep enough to accommodate a proper drainage system, your window well becomes a bucket that pours water into your home.
The Percolation Factor
In the sandy soils of Central Suffolk, water drains quickly. However, in the clay-heavy soils of the North Shore, water sits. We often have to calculate the soil percolation rate to decide if a standard stone-filled pit is enough or if we need to tie the well into the home’s existing perimeter drains (French drains) or a dedicated dry well.
Sump Pumps in Egress Wells
In areas with exceptionally high water tables where we cannot dig deep enough for a stone reservoir, we may install a dedicated sump pump inside the window well itself. This requires an even more specific excavation depth to house the pump basin below the level of the window sill.
VI. Permitting in Nassau and Suffolk: Don’t Dig Without Paperwork
Every township on Long Island – whether it’s the Town of Hempstead, Oyster Bay, Islip, or Brookhaven – views a basement egress window installation as a structural modification. You are, after all, cutting a large hole in the load-bearing foundation of your home.
A building permit is required for the excavation. The building department will want to see:
- The depth of the excavation.
- The type of window well being used.
- The drainage plan.
- A site plan showing the distance from the property line.
Trying to bypass this process is a recipe for disaster. If you sell your home later, an unpermitted egress window will fail a home inspection, often requiring you to dig it up and redo it to modern standards. Ensure you are navigating permit requirements for additions correctly to avoid these pitfalls.
VII. Cost Factors: Why Excavation Depth Influences the Quote
When you call an egress window company for a quote, the depth is one of the biggest variables in the price. Homeowners often ask why one quote is significantly higher than another. Often, it comes down to the excavation method and the anticipated depth.
Hand-Digging vs. Machine-Digging
If your egress window is located in a tight spot between your house and a fence, we have to dig by hand. Hand-digging a 4-foot or 5-foot deep hole that is 4 feet wide is labor-intensive and expensive. If we can get a mini-excavator into the backyard, the process is faster, but machine rental and transport add to the base cost.
Obstacles and “Rock Clauses”
In the North Shore of Long Island, many egress window contractors include a “rock clause” in their contracts. If we are digging to our required 48-inch depth and hit a massive glacial boulder that requires a hydraulic hammer to remove, the cost will increase. Similarly, discovering a buried utility or an old foundation wall at depth can change the scope of work. Understanding how to accurately estimate costs for home improvements is essential for any Long Island homeowner.
VIII. Professional vs. DIY: The Risks of Getting the Depth Wrong
It can be tempting for a handy homeowner to try a basement egress window installation themselves. However, the risks associated with the excavation alone are substantial. Here is what can go wrong when an amateur handles the dig:
- Structural Collapse: If you dig too close to the foundation without understanding the “angle of repose” for the soil, you can undermine the footing of your house, leading to cracks in the upper floors or even structural failure.
- Improper Ladder Spacing: If the excavation isn’t deep enough or wide enough, the required escape ladder won’t fit according to code, meaning the window won’t count as a legal egress.
- Utility Strikes: Digging without proper marking is dangerous. Striking a gas line or an underground electrical feed is life-threatening.
- Insurance Liability: If your DIY egress window leaks and floods your basement, your insurance company may deny the claim if the work was unpermitted or not done by a licensed Long Island egress window contractor. Always make sure to verify that your contractor is actually insured.
IX. Conclusion & Summary Checklist
Installing an egress window is one of the best investments you can make in your Long Island home. It adds square footage, increases natural light, and – most importantly – provides a safe exit for your family. However, the “magic” of a great installation is hidden beneath the surface in the excavation depth.
To summarize, a code-compliant Long Island egress window installation requires:
- A maximum sill height of 44 inches from the basement floor.
- An excavation deep enough to allow for 12 inches of clean stone drainage below the window.
- A window well with at least 9 square feet of clear floor area.
- Proper consideration for Long Island’s specific soil and water table conditions.
- Full permitting through your local Nassau or Suffolk township.
At Long Island Egress Pros, we don’t just dig holes; we engineer safety systems. We understand the nuances of the Island’s geology and the strict requirements of local building departments. If you are ready to finish your basement and want the peace of mind that comes with a professional, code-compliant installation, contact us today. Let’s make sure your egress project is built on a solid – and deep – foundation.