How to Document Pre-Existing Damage Before a New Build
The first time I ventured into building my dream home, I overlooked one tiny detail—documenting the existing damage on my property. A small crack in the foundation, an old dent on the garage door, a few uneven patches in the backyard—things I thought were insignificant. Turns out, those overlooked imperfections would come back to haunt me during inspections and negotiations, leading to unexpected costs and delays.
That lightbulb moment taught me the importance of thoroughly documenting pre-existing damage before starting a new construction project. If you’re planning a build—be it a fresh home, an addition, or a substantial renovation—missing out on this step can leave you vulnerable. Proper documentation not only protects your property value but also streamlines the permitting process and avoids disputes down the line.
Why Skipping Damage Documentation Can Cost You Big Time
Think about it: a building project is a complex dance of permits, inspections, and negotiations. When you start with a clear record of existing issues, you’re setting a foundation of transparency. Without it, any new damage could be mistakenly attributed to you or your contractor, leading to inflated repair costs or disputes.
Early on, I made the mistake of relying solely on my memory and a few casual photos. Unsurprisingly, when it came time for final inspections, I faced questions about damage I already knew existed but didn’t have documented. This experience drove home the need for a systematic approach.
By carefully recording pre-existing damage from the get-go, you’ll have concrete evidence to support your claims. It becomes a reference during inspections and a safeguard during project closeouts. Plus, it shows professionalism and diligence—traits that inspectors and contractors appreciate.
The good news? Documenting damage isn’t complicated, and I’ll walk you through the best practices to do it effectively. Before we dive into the steps, let’s address a common fear many face: “Is this even worth the effort?” Well, if you’ve ever had to renegotiate costs or clarify damage after the fact, you’ll realize that this simple step can save you from a heap of trouble—and money.
Conduct a Comprehensive Site Walkthrough
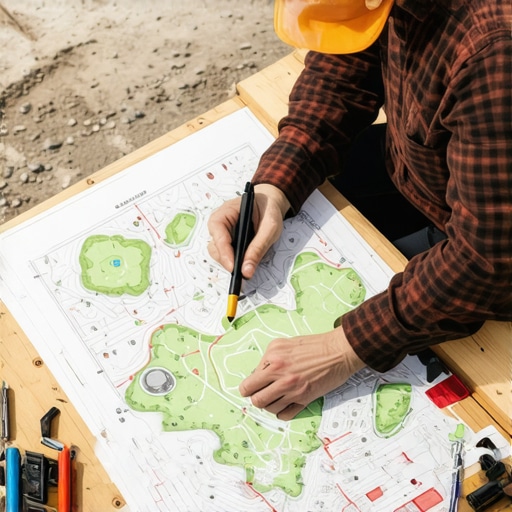
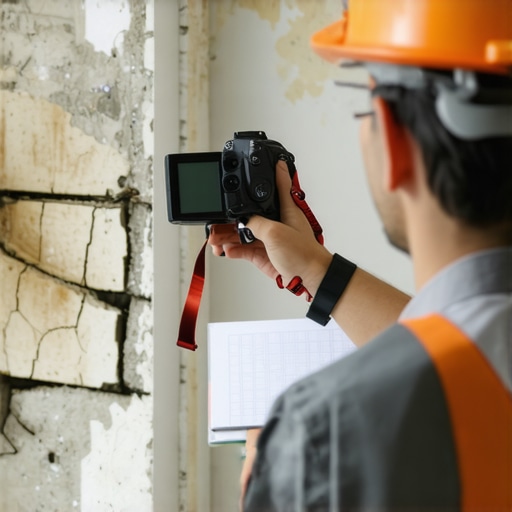
Begin with an in-person inspection of the property. Walk around and note every visible imperfection, no matter how minor. Use a high-quality camera or smartphone to take detailed photos from multiple angles. For example, during my last project, I documented a small crack in the basement wall and a dent in the garage door, which later proved essential during negotiations.
Create a Detailed Damage Log
Compile your observations into a structured document. List each defect with a clear description, location, and severity. Include the date and time when each photo was taken. This log serves as your official record and is invaluable if disputes arise later.
Use Measurement Tools for Accuracy
Employ measuring tapes, laser distance measurers, or levels to quantify damage. For instance, measure the width of cracks or the height difference between uneven surfaces. Precise measurements help substantiate your claims and differentiate between minor cosmetic issues and significant structural concerns.
Leverage Technology to Enhance Documentation
Consider drone footage or 3D scanning for large or complex sites. These tools offer a comprehensive perspective that static photos might miss. During a recent renovation, I used a 3D camera to capture the entire backyard terrain, which proved helpful when discussing boundary issues with contractors.
Store and Back Up Your Records Safely
Save all images and documents digitally in cloud storage or an external drive. Label files clearly with dates and descriptions. This ensures your documentation remains accessible and tamper-proof throughout the project.
Share Records with Stakeholders
Distribute copies of your damage log to contractors, inspectors, and other relevant parties before work begins. This transparency fosters trust and minimizes misunderstandings. When I shared my documented damage with my contractor, it expedited the permit process and aligned everyone’s expectations.
Understand the Legal and Contractual Implications
Familiarize yourself with local regulations and your contract’s clauses regarding pre-existing damage. Proper documentation can shield you from liability and provide leverage during negotiations. For additional insights, explore how proper estimation and permit handling streamline your project by visiting this guide.
While many homeowners and builders focus on the obvious steps like budgeting and obtaining permits, there’s a nuanced trap that often goes unnoticed—overestimating the certainty of your numbers and assumptions. Many believe that rough estimates and generic permit knowledge are sufficient, but in reality, these can lead to costly surprises. For instance, relying solely on average square footage costs without considering local variations or project-specific complexities can inflate or deflate budgets unexpectedly. Advanced builders know that detailed, site-specific data and understanding permit intricacies can make or break your project’s success. A common myth is that permits are a one-size-fits-all hurdle; in truth, each jurisdiction has unique requirements and processing times. Not properly researching or misinterpreting these can cause significant delays, as explained in this detailed guide on permits for new builds. Additionally, novice estimators often overlook hidden costs, like utility connections or drainage modifications, which can dramatically inflate the final budget. A study by the National Association of Home Builders noted that underestimated project scope and unforeseen site conditions are primary causes of budget overruns. To avoid these pitfalls, it’s crucial to engage with experts early, conduct thorough site assessments, and understand the local permitting landscape. This nuanced approach ensures your project is not just estimated accurately on paper but also executed smoothly on the ground. Remember, the devil is in the details—skipping them can be a silent cost in your build’s success. Have you ever fallen into this trap? Let me know in the comments.
Keeping It Working: Tools and Techniques for Longevity
Successfully managing a construction project doesn’t end once the build is complete; maintenance is key to safeguarding your investment. Using reliable tools and adopting regular upkeep routines can dramatically extend the lifespan of your structures and prevent costly repairs down the line. For example, I personally recommend investing in a high-quality moisture meter like the Tramex Moisture Encounter Plus, which helps detect hidden leaks and prevent structural damage before it becomes serious.
On the software side, I swear by construction management platforms such as Buildertrend because they enable real-time tracking of maintenance schedules, warranty deadlines, and permit renewal dates. These digital tools act as your project’s brain, ensuring nothing slips through the cracks and that all systems are functioning optimally long after the initial project wraps up.
How do I maintain my permits and estimates over time?
Accurately tracking permit renewals and updates is crucial. Setting automatic reminders within your digital calendar or project management app can prevent permits from lapsing and keep ongoing inspections on schedule. Moreover, regularly updating your cost estimates with recent market data—using resources like this estimator guide—ensures your budget remains realistic as materials and labor rates fluctuate over time.
Another critical aspect is routine inspections. Scheduling quarterly walk-throughs with digital tools helps identify potential issues early, whether it’s a roofing membrane showing wear or a gutter system clogging. Addressing these problems promptly maintains the integrity of your house and can save you thousands in repairs. Combining physical inspections with software-based alerts creates a formidable defense against long-term deterioration.
Looking ahead, I believe that automation and IoT integration will become standard in property maintenance. Smart sensors can monitor moisture levels, structural shifts, or electrical load fluctuations and alert you remotely. This proactive approach minimizes downtime and repairs, making your property not just a home but a smart, self-regulating ecosystem.
Tools that I personally use to streamline maintenance
Beyond the moisture meter and project management apps, I also rely heavily on drone inspections for large or tricky-to-access areas. Using a drone equipped with a high-resolution camera allows me to check roof surfaces or sprawling property boundaries quickly and safely. This method is especially valuable for long-term assessment after additions or renovations, as it helps catch issues before they worsen.
To keep everything in check, I suggest setting up a digital database of all maintenance records, warranties, and permits. Cloud-based solutions like Google Drive or Dropbox make it easy to access and organize this information, ensuring consistency and peace of mind. Think of it as your property’s health record—consistent monitoring and documentation are your best defenses against depreciation or unforeseen expenses.
In terms of future trends, expect increased adoption of AI-driven diagnostics and predictive maintenance platforms, transforming how we approach long-term care for construction projects.
Start by implementing one advanced tip today—perhaps integrating a smart sensor system in critical areas—and observe how it simplifies upkeep tasks for years to come. For more detailed strategies, explore this comprehensive guide.
What I Wish I Knew When Starting Out
One of the most eye-opening lessons I learned about estimating and permitting is that not all costs or requirements are visible at first glance. Early in my projects, I underestimated the time it takes to gather accurate site data, which caused delays. Real transparency came only after I realized that detailed measurements and thorough inspections are worth every minute—saving me money and stress in the long run.
Another insight is that permits are more than bureaucratic hurdles; they’re opportunities for accountability and clarity. Engaging with local regulations early helped me avoid costly reworks and legal issues. Overconfidence in generic estimates or assumed permit processes can be a silent trap—being meticulous from the start is your best defense.
The third lesson was recognizing the value of comprehensive damage documentation, which acts as your safeguard when negotiations or inspections happen. My insistence on detailed records turned potential disputes into smooth approvals. These deeper lessons have united my projects in less hassle and better results—an investment worth making.
My Go-To Tools for Better Estimating and Permitting
Since accuracy is everything, I rely on resources like top estimation techniques for reliable cost projections. They help me tailor my budgets to real conditions rather than generic averages.
For permit navigation, comprehensive permit guides have become my trusted companions. They demystify local regulations, saving me from unnecessary delays. Lastly, I keep a digital repository of all project documents—warranty info, permits, damage records—which keeps my workflow seamless and prepared for anything.
Keep Moving Forward: Building With Confidence
Construction and renovation projects are complex journeys that demand attention beyond just plans and permits. By embracing detailed estimation methods, understanding local permit nuances, and meticulously documenting every detail, you create a foundation for success. Remember, each careful step you take today prepares a smoother process tomorrow. If you’re ready to elevate your building experience, explore more on streamlining permit acquisition and boost your project confidence.
What’s the one step in estimating or permitting that you find most challenging? Share your experiences below—I’d love to hear how you’re conquering those hurdles.