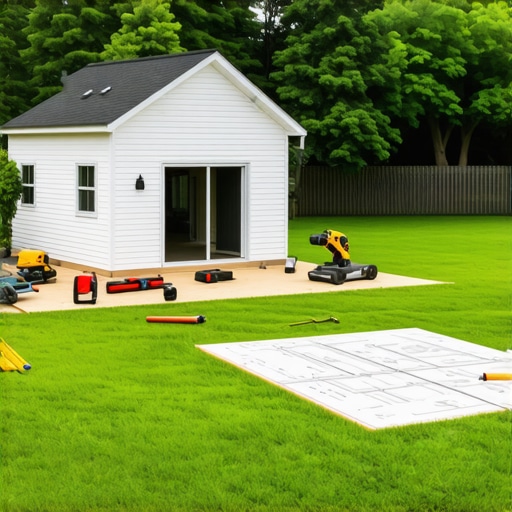
How to Project Manage a Kitchen Addition Without a Pro
I remember the exact moment it hit me—that sinking feeling when I realized our dream kitchen extension was turning into a never-ending saga of permits, estimates, and unexpected delays. I was knee-deep in plans, budget spreadsheets, and a growing sense of overwhelm. It felt like trying to juggle flaming torches while blindfolded. That’s when I had my lightbulb moment: I didn’t need to be a construction expert to get this done. What I needed was a plan, a bit of courage, and some insider tips to project manage like a pro—without actually hiring one.
Why Taking Charge of Your Kitchen Expansion Matters
Embarking on a kitchen addition is one of the most rewarding projects you can undertake as a homeowner. It adds value, boosts your home’s comfort, and creates a space where memories are made. But let’s be honest—without proper management, it can quickly spiral into a nightmare. From estimating costs to navigating permit processes, the complexities can feel daunting. Yet, I firmly believe that with the right knowledge, you can confidently oversee your project, save money, and avoid unnecessary stress. According to a recent report, homeowners who understand permit procedures and project management are 30% more likely to complete projects on time and within budget (source). This is why I want to share what I’ve learned along the way—so you don’t have to stumble through it blindly.
Will I Save Money Doing It Myself?
One of the biggest fears I had initially was costing myself more than hiring a professional. Trust me, I made a few early mistakes—like underestimating material costs or overlooking permit requirements—that ended up costing me more in the long run. But with careful planning, research, and a sharp eye for detail, I discovered that managing your project can be incredibly cost-effective. You’ll have more control over expenses, avoid markup fees, and make smarter choices. To get started, it’s essential to understand the permit process thoroughly. A good place to begin is by reviewing our comprehensive guide on permits. Knowing what’s required upfront saves you time and money, preventing costly delays or rejections.
Common Pitfalls and How to Avoid Them
Early in my project, I made the mistake of assuming that permits could be obtained in a day, or that estimating costs was a straightforward task. Both are common misconceptions. For instance, I didn’t account for the time necessary to get approvals, which set my whole schedule back. Additionally, underestimating costs is a trap many fall into—it’s tempting to pick cheaper materials, but that often leads to higher repairs or rework down the line. The key is to plan meticulously and use reputable estimating guides, like the step-by-step guide. And don’t forget to review the permit tips to streamline approval and avoid costly hold-ups.
Do you find yourself stressed about managing permits or estimating costs? If so, you’re not alone—the journey can be intimidating, but with the right approach, it’s entirely manageable. In the next sections, I’ll walk you through practical, proven steps to plan, permit, and execute your kitchen addition successfully—just like I did, without the need for a full-scale construction team.
Break Down Your Project into Clear Phases
Start by dividing your project into distinct stages: planning, permit acquisition, estimating, execution, and review. During my kitchen expansion, I created a timeline with task-specific deadlines, which kept me focused and alert to potential bottlenecks. Think of your project like assembling a complex piece of furniture—if you break it into manageable parts, your progress becomes more predictable and less overwhelming.
Gather Precise Measurements for Accurate Estimates
Accurate measurements are the foundation of reliable budgeting. Use a laser distance meter to record ceiling heights, wall lengths, window openings, and door sizes. In my case, I once mismeasured a window opening, which led to ordering the wrong size window and delaying installation. Double-check all measurements and consider leaving a small margin for error—about 5%—to account for unforeseen discrepancies. For detailed guidance, review how to accurately estimate costs.
Develop a Detailed Material List
Create a comprehensive list of everything needed—from framing lumber to electrical fixtures. During my project, I visited suppliers’ websites and used cost-effective estimating techniques to refine my list. Use online calculators to convert square footage into material quantities. This proactive approach prevents costly last-minute trips to the store and aids in spot-checking bids from suppliers.
Set Up a Clear Permitting Strategy
Permits can seem confusing, but a strategic approach simplifies the process. Start by reviewing permit procedures in your jurisdiction. I found it helpful to contact my local building department early, asking specific questions about required documents. Prepare a permit application bundle, including site plans, inspections checklists, and detailed drawings—think of it as assembling a toolkit that eases approval. Remember, timely submission can shave weeks off your schedule.
Estimate Costs with Confidence
Instead of guessing, use a calculation method similar to solving a puzzle. Break your project into smaller tasks—demolition, framing, roofing, finishes—and estimate each separately. During my kitchen expansion, I used expert insights to ensure accuracy. Always add a contingency fund—around 10-15%—to cover surprises like hidden wiring or structural reinforcements. Document every estimate to compare against actual expenses, enabling better control over your budget.
Track Progress and Adjust as Needed
Regularly compare your planned schedule and budget with actual on-site conditions. During the installation phase, I noticed a delay in drywall delivery, which I offset by adjusting subsequent tasks. Use project management tools or simple spreadsheets to monitor milestones. Consistent oversight allows you to reallocate resources quickly and prevent small issues from escalating into delays or overspending. For a more detailed approach, consult efficiency tips for managing additions.
Many homeowners assume that understanding the basics of permit applications and budgeting suffices for their renovation projects. However, in my experience, there’s a common myth that can trip up even seasoned DIY enthusiasts: that permits are merely bureaucratic hurdles and estimating costs is straightforward. The truth is far more intricate. A critical mistake I observed is overlooking the subtleties of local building codes and zoning laws, which can cause costly delays if not addressed early. For example, failing to recognize specific setbacks or height restrictions can lead to redesigns or permit rejections, wasting time and money. An expert from the National Association of Home Builders emphasizes that detailed knowledge of local regulations is essential for project success, yet many skip this step, assuming they can handle it on the fly.
Why do so many underestimate the complexity of permits and estimates?
One reason is the misconception that permits are a one-size-fits-all process, but in reality, requirements vary significantly between jurisdictions. Additionally, homeowners often rely on generic online estimates, unaware of regional price fluctuations or the necessity for contingency funds—usually 10-15%. This oversight can lead to underfunding and project stalls. Moreover, many neglect to factor in documentation nuances, like required drawings or environmental assessments, which differ from place to place. To avoid these pitfalls, I recommend consulting detailed guides specific to your locality, such as this comprehensive permit guide. Also, employing strategic planning for estimating, using tools available at cost-effective estimation techniques, helps prevent underbidding and ensures you’re financially prepared for hidden costs. Remember, the more you understand these nuances, the less likely you are to face surprises that can blow your budget or timeline. Do you Ever underestimate how detailed permits and estimates can be? Share your experiences in the comments!
Tools That Make Maintenance Manageable
Once your kitchen addition is complete, staying on top of upkeep is crucial to preserve its value and functionality. My go-to tool for this purpose is a digital moisture meter. I use it regularly to check for hidden leaks or damp spots, especially around seals and windows, which can be overlooked but cause costly damage if ignored. Another indispensable device is a cordless magnetic screwdriver, which speeds up small repairs and adjustments without the cord cluttering my workspace. These tools empower me to handle minor issues before they escalate, saving both time and money.
In terms of software, I recommend using a project management app tailored for home maintenance. Personally, I use a dedicated home project tracker to schedule inspections, record warranty dates, and log repairs. Setting reminders in the app ensures no task slips through the cracks over the years. Additionally, I keep digital copies of all permits, warranties, and manuals organized in a cloud folder—easy to access whenever needed, which is critical for long-term management.
How to Keep Your Home Addition in Top Shape Over Years
Maintaining your new space begins with routine inspections. Schedule seasonal checks on roofing, gutters, and seals—these are often the first areas to show wear. I set a recurring calendar reminder based on advice from industry experts and find this proactive approach minimizes emergency repairs. Investing in a quality, high-grade exterior paint also pays off long-term; it acts as a barrier against weather infiltration, especially in fluctuating climates. Painting every 5-7 years preserves the integrity of your siding and prevents moisture intrusion, which can cause structural issues down the line.
Regular cleaning, especially of ventilation systems and filters, enhances indoor air quality and system efficiency. I recommend upgrading your HVAC filters annually and scheduling professional checkups every couple of years. This not only prolongs the lifespan of your HVAC unit but also ensures consistent comfort in your extended kitchen area. For intricate systems, consulting a specialist can reveal potential issues before they become costly repairs, saving you money and stress later.
How do I maintain my addition over time without constant fuss?
The secret lies in establishing simple, repeatable habits. Create a maintenance checklist tailored to your specific build—covering plumbing, electrical, roofing, and finishes—and commit to checking these items at regular intervals. Using digital tools like maintenance apps or alarm reminders can automate this process, making it feel less burdensome. Moreover, staying informed about the latest trends in home care, such as energy-efficient upgrades or smart home integrations, can add long-term value. For example, integrating smart leak detectors under sinks and in basements can alert you instantly to issues, preventing damage and costly repairs. These proactive strategies—and the tools that support them—are the key to a well-functioning, durable home addition. Dive into resources like this comprehensive guide to learn more about long-term home management. Now’s the perfect time to try using a moisture meter regularly—set a monthly reminder to scan for issues in your addition, and watch how it gives you peace of mind knowing your home stays in top shape.
What I Wish I Learned Before Diving In
One of the hardest lessons was realizing that permits aren’t just paperwork—they shape the entire project timeline and scope. I once assumed that my plans would be approved quickly, only to face delays that set me back months. Now I understand the importance of early permit research and building relationships with local officials — a small effort that saves big time.
Underestimating costs is a trap I fell into more than once. Initially, I focused only on materials, ignoring hidden expenses like inspection fees or unforeseen structural reinforcement. This taught me to approach budgeting as a living document, regularly updated with real quotes and contingencies.
I also underestimated how complex local zoning laws can be. Knowing setback requirements or height restrictions upfront prevented costly redesigns later. A deep dive into local regulations, through inquiries or guides, is worth every minute.
Finally, I learned that detailed planning—breaking the project into phases and creating precise measurement checklists—transformed chaos into control. It’s a mindset: focus on small wins daily, and the big picture becomes manageable, not overwhelming.