The Ventilation Requirement for Attached Garages
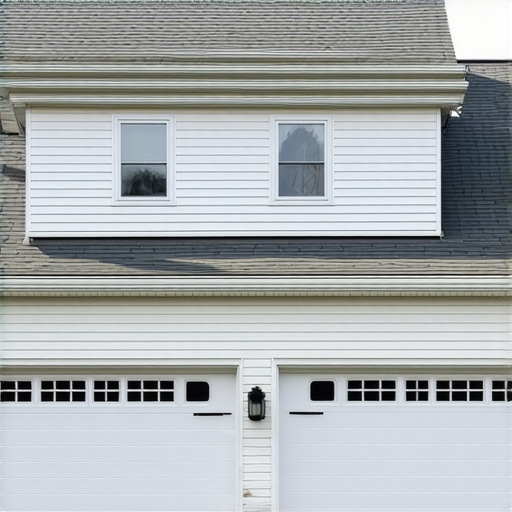
I remember the moment vividly—standing in my garage, feeling that stale, unsettling smell of gasoline fumes lingering just a bit too long. It hit me like a ton of bricks: I had overlooked a crucial detail when planning my attached garage. Years of DIY projects and permit applications had taught me one thing—ventilation isn’t just about comfort; it’s a health and safety necessity. But why is the ventilation requirement so strict, and how can you ensure your garage complies without turning the process into a confusing nightmare?
Why Proper Ventilation Matters More Than You Think
Most homeowners focus on the size, style, or even the color of an attached garage, but ventilation? That tends to fall by the wayside. The real issue is, poor ventilation can lead to dangerous exhaust buildup, increased humidity, and even structural problems over time. It’s one of those details that can make or break your project, especially when you’re trying to pass inspections or meet local building codes. And trust me, making that mistake early on can cost you dearly in delays and rework.
Are You Overestimating Your Ventilation Setup?
Early in my renovations, I assumed standard vents or a couple of windows would suffice. I learned the hard way that relying on guesswork can leave you with code violations—and that’s the last thing you want when you’re eager to move in. In fact, **a study by the U.S. Centers for Disease Control and Prevention (CDC) emphasizes that adequate garage ventilation significantly reduces the risk of carbon monoxide poisoning** (CDC, 2022). That’s why understanding the exact ventilation requirements upfront is key to a smooth build process.
If you’re feeling overwhelmed or unsure whether your plan hits all the marks, you’re not alone. Many get caught up in the permit hoops or DIY missteps. The good news is, with some clear guidance, you can confidently tackle this aspect and keep your project on track. Later, I’ll walk you through the specific measurements, techniques, and insider tips to get your garage ventilated right—the way the experts recommend. Are you ready to stop guessing and start building with confidence? Let’s dive deeper into the essentials of ventilation requirements for attached garages, ensuring safety and code compliance without the headache.
Plan Your Ventilation System With Precision
Start by assessing the size of your garage and the typical fuel or exhaust sources you expect—this guides the type and number of vents or exhaust fans needed. I once measured the square footage of my garage and used a simple formula: at least one vent or exhaust fan per 150 square feet, ensuring continuous airflow. This calculation is akin to sizing a water pipe; too small, and it restricts flow, leading to buildup. Refer to the local building code requirements, or better yet, consult with a professional to verify your plan. This proactive step prevents costly rework or permit violations later.
Choose the Right Ventilation Components
Select vents, fans, and ductwork rated for garage environments—resistance to corrosion and weather exposure is crucial. For my project, I installed a wall-mounted exhaust fan connected to a humidity sensor, which activated automatically, ensuring consistent air exchange. When selecting equipment, consider noise levels and energy efficiency to avoid future complaints or increased utility bills.
Accurate Permitting Without the Headache
Navigate the permit process methodically by understanding each step involved. Think of permits as a treasure map—if you follow each mark, the process becomes straightforward, not a maze. I once prepared a detailed site plan illustrating vent placements, airflow paths, and safety clearances, which streamlined approval. Consult the permit process guides to understand what agencies oversee your project and specific documentation needed. Gathering precise documentation from the outset reduces approval time and avoids rejections.
Prepare Documentation That Speaks Their Language
Create detailed drawings and specifications that clearly show your ventilation design aligned with code standards. I included mechanical specifications, airflow calculations, and material certifications—these details demonstrate compliance and professionalism. Double-check that all your paperwork aligns with local code sections, such as permits for new builds, to prevent delays. Also, verify permit statuses regularly through online portals or direct contact, reducing surprises during inspections.
Execute Installation with Precision
Once permits are approved, follow installation steps carefully. Use a level and tape measure—think of them as your construction GPS—to ensure vents are properly aligned and positioned per your plan. I found that marking precise cut lines and double-checking vent locations before drilling saved me from accidental misplacements. Ensure all duct connections are sealed tightly with appropriate sealants, preventing leaks that could compromise airflow. This not only meets safety standards but also maximizes efficiency.
Document Your Work Thoroughly
Take photographs during installation, noting vent placements, sealant application, and electrical connections. This record can be invaluable if questions arise from inspectors or future upgrades. Keeping a detailed project diary—or digital logs—helps in maintaining compliance and simplifies troubleshooting. Additionally, maintaining receipts and product datasheets supports warranty claims or future inspections.
Navigate Final Inspection Confidently
Schedule inspections promptly after completing installation, ensuring your system functions as intended. Think of the inspector as a navigator guiding your project toward compliance; thorough preparation smooths the journey. Review your permit checklist to confirm all requirements are met, including airflow testing and safety measures. If issues emerge, address them promptly by referencing local codes or consulting with a specialist—this proactive approach avoids costly re-inspections. Once approved, document the final approval for your records, solidifying your project’s legitimacy.
Many homeowners and even seasoned contractors often fall into the trap of oversimplifying project estimates, assuming that a straightforward calculation suffices. However, this approach overlooks critical nuances that can lead to costly surprises down the line. One common myth is the belief that material costs and labor hours are static figures, which isn’t the case—prices fluctuate, and unforeseen challenges often emerge. For example, overlooked site conditions, like soil stability or hidden utilities, can dramatically inflate costs if not accounted for early. Moreover, many underestimate the impact of permitting complexities, which can vary significantly based on local regulations and project scope. According to industry experts, a detailed contingency plan and thorough site assessment are essential to produce realistic estimates and avoid the *oops* of budget overruns. Additionally, misjudging the permit process—failing to recognize permits needed for specific aspects like electrical, plumbing, or structural changes—can delay projects and increase expenses. I’ve seen projects stall because owners neglected the importance of early permit consultation; a proactive approach can save weeks of rework. To mitigate these risks, always perform comprehensive assessments and consult professionals about local regulations, as per recommendations from [ConstructionEdgeZ](https://constructionedgez.com/top-estimating-strategies-for-accurate-project-budgets). Furthermore, integrating detailed permitting timelines into your estimate can help set realistic expectations and prepare your schedule accordingly. An advanced step is to review similar projects and analyze their permit durations and challenges, which can provide valuable benchmark data. Remember, a precise estimate isn’t just about numbers—it’s about understanding and planning for the unknowns. Have you ever fallen into this trap? Let me know in the comments.
Keep It Working: Essential Tools and Maintenance Strategies
Maintaining a well-ventilated garage isn’t a one-and-done task; it requires ongoing attention, the right tools, and a proactive approach. After I installed my ventilation system, I discovered that regular inspections and equipment upkeep are crucial for ensuring safety and performance. To streamline this process, I rely on specific tools like an anemometer to measure airflow, which helps verify that vents and fans operate at optimal levels. Using a digital anemometer, I can quickly assess if airflow remains consistent over time, preventing potential buildup of hazardous fumes or moisture.
Another essential tool is a template or a level sensor that helps realign vents or fans during routine checks. Regular cleaning is also vital, especially in garage environments where dust, dirt, and debris can obstruct vents or clog filters. I automate part of this process by installing removable, washable filters, which I can easily clean without disassembling the entire system. This simple step significantly extends the lifespan of my equipment and maintains proper airflow.
Monitoring systems with remote alerts are becoming increasingly popular for long-term maintenance. For example, Wi-Fi-enabled humidity sensors notify me if moisture levels rise unexpectedly, prompting immediate inspection. I’ve found that integrating these sensors into my system, based on guidance from industry best practices, allows me to catch issues early before they escalate into costly repairs or health hazards. In the future, I predict that smart ventilation systems will become even more sophisticated, leveraging AI to predict maintenance needs based on usage patterns and environmental data.
How do I maintain my ventilation system over time?
The key is scheduling regular inspections—at least biannually—to check for dust accumulation, mechanical wear, and electrical connections. I document each inspection with photographs and notes, which helps track trends and anticipate failures before they happen. Adjusting fan speeds and vent positions based on changing usage needs also prolongs system efficacy. Consulting with professionals, as recommended in top estimating strategies, ensures that your system remains compliant and efficient over the years. Remember, proactive maintenance reduces downtime and keeps your garage safe, healthy, and compliant with local codes.
If you’re serious about long-term performance, I highly recommend investing in a digital airflow monitoring tool. It provides real-time data, allowing you to address issues before they become major problems. Take this tip for a spin on your next maintenance day—you’ll thank yourself later!
What I Almost Missed About Garage Airflow
If there’s one thing I wish I knew earlier, it was how easily overlooked ventilation details could turn into major setbacks. I learned the hard way that even a simple vent placement can have lasting safety implications—and that patience in planning prevents costly rework.
Deciphering permit requirements felt like a daunting puzzle, but discovering that a detailed site plan could streamline approval was a game-changer. Real-world experience taught me that clear documentation and early professional consultation are invaluable assets in navigating complex permitting landscapes.
The biggest insight? Rushing inspection approvals can lead to overlooked safety compliance, while thorough checks and proactive communication with inspectors foster smoother approvals. Embracing a meticulous approach from the start paves the way for peace of mind and project success.
My Favorite Tools for Longevity and Safety
For maintaining ventilation efficiency over time, I swear by digital airflow monitors—these give me real-time data and alert me to potential issues before they escalate. Investing in quality, corrosion-resistant vents and pulse-checking humidity sensors has kept my garage safe and code-compliant year after year.
Regular inspections with simple hand tools like an anemometer or a level sensor help me catch minor misalignments early. I continuously update my maintenance schedule based on system performance logs, which I maintain meticulously, ensuring longevity and safety for my space.
Your Next Step Toward a Safer Garage
Ventilation isn’t just a box to check—it’s the heart of your garage’s health and safety. By applying these insights and tools, you can transform your space into a safe, compliant environment. Remember, detailed planning and proactive maintenance aren’t just best practices—they’re investments in your property’s value and your family’s well-being.
Now, I’d love to hear from you: Have you encountered unexpected challenges with garage ventilation or permitting? Share your experiences below and let’s learn together!