The Specific Drainage Plan Needed for Hillside Permits
It was a hot summer afternoon when I finally realized I’d bitten off more than I could chew with my hillside project. Standing there, sweat trickling down my brow, I stared at the uneven slope of my backyard—an obstacle course of rocks, roots, and all the drainage nightmares I hadn’t anticipated. The permit process was looming, and I knew my drainage plan could make or break it. That lightbulb moment hit me hard: I needed a specific, well-crafted drainage plan—stat. Without it, I risked delays, extra costs, or worse, failing inspection altogether.
Why Proper Drainage Planning Is Your Best Friend for Hillside Permits
Dealing with hillside permits can feel like trying to solve a Rubik’s Cube blindfolded. Why? Because approved drainage solutions are often the gatekeepers to permits, ensuring your project won’t cause erosion, flooding, or damage to neighboring properties. A poorly executed drainage plan isn’t just a red flag—it can lead to costly modifications, construction delays, and even legal troubles. I learned this the hard way early on, when a simple oversight almost derailed my entire build.
When I first started, I didn’t fully appreciate the complexity of hillside drainage. I thought I could wing it with a basic idea and hope for the best. Wrong. I vividly remember the mistake I made: I assumed that gravity alone would suffice for runoff management. Spoiler alert—it doesn’t. Proper drainage isn’t just about directing water away; it’s about designing a system that works in harmony with the land’s natural contours and meets local regulations.
According to a study by the American Society of Civil Engineers, poor stormwater management not only jeopardizes property safety but also contributes significantly to environmental degradation, costing billions annually in damages and repairs. That’s why investing time and effort into a specific drainage plan tailored for hillside conditions isn’t just wise—it’s essential.
If you’re like me, facing the mountain of paperwork and technical requirements, I want to reassure you: There’s a clear path through this. In the upcoming sections, I’ll walk you through the key steps to create an effective drainage plan that aligns with permit requirements and prevents headaches down the line. And trust me, with the right guidance, this challenge can become one of your project’s biggest wins. If you’ve already stumbled over this issue or want to ensure you’re on the right track, feel free to reach out for personalized assistance and avoid common pitfalls that delay permits and inflate costs. You can visit our contact page to get started.
Establish Your Site’s Topography and Water Flow
Begin by mapping your hillside to understand natural water paths. Use a level or GPS device to identify high points and slopes. I once used a laser level to survey my property, which revealed unexpected water pooling areas. This step helps plan effective drainage channels and avoid future erosion.
Design Effective Drainage Routes
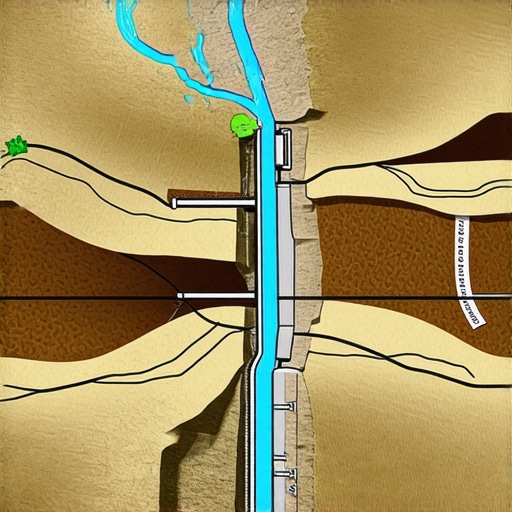
Create a detailed plan showing where water naturally collects and flows. Use contour lines to visualize flow paths. I drafted my routes on graph paper, then tested them with garden hoses to simulate runoff. The key is to ensure water moves away from foundations and structures without causing erosion or pooling.
Implement Proper Channeling and Grading Techniques
excavate or modify terrain to direct water along your planned routes. Use swales, berms, or French drains as necessary. For my project, I installed a French drain along the lower slope, which drastically reduced standing water and improved drainage efficiency. Proper grading is vital to prevent water from seeping into your basement or crawl spaces.
Select the Right Materials
Choose durable pipes, gravel, and erosion control fabrics. Avoid cheap plastic that deteriorates quickly. I opted for perforated pipes wrapped in geo-textile fabric, which lasted over years without clogging or breaking, ensuring long-term effectiveness.
Coordinate with Local Permitting Authorities
Prepare detailed drawings and specifications for review. Submit your plan early to address any corrections. I learned this the hard way when I initially submitted vague plans; a detailed drainage design sped up permit approval. Always incorporate local regulations to avoid delays or rework.
Install and Test Your Drainage System
Follow your plan meticulously during installation. After completion, conduct a runoff test by simulating heavy rain with hoses or observing after a storm. My test revealed a minor pooling area, which I amended promptly, preventing potential permit issues later.
Document and Maintain Your System
Keep detailed records of designs, permits, and modifications. Schedule regular inspections, especially after storms. I found that annual checks and clearing debris keep my drainage system functioning flawlessly, maintaining compliance and protecting my property.
When it comes to navigating building permits, new constructions, and additions, many professionals and homeowners fall prey to misconceptions that can derail projects and inflate budgets. While many believe that permits are a bureaucratic hurdle easily bypassed or that estimating costs is straightforward, the reality is far more nuanced. Let’s explore some of these common myths and the often-overlooked intricacies.
Myth: Permits Are Just a Formality
Many assume that acquiring a permit is merely a paperwork process, but in reality, permits are essential for ensuring safety, environmental compliance, and legal adherence. Skipping or rushing the permit process can lead to costly fines, delays, and even the need to redo work. As highlighted in the [complete guide to permitting](https://constructionedgez.com/the-complete-guide-to-permitting-for-new-builds-and-additions), thorough planning and early engagement with local authorities prevent headaches later.
Hidden Trap: Misestimating Due to Overconfidence
One of the most common pitfalls in project estimation is overconfidence in initial figures. Many underestimate hidden costs like permits, utility connections, or unexpected site conditions. Relying solely on basic square footage or rough estimates can lead to budget overruns. For precise estimation, consulting [expert insights](https://constructionedgez.com/estimating-costs-for-new-builds-expert-insights) and conducting detailed site assessments are crucial.
Portraying the Advanced Edge: How to Avoid Estimating Pitfalls
Advanced professionals recognize that every project has unique nuances that can significantly impact costs and permit requirements. Factors such as soil stability, easements, and existing infrastructure can influence both the permit process and the estimation accuracy. Incorporating contingency budgets, thorough site investigations, and staying informed about local regulations safeguards the project. Learning to identify these factors early can be a game-changer.
One often overlooked aspect is the importance of precisely estimating utility hook-ups and addressing hidden easements, which, if neglected, cause delays or added expenses. For example, discovering an easement only after construction begins can halt progress or necessitate costly rerouting.
Have you ever fallen into this trap? Let me know in the comments. For tailored advice on your project, don’t hesitate to [reach out](https://constructionedgez.com/contact-us-2). Remember, understanding and planning for these nuances ensures smoother permits, accurate budgets, and ultimately, a more successful build.Maintaining your construction tools and leveraging the right software can significantly streamline your project workflow and ensure compliance over its lifespan. In my experience, investing in high-quality equipment and adopting systematic maintenance routines saves both time and money in the long run. For instance, I personally swear by using laser levels like the Bosch GLL 3-50 for site measurements. Their accuracy and durability make them indispensable during grading and drainage setup, preventing costly rework due to measurement errors.
When it comes to managing permits and estimating costs, software tools such as Buildertrend have transformed my approach. This cloud-based platform allows me to track permit applications, document revisions, and communicate seamlessly with inspectors and clients. Its integration capabilities mean I can update estimates and schedules in real-time, reducing the risk of oversight or miscommunication—a common cause of project delays.
Long-term results depend on consistent upkeep of both physical tools and digital systems. Regular calibration of measuring equipment, combined with routine software updates, ensures accuracy and compliance. I set quarterly reviews to check calibration and back up project data, which has proven invaluable during inspections or audits.
Looking ahead, I believe the trend toward automation and smart technology will further enhance construction management. Drones for site surveys, AI-based estimating tools, and IoT devices for equipment maintenance are already entering mainstream use. Embracing these innovations now can position you ahead of the curve.
**How do I maintain my tools and software for ongoing project success?** I recommend developing a personalized maintenance schedule. For tools, establish a routine for calibration, cleaning, and storage—never neglect the manufacturer’s guidelines. For digital systems, ensure regular backups, software updates, and user access reviews. Keeping your systems optimized reduces unexpected downtime and maintains your project’s momentum.
To make this process smoother, consider integrating software that alerts you to upcoming updates or calibration needs, much like how preventive maintenance apps work for industrial equipment. This proactive approach has saved me from costly surprises, especially during critical permit stages.
If you’re ready to elevate your project management, try implementing a maintenance checklist for both your physical tools and digital systems. Starting with a simple schedule for calibration and backups will set the foundation for sustained success. Need tailored advice on the best tools to suit your specific project? Feel free to [reach out](https://constructionedgez.com/contact-us-2) — I’m here to help you build smarter, faster, and more reliably.
What I Wish I Knew Before Diving In
One of the toughest lessons I learned was that unanticipated terrain complications can derail your entire hillside project. It’s tempting to jump into designing your drainage system, but neglecting thorough site analysis can lead to costly setbacks. My initial oversight of soil stability resulted in delays that could have been avoided with proper geotechnical investigations.
Another insight is that local regulations often contain hidden requirements—not just the obvious permit forms. I once assumed my plan was compliant because it looked good on paper, only to find that specific erosion control measures were mandated by my city. Talking early with permit authorities saves headaches down the line.
Overconfidence in estimating construction costs and permit fees was a trap I fell into early on. Underestimating utility hook-up charges or drainage infrastructure expenses led to budget overruns. Consulting detailed resources, like our cost estimation guides, helps set realistic budgets and avoid surprises.
Lastly, I realized the importance of documentation and record-keeping. Keeping detailed records of site conditions, modifications, and correspondence with authorities proved invaluable when navigating permit amendments or inspections. Maintaining organized documentation streamlines the approval process and keeps your project on track.
My Recommended Arsenal for Permit and Estimating Success
- GeoSurvey Tools: Devices like handheld GPS and laser levels are indispensable for accurate topography mapping. They help you understand natural water flow and terrain features critical for drainage planning.
- Project Management Software: Platforms such as project management tools keep track of permits, modifications, and deadlines, preventing overlooked steps that cause delays.
- Permitting Guides and Local Ordinance Resources: Staying informed with comprehensive guides ensures you meet all regional requirements, saving time and avoiding rejections.
- Expert Consultations: Building relationships with civil engineers and permit inspectors can provide insider tips that tailor your plan to local nuances.
Be Bold, Take Action, and Remember This
Navigating hillside permits with confidence comes from combining thorough planning, leveraging reliable tools, and staying proactive. Don’t let hidden terrain issues or overlooked regulations hold back your dream project. Take the leap, prepare diligently, and use every resource available to make your hillside development a success. Remember, every obstacle you overcome now paves the way for smoother permits and endless possibilities. Share your own experiences or ask questions below—learning from each other makes all the difference.
Ready to start transforming your hillside project with smarter permit strategies? Contact me today for personalized guidance, and let’s turn those challenges into your biggest wins!
,