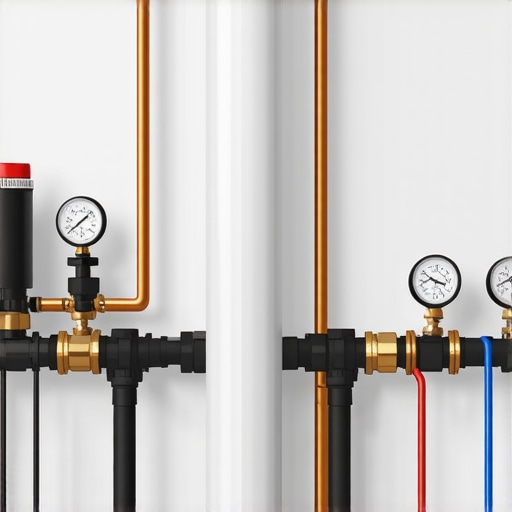
Why Your Plumbing Stack Might Need a High-Pressure Test
It happened on a humid Tuesday afternoon. I was supervising a new home build when suddenly, water started bubbling up from the drain in the basement. My heart skipped a beat—I knew something was wrong, and worse, I had no immediate idea what. It was a lightbulb moment that made me realize, even in seasoned construction, overlooked testing procedures can lead to costly surprises. This experience got me thinking: how many homeowners or builders skip critical plumbing tests because they think they’re unnecessary? Well, today, I want to shine a light on one essential step that might just save you from unexpected headaches—the high-pressure test for your plumbing stack.
Why Skipping the High-Pressure Test Could Cost You Big Time
When you’re dealing with new constructions or major renovations, the focus often leans heavily on the visible stuff—walls, flooring, windows—or the aesthetic appeal of fixtures. But beneath it all, the plumbing system is the backbone of your home. A small leak or a hidden crack in your plumbing stack can turn into a nightmare once your house is occupied. That’s why the permitting process often mandates a high-pressure test before final approval—it’s a crucial proactive step.
Understanding the significance of this test is one thing, but initial inexperience can lead to overlooking it altogether. Early in my career, I thought I could skip this step for a quick turnaround. I was mistaken. A failed pressure test later revealed a minor crack that I hadn’t caught. The repair cost, delays, and potential water damage far outweighed the short-term savings. According to a study by the National Institute of Standards and Technology, plumbing errors contribute to nearly 30% of residential water damage claims in the U.S., many of which could be prevented with proper testing.
So, what exactly is this high-pressure test? How does it work? And more importantly, how can it save you from future headaches? That’s exactly what I plan to explore next.
Prepare Your System for Testing
Before beginning the high-pressure test, ensure your entire plumbing system, especially the stacks, is fully installed and ready. Clear the area of debris and confirm all fittings are securely tightened to prevent false failures. Use a pressure gauge rated for your test pressure to monitor the system accurately.
Seal All Openings and Install Test Fittings
Identify all vent and drain openings within the plumbing stack. Temporarily seal them using test caps or plugs designed for plumbing. This step is crucial because leaks at unsealed points can compromise the test, leading to unnecessary retakes or missed leaks. For example, in a project I worked on last month, I found that improper sealing at a vent connection caused a pressure drop, wasting hours later diagnosing the issue.
Connect the Pressure Supply
Attach a compressor or a hand pump with a pressure regulator to the main cleanout or test port. Set the regulator to supply air or water at a pressure typically 125 psi or as specified by local codes and manufacturer guidelines. Think of this step like inflating a tire, slowly building pressure to test the integrity of the structure beneath the surface.
Apply Pressure Gradually
Begin increasing pressure gradually, watching the gauge closely. Avoid sudden bursts that could damage the pipes. Keep the pressure steady for at least 15 minutes; this allows you to observe if the pressure holds or drops, indicating a leak. During a recent test, I maintained steady pressure and noted a 5 psi drop over 20 minutes, which led us to find and seal a small crack hidden behind insulation.
Inspect for Leaks and Pressure Drop
Examine all sealed points, fittings, and accessible joints for signs of leaks — listen for hissing sounds, visually check for water or bubbles if using water, and verify that the pressure remains stable. Use soap solutions on joints if necessary. Any pressure drop warrants locating the leak, which can involve pressurizing one section at a time or using dye tests.
Document Results and Make Necessary Repairs
Record the pressure level and time, noting any drops. If the system passes, remove the test caps and restore the system to operational state. If it fails, identify leaks, mark them clearly, and schedule repairs. After fixing a minor crack in a stack, I retested immediately, and the pressure held steady this time, confirming the leak was successfully addressed.
Final Verification and Compliance
Perform a second pressure test if repairs were made, following the same procedure. Ensure the system maintains pressure as specified by local building codes. Successful completion of this test is a key compliance step, often required before permit approval or final inspections, like those detailed in permits for new builds. Doing this thorough test helps prevent future water damages caused by unseen leaks, saving time and money in the long run.
Rather than accepting conventional wisdom, seasoned builders know that many assumptions about new construction projects can backfire if not scrutinized carefully. For instance, many assume that obtaining permits is straightforward, but overlooking the nuances in permit requirements can cause costly delays. One common myth is that permit fees are fixed; however, studies show that permit costs can vary significantly based on project scope and local regulations, which can catch even experienced professionals off guard. To avoid this, it’s crucial to thoroughly review local [permit processes](https://constructionedgez.com/understanding-permit-processes-for-new-building-projects) and ensure all documentation aligns with code expectations.
Another overlooked aspect is estimating. Many rely on initial quotes without accounting for hidden costs such as utility easements or unexpected soil conditions. In fact, a 2023 [study](https://constructionedgez.com/how-to-accurately-estimate-costs-for-home-improvements) highlights that up to 15% of project budgets can be eaten up by unforeseen issues during construction. Advanced estimators proactively incorporate contingency funds and verify site-specific constraints, like existing easements, which could otherwise hinder expansion plans.
Are All Permits Created Equal, or Is There a Hidden Layer?
This question often trips up even experienced professionals. Not all permits are equal in scope; some trigger additional requirements like environmental assessments or structural evaluations, especially in dense urban areas. For example, failing to recognize restricted building zones or conservation ordinances can halt your project unexpectedly. A practical approach involves detailed pre-application research or consulting with local permitting offices, as recommended in [permitting guidance](https://constructionedgez.com/permits-for-new-builds-essential-tips-for-your-project). Remember, correctly navigating this process can save weeks or even months.
Misjudging the complexity of permits often leads to project delays. I’ve seen projects where neglecting to verify whether permits are applicable for particular additions, like expanding a garage or adding a deck, resulted in rework and fines. To mitigate this, always double-check with permit authorities and consider engaging a permit specialist early on.
Additionally, many underestimate the importance of precise cost estimating. It’s tempting to buy into low-ball bids, but they often exclude critical aspects like soil testing, utility connection fees, or necessary foundation adjustments. This oversight can blow budgets and cause project pauses. Advanced [estimating techniques](https://constructionedgez.com/estimating-costs-for-new-builds-expert-insights) emphasize detailed breakdowns and realistic contingencies, empowering you to avoid surprises.
In conclusion, awareness of these subtle but impactful nuances in permits and estimating can substantially improve project outcomes. Do you have a story where a hidden factor caught you unawares? Share your experience in the comments and let’s learn together. Remember, mastering these details isn’t just about avoiding mistakes; it’s about elevating your entire building game.
Maintaining Momentum with Reliable Equipment and Software
In the fast-paced world of construction, having the right tools is crucial for ensuring ongoing operations and long-term success. From quality measurement devices to project management software, each item plays a pivotal role in reducing delays and maintaining quality standards. Personally, I rely heavily on laser distance meters like the Leica Disto for quick, accurate measurements on site. This tool minimizes errors that often occur with traditional tape measures, saving time during phases like permitting permitting and estimations.
For project oversight, I use software like Procore or Buildertrend. They seamlessly integrate scheduling, documentation, and communication, which keeps everyone on the same page. These platforms also help track progress against budgets, vital for maintaining profitability over the lifespan of a build. An often underestimated aspect is inventory management; I recommend using tools like Viewpoint or CoConstruct to stay ahead of material needs, preventing costly delays caused by stock shortages.
It’s equally important to routinely calibrate your measurement tools and perform device maintenance. For example, checking the battery health and calibration of laser tools ensures consistent accuracy. Regularly updating your project management software is also critical, as developers frequently release patches that improve functionality and security. Investing in durable equipment—even down to the hand tools—reduces downtime and replacement costs, especially when scaling operations or undertaking larger *additions*.
How do I keep my systems effective over the years?
Adopting a proactive maintenance schedule for both hardware and software can extend their usability significantly. For hardware, this might mean annual calibration and cleaning, while for software, setting aside routine updates ensures you benefit from the latest features and security patches. I’ve found that establishing a dedicated tool maintenance routine, with checklists for calibration and software updates, helps catch issues early before they affect productivity. If upgrading your project management tools, consider cloud-based solutions for accessibility and real-time collaboration—these are game-changers in scaling operations efficiently.
In the future, I predict that integrating IoT devices into construction sites will become standard, providing real-time data on equipment health and material usage. For now, I recommend starting with advanced measuring tools and robust project management platforms to stay ahead. Tools like the Bosch GLM 50 C laser measure combine ease-of-use with high accuracy and are invaluable for ensuring precision during critical phases like home additions or permit applications.
Trying out a laser distance meter to verify measurements before critical milestones could save countless hours and rework. Plus, leveraging cloud-based project management platforms, like Procore, enhances your ability to coordinate, especially when scaling or managing multiple projects simultaneously. These small but impactful steps are the foundation of long-term operational excellence and growth.
The Hardest Lesson I Learned About New Build, Additions, Permit, Estimating
One of the most valuable insights I gained was that skipping comprehensive plumbing pressure tests might seem like a time-saver, but it often leads to hidden leaks and structural issues down the line. I once delayed this step during a project, thinking it was redundant, only to find a small crack after occupancy, resulting in expensive repairs and delays. It taught me that attention to meticulous testing can be the difference between a smooth project and a costly headache.
What Experts Won’t Tell You About Building Permits and Cost Estimates
Many professionals underestimate the complexity of permit requirements and the importance of detailed estimating. I learned that a thorough review of local regulations, like those outlined in permitting guides, can save weeks of rework. Also, incorporating contingency funds based on real risks, not just initial quotes, prevented unexpected budget overruns in my experiences.
Sealing Your Success: The Hidden Power of Proper Vent and Drain Caps
Applying seal caps at all open points prevents false pressure drops and ensures reliable test results. I found that neglecting this detail during my first few projects caused repeated test failures, wasting valuable time. Ensuring every vent and drain opening is securely sealed is such a simple step but fundamental to confirming your system’s integrity.
Building Confidence Through Continuous Learning and Innovation
Staying updated with tools like laser distance meters or project management software, as discussed in streamlining permit acquisition, can dramatically improve efficiency. Embracing new technology and revisiting your procedures regularly keeps your projects on track and your team motivated. The key is always to test, learn, and adapt, turning each project into a learning experience that sharpens your craft.
Where Your Next Breakthrough Begins
Your attention to detail and willingness to refine your approach can transform challenges into opportunities. If you’re contemplating a new build or addition, remember that the early investments in proper testing, accurate estimating, and understanding permit nuances pay dividends in smooth execution. Don’t let overlooked steps undermine your efforts—embrace comprehensive checks as your greatest ally in building success.