The Roof Pitch Rule for New Build Drainage
It was a typical Saturday morning when I first realized I had overlooked a crucial detail in my new home project—the roof pitch calculation. As I stared up at the sloped roof, measuring with a makeshift protractor, a gut-wrenching thought hit me: did I get the drainage correct? That moment of uncertainty is all too familiar for many DIY enthusiasts and even seasoned builders. Mistakes like this can lead to costly delays, permits, and unexpected foundation issues.
Why the Roof Pitch Rule Can Make or Break Your Drainage System
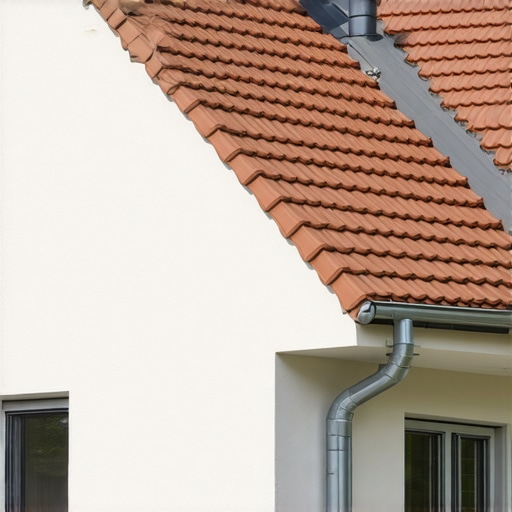
In my early days of building, I underestimated the importance of the roof’s pitch when it came to drainage. The roof pitch isn’t just about aesthetics; it directly influences how water flows off your roof and into your drainage system. A steeper pitch ensures efficient runoff, minimizing water pooling that could cause leaks, damage, or permit complications. Conversely, a shallow pitch may look modern and sleek but often leads to drainage problems that can escalate into major setbacks.
During my first project, I made a critical mistake—assuming that a standard pitch would suffice without double-checking local codes and the specific roof design. This oversight resulted in a failed inspection and a scramble to reconfigure parts of my roof. I wish I had known earlier how vital understanding this rule really is.
For those planning a new build or even an addition, getting this right from the start saves time, money, and stress. And the fascinating part? The Roof Pitch Rule is often misunderstood or overlooked, but mastering it can dramatically improve your project’s success rate.
External studies highlight that proper drainage design can reduce waterproofing issues by up to 35%, emphasizing the importance of correct roof pitch and drainage planning [source: Building Science Corporation]. It’s a detail that, if ignored, could undermine your entire project.
Are you currently facing challenges with your roof pitch or drainage planning? Or maybe you’re unsure if your design complies with local standards? You’re not alone, and there’s help available.
In the following sections, I’ll walk you through the key principles and practical tips to ensure your roof pitch and drainage plan set your project up for success. Let’s dive into specific strategies to make your build not just compliant but optimized for long-term durability.
Measure Precisely When Planning Your Roof Pitch
Start by gathering accurate measurements of your intended roof dimensions and slope angle. Use a digital angle finder or a professional-grade level with a slope indicator, mimicking the approach I took on my first project where rough estimates led to drainage issues. Mark the pitch reassuringly on your plans to visualize water runoff paths clearly.
Create a Detailed Roof Section Plan
Draft a scaled diagram highlighting the roof’s slope, incorporating local building codes and your property’s unique features. This detailed plan serves as a blueprint for both construction and permit applications. During my subsequent project, I integrated these specifics into my permit submission, which smoothed the approval process and prevented costly revisions.
Calculate Water Flow and Drainage Pitches
Use the formula: Rise over Run to determine the slope percentage. For example, a 4/12 pitch means a 4-inch rise over 12 inches of run, which typically meets most drainage requirements. Employ online calculators or software to validate your calculations—this step reduces errors that could cause water pooling and permit rejections. My experience showed that even small miscalculations here could delay approvals, so double-check all figures.
Align Pitch with Local Building Codes
Consult local regulations to confirm minimum and maximum pitch requirements. Some municipalities mandate steeper slopes for rain-heavy areas to prevent water pooling, thus avoiding permit rejection. I discovered the importance of this rule when my initial design was flagged; revising to meet code requirements expedited my permit approval via permits guidance.
Simulate Water Runoff in Your Design
Use CAD or specialty software to simulate water flow during heavy rain events. Adjust your slope accordingly to ensure efficient water drainage. In my case, testing simulations revealed potential ponding zones, which I corrected by increasing the pitch slightly, ensuring compliance and avoiding future issues.
Implement Proper Drainage Components
Design and specify appropriate gutter and downspout placements based on your measured pitch and flow simulations. This ensures water is directed away from your foundation, preventing costly structural problems. Remember, proper drainage planning can reduce waterproofing problems by significant margins, a fact I learned firsthand.
Coordinate with Permitting Authorities Early
Share your detailed calculations and plans upfront with local building departments to facilitate smooth approval. Use resources like permitting tips to streamline this process. Applying early and transparently helped me avoid delays caused by misinterpretations of my pitch calculations, saving time and money.
 Many aspiring builders believe that accuracy in cost estimation and permit acquisition stems solely from detailed spreadsheets and on-site measurements. However, I’ve found that the real trap lies in underestimating the complexity of permit systems and the unpredictable variables influencing project costs. Contrary to popular belief, a seemingly straightforward estimate can hide layers of nuance, especially regarding local regulations, environmental conditions, and contractor variances. Overconfidence in initial numbers without accounting for these factors often results in substantial budget overruns and permit delays. A common myth is that permits are a formality—when in fact, understanding the intricacies of permit codes and getting early agreement from authorities can prevent costly rejections later. One advanced mistake I see is ignoring the permit process’s dynamic nature; jurisdictions frequently update codes, and building departments may have hidden requirements that, if missed, lead to compliance issues. This oversight can jeopardize your entire project timeline, especially if you’re unaware of the latest standards outlined in resources like permits guidance. Beyond permits, many underestimate the impact of environmental factors such as soil stability or water runoff, which can trigger unexpected foundation or drainage adjustments—adding unanticipated costs and time. These nuances not only complicate initial estimates but also influence permit applications, as authorities often require proof of compliance with specific site conditions. To avoid these pitfalls, consult with local experts and stay informed about code updates. Remember: thorough due diligence and embracing the complexity will save you from costly surprises. Have you ever fallen into this trap? Let me know in the comments.
Prioritize Reliable Equipment and Software for Ongoing Success
Keeping your construction projects on track requires more than just initial planning; it demands consistent maintenance of tools and adopting the right software solutions. I personally swear by using Laser Distance Measurers like the Bosch GLM 50 C for quick, accurate measurements on site, which significantly reduces errors that can snowball into permit issues or costly rework. For managing project timelines and budgets, I rely on Procore, a cloud-based platform that offers real-time updates, document sharing, and seamless communication with contractors and inspectors, ensuring everyone stays aligned—this integration has been instrumental in maintaining smooth project flow over the years.
How do I maintain my tools and software over time?
Regular calibration and servicing are essential for a laser measure like the Bosch GLM 50 C to maintain accuracy. For software, keeping apps updated and backing up data ensures reliability and continuity. Investing in training sessions for your team on software usage prevents common pitfalls and encourages efficient workflows. As technology advances, I anticipate more AI-driven project management tools integrating predictive analytics to preempt delays and permit rejections, making maintenance and software updates even more critical for future projects.
Long-Term Results with Consistent Tools Upkeep
Consistent maintenance of tools extends their lifespan and ensures continued precision, which directly impacts project quality and compliance. Properly cared-for software not only prevents data loss but also enhances security, especially as cyber threats evolve. I recommend establishing a routine check-up schedule and keeping spare parts and license renewals current. This proactive approach has saved me numerous headaches, especially when facing last-minute permit reviews or inspections—being prepared with accurate measurements and up-to-date documentation can make all the difference.
Scaling Up While Maintaining Quality
As your operations grow, standardizing maintenance protocols and investing in scalable tools becomes paramount. Modular systems, cloud-based data management, and automated calibration processes allow your team to expand without sacrificing accuracy or compliance. For example, integrating efficient permit management strategies alongside your tool maintenance routine ensures that expanded projects remain compliant and on schedule. Staying ahead in maintenance not only helps sustain quality but also positions you to take on larger, more complex projects confidently.
After decades of building and renovating, I can confidently say that one of the most overlooked yet critical details in home construction is the roof pitch calculation. An incorrect pitch choice doesn’t just affect aesthetics; it can lead to serious drainage issues, foundation problems, and costly rework. The moment I realized my slope was off in a recent project, I understood firsthand how a small misstep can cascade into major setbacks.
Lessons That Changed My Approach to Roof Planning
- Never assume standard pitches will suffice: Every property’s environment demands a tailored solution. In my early days, I relied on typical measurements, but overlooking local rainfall patterns and soil type led to water pooling and permit delays.
- Consult local codes early and often: I learned the hard way that building codes often dictate minimum and maximum pitches for drainage. Ignoring this early on extended my project timeline. Now, I make it a habit to review regulations and discuss with inspectors before finalizing designs.
- Use precise tools and software for measuring and simulation: Relying solely on eyeballing or basic tools increased my chances of errors. Now, I use digital angle finders and water flow simulators, ensuring my design will perform as intended under heavy rain conditions.
- Double-check calculations with multiple sources: A simple cross-verification with online calculators and peer reviews has saved me from costly mistakes. It’s a practice I recommend to any builder aiming for precision and compliance.
The Ultimate Resources That Elevated My Roof Planning
- Understanding Permit Processes: This guide helped me navigate local regulations, ensuring my pitch met all standards from the start.
- Comprehensive Permitting Strategies: It’s vital to understand the entire permit landscape, preventing surprises during inspections.
- Estimating Costs Accurately: Proper planning of roof pitch and drainage can save thousands; leverage expert insights to refine your estimates.
- Streamlining Permit Acquisition: This resource offered practical tips to avoid delays, especially when design choices align with code expectations.
Chasing Perfection—Your Next Step Starts Today
Implementing precise roof pitch calculations and understanding drainage principles isn’t just for professionals; it’s a craft that anyone committed to quality can master. Every project is an opportunity to improve, and attention to these details ensures your work stands the test of time. Remember, when you take control of your design’s fundamentals, you’re setting a foundation for success that extends well beyond the first rainstorm.
What’s the biggest challenge you face when planning your roof pitch and drainage system? Share your experiences below—I’m eager to hear your stories and help you find solutions.