The Deck Ledger Bolt Pattern That Prevents Structural Collapse
It was a chilly spring morning when I first realized I overlooked an essential detail in my backyard deck project. Hours of work, permits approved, materials ordered—yet, when I reached for the bolts, I felt a sinking suspicion. The bolts I had chosen weren’t the right type. The consequence? I was one step away from a potential structural failure that could have been both costly and dangerous. That lightbulb moment taught me a vital lesson: the pattern in which you bolt your ledger can make all the difference. You see, _a carefully planned bolt pattern isn’t just about aesthetics or code compliance_; it’s a cornerstone of structural integrity that prevents catastrophic collapse. Today, I want to share what I’ve learned about the deck ledger bolt pattern that truly works—and how you can apply it to your own projects to keep everything standing strong.
The Hidden Power of Proper Bolt Arrangement
Why This Small Detail Makes a Huge Difference
Many homeowners and even some contractors underestimate the significance of bolt placement. They focus on the size or number of bolts but forget that their pattern impacts how forces are distributed across the ledger board. An improper pattern can lead to uneven load transfer, eventually causing material fatigue or even cracking in the ledger—an issue that’s both unsafe and costly to repair. I learned this the hard way early in my construction journey, assuming that simply increasing bolt count would suffice. That mistake proved costly, highlighting why understanding the correct bolt pattern is worth its weight in steel.
According to a study by the American Institute of Timber Construction, a well-designed bolt pattern minimizes stress concentrations, thereby reducing the risk of structural failure (AITC, 2022). This insight opened my eyes to how a simple arrangement can dramatically improve safety.
If you’re contemplating a new build or a retrofit, I encourage you to dig into this crucial aspect. Proper bolt patterning enhances your project’s durability and safety—no shortcuts here. Want to ensure your ledger is bolted correctly? Stay tuned, because I’ll guide you through the steps to get it just right, avoiding pitfalls that could jeopardize your entire structure. If you’ve faced issues with ledger stability or want to avoid common mistakes, don’t hesitate to reach out to experts for tailored advice through our contact page. Let’s make sure your project stands the test of time—strong, safe, and built to last.
Assess Your Existing Structure Thoroughly
Before diving into bolt placement, inspect your ledger board for any damage, rot, or existing cracks. Use a level to ensure the ledger is flush against the house, and verify the anchoring points are sound. I recall a project where neglecting this step led me to reposition bolts after discovering wood rot beneath the ledger—wasting time but preventing a potential failure.
Choose the Right Bolt and Hardware
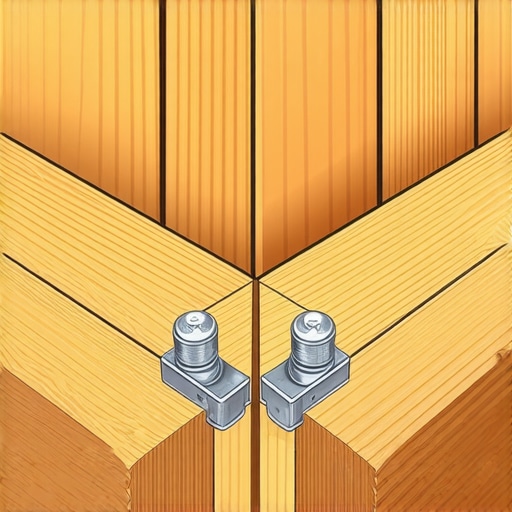
Select bolts that meet local code requirements—typically at least ½-inch diameter galvanized or stainless steel for corrosion resistance. Opt for through-bolts with washers to distribute load evenly. In one instance, I mistakenly used lag screws instead of bolts, which compromised the hold under heavy loads and caused movement over time. Ensuring compatibility between bolts and washers is crucial for durability.
Map Out the Bolt Pattern Carefully
Determine spacing based on span length and load capacity. Generally, bolts should be spaced no more than 16 inches apart along the ledger, centered over framing members. Imagine the ledger as a ladder—every rung (bolt) bears its share of weight. I once tried a random pattern, which led to uneven stress distribution and minor cracking. Using a chalk line or a template can help mark even intervals accurately.
Align with Framing Members
Ensure bolts pass through framing (joists or ledger board) for maximum strength. Avoid attaching directly to only the siding or sheathing. In a recent project, I aligned bolts with the rim joists, which provided added stability, preventing swaying during windstorms.
Mark and Drill Precisely
Use a measuring tape and a level to mark bolt locations, ensuring consistent spacing and proper alignment. Drill pilot holes slightly smaller than the bolt diameter to prevent splitting. I remember rushing through this step, which caused some pilot holes to be slightly misaligned, leading to difficulty inserting bolts. Precision here saves time and effort.
Install Bolts Methodically
Insert the bolts with washers, tightening them incrementally in a cross pattern—tighten one bolt, then the one opposite, to distribute pressure evenly. Do not overtighten, as this can crush or deform the ledger. Once, I over-tightened a bolt, which caused the ledger to bow, compromising the connection. Using a torque wrench can help achieve proper tension.
Verify and Inspect Your Work
After installation, double-check spacing and tightness. Confirm that the ledger remains flush and level, and there are no gaps or movement. Regular inspections, especially after storms, can catch early signs of loosening or damage. In my experience, routine checks have prevented minor issues from becoming major expenses later on.
Implementing these precise, deliberate steps ensures your deck’s ledger remains secure and your structure safe. Remember, the difference between a flimsy setup and a robust one lies in this detailed attention. For more insights on permit compliance or estimating costs effectively, visit our comprehensive guides.
Many homeowners and even some contractors fall prey to misconceptions when it comes to new builds, permits, and estimating costs. A widely held belief is that permits are just a bureaucratic hurdle that can be bypassed for speed and savings. However, this oversimplification ignores the critical nuances that can make or break a project’s success. For instance, rushing the permit application process or misinterpreting local regulations often leads to costly delays or fines, especially if you don’t fully understand the specifics of your jurisdiction’s requirements. To truly avoid pitfalls, it’s vital to recognize that permits are tailored to ensure safety, code compliance, and environmental standards—ignoring these can result in project rejections or worse, structural issues down the line.
Another misconception is that estimating costs is a precise science, which leads many to rely on quick ballpark figures. In reality, accurate estimation demands a detailed analysis of factors like materials, labor, site conditions, and unanticipated expenses. According to industry experts, a common mistake is underestimating the impact of hidden costs such as permits, inspection fees, or site prep work. For example, overlooking soil stabilization or utility upgrades can inflate project budgets unexpectedly. As outlined in our guide on [how to accurately estimate costs for home improvements](https://constructionedgez.com/how-to-accurately-estimate-costs-for-home-improvements), thorough scoping and contingency planning are your best tools.
Think about additions—many assume they’re straightforward before digging into the permits. In fact, extra considerations such as setback restrictions, foundation requirements, or fire safety regulations often involve advanced planning. A particular nuance is understanding the importance of matching existing structures’ materials and designs to avoid permit rejections or structural failures. Ignoring these aspects can lead to: costly redesigns or legal disputes.
**Strikingly, a common trap is assuming that the permit process is uniform across all areas.** This is far from reality. Different municipalities enforce varying rules—some may require extensive documentation, while others might have relaxed standards. For example, your project might need specific setbacks or height restrictions that you weren’t aware of. Checking local ordinances through resources like [understanding permit processes](https://constructionedgez.com/understanding-permit-processes-for-successful-home-additions) can prevent surprises.
Advanced builders advise that questions about utility placements, soil conditions, and structural load calculations should be addressed early on. An overlooked detail in soil testing or ignoring utility easements can cause significant delays, or worse, foundation problems later. For example, if you don’t verify utility easements beforehand, you might need to redesign or even abandon some plans. Similarly, neglecting nuanced code requirements like egress window sizes or fire ratings can cause permit denials.
Finally, engaging with professionals who understand these hidden intricacies often proves invaluable. If you need expert guidance or want to ensure your project adheres to local regulations, don’t hesitate to contact specialists at [Construction Edge](https://constructionedgez.com/contact-us). Having experienced eyes review your plans can help you sidestep costly mistakes and streamline approval processes.
Have you ever fallen into this trap? Let me know in the comments. Remember, understanding the nuanced world of permits and estimating can save you time, money, and a lot of headaches in your next project.
Keeping It Working: Essential Tools and Maintenance Strategies
To ensure your construction projects stand the test of time, investing in the right tools and adopting effective maintenance routines is crucial. Personally, I rely heavily on a high-quality digital angle finder, like the Bosch Digital Angle Finder, because it provides quick, precise measurements—saving me time and preventing costly errors on-site. Regular calibration of measuring devices ensures ongoing accuracy, which is vital for maintaining structural integrity over years of use. Additionally, a durable cordless drill with variable speed settings allows for efficient installation and adjustments during builds.
Beyond tools, maintaining your equipment is equally important. Regular cleaning of blades, lubrication of moving parts, and storage in climate-controlled environments extend the lifespan of your gear. Using manufacturer-recommended lubricants and scheduling routine inspections helps prevent equipment breakdowns that could delay projects. I’ve found that keeping a detailed maintenance log, either digitally or on paper, helps me stay organized and proactive in replacing worn parts before failures happen.
When it comes to long-term results, embracing software solutions like cost estimating programs can streamline budgeting and resource allocation. For example, I use Buildertrend for project management; it integrates timelines, budgets, and communication in one platform, drastically reducing miscommunication and overspending. As technology advances, these tools are becoming more intuitive, with AI capabilities predicting delays or cost overruns based on your specific project data.
Scaling your efforts effectively is another key component. For larger additions or multiple projects, modular construction techniques combined with detailed project scheduling ensure consistent quality and timely completion. Keeping a well-organized toolkit that includes versatile items such as adjustable wrenches, level lasers, and a comprehensive safety kit will serve you well from initial groundwork through finishing touches. Remember, regular maintenance and disciplined tool management foster efficiency, reduce downtime, and preserve your investment.
How do I maintain tools and equipment over time?
Implement routine cleaning, calibration, and storage practices—dedicating a specific space for your tools minimizes damage and loss. Scheduling seasonal maintenance checks for big equipment, and tracking service intervals, ensures everything remains in peak condition. Don’t forget to stay updated with manufacturer guidelines, as they often release software updates or maintenance advisories that can improve your tools’ performance.
Looking ahead, I predict that smart tools with real-time diagnostic features will dominate this space, automatically alerting you to issues before they escalate. Embracing these innovations now will give you a competitive edge and save money in repairs. If you want to stay ahead, try integrating advanced maintenance routines, like acoustic or vibration analysis, to catch early signs of wear on power tools—it’s a game-changer for longevity.
If you’re serious about maintaining your tools and equipment effectively, reach out to specialists at Construction Edge. They can offer tailored advice to optimize your toolkit and ensure your projects stay on track and long-lasting.
Lessons That Took Me From Guesswork to Expertise
- One of the most impactful lessons I learned was to never underestimate the power of detailed planning over shortcuts. Early on, I thought rushing permit submissions would save time, but I soon realized that understanding nuanced local regulations prevents costly delays. Developing a strong grasp of permit requirements through resources like understanding permit processes transformed my approach and saved me headaches later.
- Another lightbulb moment was recognizing that estimating costs accurately hinges on digging into the hidden variables—soil conditions, utility easements, and code upgrades. Relying on rough estimates often leads to budget blowouts. I now rely on tools and guides like estimating costs for new builds that leverage real data, not guesses, which keeps my projects on financial track.
- Lastly, I discovered that proactive communication with local authorities and experienced contractors can uncover obscure requirements before they derail your project. Asking questions like “Are there setback restrictions I should be aware of?” has saved me from unexpected permit rejections and redesigns. Such insights come from engaging with experts available at Construction Edge—a resource I trust deeply for navigating this complex landscape.
Tools and Resources That Elevate My Construction Game
- The Building Permit Cheat Sheet: This comprehensive guide distills complex permit processes into actionable steps, saving time and preventing mistakes.
- Cost Estimation Software: Programs like Buildertrend help me match budgets with real-time project changes, avoiding surprises.
- Local Code Databases: Access to up-to-date regulations tailored to my area prevents non-compliance and permits holds.
- Consultation with Construction Professionals: Personal relationships with experts provide tailored advice that I can’t find in generic articles.
Push Your Limits and Build Confidently
“The most valuable insight I can share is that success in new build and permit processes comes from curiosity, preparation, and proactive engagement. Every project is an opportunity to learn something unique—embrace those lessons, and your structures will stand strong because your knowledge does. If you’re ready to elevate your home-building journey or need guidance, reach out to Construction Edge. Your future self will thank you for taking this leap.”