The Soil Compaction Test Required for Large Home Extensions
I remember the sinking feeling when I realized my dream home extension was on hold—not because of planning permissions or design issues, but because of a soil test I hadn’t fully appreciated. It was a hot summer day, and I was just about to relax after hours of site planning, when my builder mentioned the dreaded soil compaction test. Honestly, I had no clue what it was or why it was such a big deal. That lightbulb moment made me dig deeper—fast.
Why Soil Compactness Can Make or Break Your Extension Project
The truth is, soil isn’t just dirt; it’s the foundation of your entire project. A soil compaction test measures how well your site’s soil can support the weight of your new construction. If the soil isn’t compact enough, it can lead to settling, cracks, and even structural failure down the line. Think of it like building a house on a wobbly table—that’s a recipe for future headaches and costly repairs.
Early on, I made the mistake of assuming all soil is created equal. Boy, was I wrong. A soil that’s poorly compacted can cause uneven settling, leading to cracked foundations and walls. A study published by the UK Building Research Establishment shows that improper soil testing and inadequate compaction can increase structural repair costs by up to 30%. That was enough to make me sit up and pay attention.
If you’re planning a large home extension, this isn’t something to overlook. The [soil compaction test](https://constructionedgez.com/the-soil-compaction-rule-for-new-driveways-and-patios) helps ensure your site’s ground can handle the added load. Skipping or rushing this step can turn your dream build into a nightmare. That’s why I want to walk you through what you need to know—and do—to get this right.
But before we dive into the practical steps, let me ask: Have you ever faced unexpected delays or added costs because of soil issues? If so, you’re not alone. Many homeowners and builders underestimate how critical proper soil assessment is, especially for large extensions. Now, let’s arm ourselves with the right knowledge and avoid common pitfalls.
Schedule a Comprehensive Soil Testing
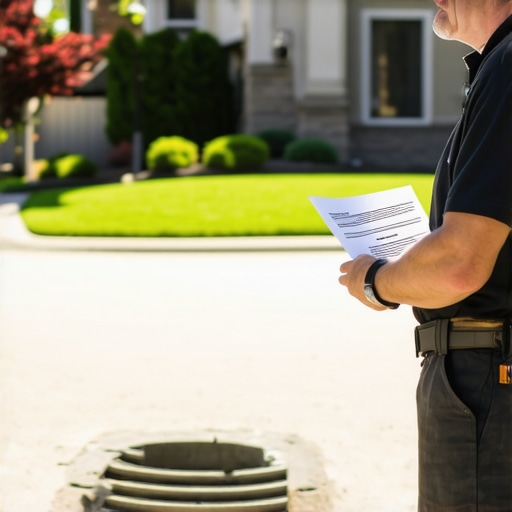
Begin by hiring a qualified geotechnical engineer to perform the soil compaction test early in your planning. I once learned this lesson the hard way when rushing into construction without proper testing, which led to costly foundation issues. Ensure the testing covers compaction levels, drainage capacity, and soil bearing strength. Use trusted local contractors or find specialists through referral networks.
Interpreting and Acting on Soil Test Results
Once you receive the results, review them carefully. If soil is poorly compacted or unstable, plan to improve it with compaction methods or soil replacement. For instance, I once faced a site with loose soil; I organized a soil stabilization process that included adding granular material and using vibratory rollers. This step is crucial because inadequate preparation can cause settling issues, leading to cracks or uneven floors later on. If needed, consult with a structural engineer to determine whether deep foundations like drilled piers are necessary. Proper understanding of these results is essential before moving forward with any construction permits or excavation.
Secure the Right Permits Before Breaking Ground
Never skip the permit process. Visit the official permit application guidelines to understand the requirements. I once delayed my project by neglecting this and faced rework that cost thousands. Gather all required documentation—site plans, soil test reports, engineering assessments—and submit your application through your local council or building authority. Remember, permits are not just bureaucratic hoops but safeguards to ensure your project complies with safety and zoning standards, especially after soil issues are addressed.
Plan for Permitting Nuances
Every locale has specific rules, so review your area’s regulations thoroughly. For example, some regions require soil reports to be signed by certified engineers. Use resources like this guide to streamline your process. I once thought my application was straightforward but had to amend documents when the city asked for additional soil compatibility data. Preparing for these nuances saves time and prevents project delays.
Estimate Costs and Build Your Budget
Factor in soil testing fees, soil stabilization costs, and permit fees into your overall estimate. Refer to expert estimation techniques to avoid surprises. I learned this when my initial budget was blown because I had underestimated soil stabilization and permit expenses. Detailed and accurate budgeting ensures you have enough contingency funds, reducing stress during construction.
Record and Document Everything
Keep detailed records of soil reports, test results, permit submissions, and correspondence. These documents can be invaluable if disputes or inspections arise. Always store digital copies alongside printed folders, and consider creating a project timeline that includes all testing and permitting milestones. When I faced a minor compliance issue, organized documentation allowed me to address concerns swiftly and keep my project on track.
Many homeowners assume that estimating costs and navigating permits for home additions or new builds is straightforward, but the truth is, there’s a lot more beneath the surface. While common advice emphasizes early planning and accurate budgeting, one of the most overlooked aspects is understanding the complexities that can trip up even seasoned builders. Many believe that obtaining permits is merely about filling out forms, but in reality, permits involve detailed assessments of soil stability, zoning regulations, and specific safety standards—details that, if misunderstood, can cause costly delays that could be avoided.
Essential Tools for Long-Term Maintenance
Maintaining your construction site and finished structures over time requires a combination of the right equipment and software. I personally rely on a high-quality laser level, such as the Bosch GLL 3-81, for ensuring precise ongoing measurements during minor adjustments or repairs. Its self-leveling feature and robust build make it indispensable for maintaining alignment and levelness, especially after settling or shifting. Additionally, I use digital project management tools like Buildertrend to track maintenance schedules, permits, and upgrades, keeping all documentation organized and accessible. The integration of such software allows me to set reminders for routine inspections or re-evaluations, which are crucial for long-term success.
Why Invest in Quality Equipment?
High-quality tools might seem costly initially, but they offer reliability and precision that cheap alternatives simply can’t match. Regular calibration of equipment like laser levels or GPS-based site scanners ensures ongoing accuracy. For example, I calibrate my laser level monthly using a dedicated calibration station, preventing small errors from snowballing into significant issues down the line. This proactive approach minimizes unexpected repair costs, helps maintain safety standards, and ensures your project remains compliant with local regulations.
Software and Methods for Sustained Success
Beyond physical tools, mastering software like cost estimation programs helps plan for future expenses related to maintenance or scaling. I recommend using detailed digital models—such as Building Information Modeling (BIM)—to visualize how ongoing changes or repairs will impact your structure. BIM also enhances collaboration with specialists, making it easier to predict and mitigate potential issues.
Preserving Long-Term Value and Planning for Growth
Scaling construction projects requires systematic maintenance and upgrades. Regularly checking foundational elements, like soil stability and drainage, prevents long-term deterioration. As an example, I schedule semi-annual inspections with geotechnical experts to monitor soil conditions, especially after major weather events. Keep in mind that proactive maintenance extends the lifespan and value of your property, avoiding costly emergency repairs down the line. To streamline this process, consider creating a detailed maintenance calendar derived from your initial soil tests and structural assessments. This way, you’ll catch potential problems early, saving both time and money.
How do I keep my project systems in top shape over time?
Invest in high-quality tools such as laser levels, GPS equipment, and digital management systems, and develop a routine for regular calibration and inspections. Use advanced software like BIM and comprehensive maintenance planning to anticipate needs before they become costly issues. Embracing these practices prepares your project for future scaling and ensures consistent performance, whether you’re updating existing structures or expanding your site. For a deeper dive into effective estimation and upkeep strategies, visit this guide on adding value through ongoing maintenance. Remember, the key is to see maintenance not as a chore but as a vital part of your project’s lifecycle—invest now to save later.
Uncovering Hidden Truths About Soil and Construction
One of the most profound lessons I learned was that underground conditions are often overlooked until problems emerge. My initial neglect of thorough soil testing led to foundation cracks I couldn’t ignore. This experience underscored that soil assessment isn’t just a formality—it’s the bedrock of a successful build.
Why Skipping Soil Tests Can Cost More Than You Think
It’s tempting to streamline the planning phase, but overlooking soil compaction evaluations can result in costly repairs and delays. I realized that investing early in comprehensive testing saves headaches and money in the long run, fostering a smoother construction journey.
Practice Makes Perfect—Or at Least Safer
Applying proper soil stabilization techniques after discovering loose soil transformed my project. It taught me that proactive measures, guided by accurate test results, are essential for durability and safety. This approach has since become a cornerstone of my building projects.
Curated Resources for Building Confidence
- https://constructionedgez.com/estimating-costs-for-new-builds-expert-insights: An invaluable resource that helped me refine my budgeting skills, especially understanding how soil and site prep impact costs.
- https://constructionedgez.com/navigating-permit-requirements-for-additions-in-2025: This guide clarified permit nuances related to soil stability, saving me time and frustration during approval processes.
- High-Quality Geotechnical Engineers: Trustworthy local specialists whose expertise I rely on for precise soil analysis—essential for avoiding surprises.
Seize the Moment: Build Smarter and Safer
Your construction journey can be much smoother when you prioritize thorough soil evaluation from the outset. Embrace detailed testing, trust expert guidance, and plan for contingencies. Remember, addressing soil conditions today ensures a solid foundation for tomorrow’s dreams. What steps will you take to ensure your soil is ready for your next project? Share your plans below and let’s learn together!