The Fire Blocking Rule for Vertical Plumbing and Wiring Gaps
I remember the first time I overlooked a tiny gap in the plumbing chase during a renovation. It was a small detail, almost invisible—yet it turned into a major headache when a fire inspector flagged it during the final review. That moment was a real lightbulb for me: in home building and remodeling, the devil truly is in the details, especially when it comes to fire safety codes.
The Critical Role of Proper Fire Blocking for Your Home’s Safety
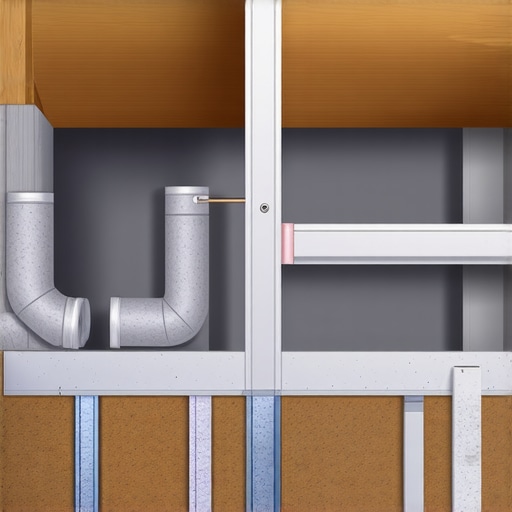
Understanding and correctly implementing fire blocking in vertical plumbing and wiring gaps isn’t just about ticking boxes; it’s about safeguarding your investment and the lives of those under your roof. If you’ve ever faced frustrating delays or rework because of overlooked fire code requirements, you’re not alone. Many homeowners and builders underestimate how crucial these small gaps can be in preventing the spread of fires through walls and ceilings.
Is Fire Blocking as Important as the Builders Say?
Early in my journey, I made the mistake of assuming that tightly packed insulation alone would suffice. Turns out, that’s not the case. The National Fire Protection Association reports that proper fire blocking can reduce fire spread by up to 80%, significantly enhancing the safety of your home. Ignoring these regulations can lead to costly code violations or, worse, compromise your home’s safety in an emergency.
If you’re currently in the planning or renovation phase, understanding how to properly seal those vertical gaps for plumbing and wiring might save you headaches down the line. In the following sections, I’ll guide you through the essential steps to ensure your project complies with the Fire Blocking Rule for Vertical Plumbing and Wiring Gaps, giving you peace of mind and a safer home.
,
Start with Precise Measurements
During my first project, I learned that accurate measurements are the foundation of effective fire blocking. Use a reliable tape measure or laser distance finder to identify all gaps around pipes and wiring routes. I once skipped re-measuring a narrow vertical chase, assuming my initial numbers were sufficient. As a result, I had to redo a section of fire block, adding unnecessary delays. Always double-check measurements before cutting or installing any blocking materials to prevent such setbacks.
Choose the Right Fire-Resistant Materials
Selecting appropriate materials is critical. Fire-resistant foam, mineral wool batts, or cement board can serve as effective blockings. In one instance, I opted for mineral wool, which is easy to cut and provides excellent fire resistance. Remember, the goal is to fill every gap completely with non-combustible material. Avoid using standard insulation alone, as it does not offer sufficient fire protection.
Cut and Fit with Precision
Precision cuts ensure a snug fit. Measure the exact size of each gap and cut your material slightly larger for a tight seal. I once underestimated a pipe’s width, resulting in a loose fitting that compromised fire safety. To avoid this, I now cut all pieces a little larger and trim excess after fitting. Use a fine-toothed saw or specialized cutting tools for clean, precise edges that fill gaps fully.
Seal Gaps Thoroughly
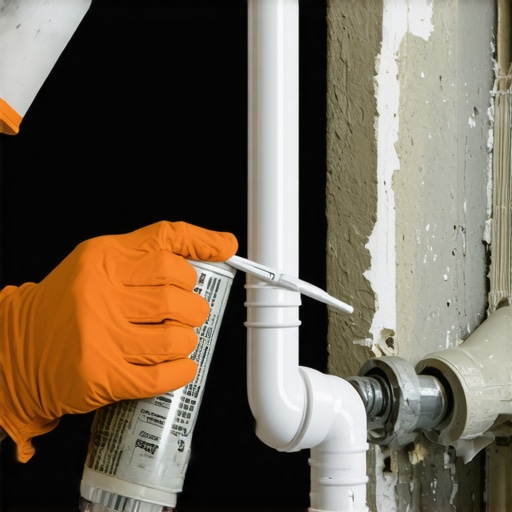
Apply high-temperature, fire-resistant caulk or foam to seal all joints and seams. For larger gaps, I apply a layer of fire-resistant sealant before inserting the block. Ensure there are no gaps or voids; even small openings can allow flames to pass. During installation, I hold the material firmly in place and seal around all edges, checking for unfilled areas with a flashlight.
Secure Materials Properly
Fasten the fire block in place using fire-rated fasteners or adhesive. For vertical chases, metal brackets or fire-rated screws work well. I once used standard nails that weren’t rated for fire safety, which caused the material to loosen over time. Now, I double-check that all fasteners are fire-rated and properly embedded to prevent movement over the lifespan of the structure.
Verify the Fire Blockage
After installation, inspect each gap meticulously. Use a flashlight to identify missed areas or gaps. In a recent project, I conducted a detailed check and found a small unsealed hole behind a conduit connector, which I promptly sealed. Document all fire blocking activities as part of your project records, ensuring compliance and ease of inspections.
Applying these steps consistently elevates your home’s safety standards and ensures you meet fire safety codes. Remember, details matter—skipping a step or rushing can undermine your entire effort. For more insights into the permitting process or cost estimation, visit this guide and these estimation tips.
 When it comes to new build projects, many assume that following standard procedures guarantees success. However, seasoned professionals know that the devil truly is in the details, especially in estimating costs and navigating permits. A common myth I encounter is the belief that initial estimates are sufficient for all project phases. In reality, relying solely on early numbers often leads to unexpected overruns and delays. Furthermore, many underestimate the complexity of permit processes. For instance, the misconception that permits are a mere formality can be costly, as overlooked requirements or misinterpreted regulations can halt progress—something I experienced firsthand during a mid-project review.
Let’s address a critical question for advanced builders: How can understanding permit nuances save your project from costly rework?
One advanced mistake I often see is disregarding regional permit variances. Different jurisdictions have unique rules that evolve over time. Ignoring these can result in non-compliance or additional fees. For example, recent studies, such as those highlighted by the International Code Council, show that staying updated on local regulations can reduce permit-related delays by up to 30%. This emphasizes the importance of continuous learning and regional awareness.
Another trap involves underestimating the hidden costs embedded within estimates. Beyond material prices, factors like inspection fees, plan revisions, and buffer allowances are often overlooked. I recommend reviewing comprehensive guides like those available at [constructionedgez.com](https://constructionedgez.com/navigating-permit-requirements-for-additions-in-2025) to better understand these subtleties. Properly accounting for these factors ensures accuracy and reduces surprises.
Additionally, the misconception that permits are a separate step rather than an integral part of project planning can sabotage timelines. Integrating permit strategies early in the design process, such as reviewing zoning setbacks or easements, can facilitate smoother approvals. To master this, I suggest exploring resources like [permitting guides for new builds](https://constructionedgez.com/the-complete-guide-to-permitting-for-new-builds-and-additions).
Lastly, one of the most overlooked aspects is the importance of detailed estimations that incorporate regional material costs and labor variations. Broad averages often lead to underbudgeting, especially in fluctuating markets. Tools and techniques outlined in [estimating costs for new builds](https://constructionedgez.com/estimating-costs-for-new-builds-expert-insights) can help refine these estimates, saving both time and money.
In my experience, paying close attention to these nuances not only keeps your project on track but also positions you as a knowledgeable professional who anticipates and mitigates risks. Have you ever fallen into this trap? Let me know in the comments and share your stories. For a deeper dive into managing permits and estimating with precision, explore more at [constructionedgez.com](https://constructionedgez.com/adding-value-with-expert-home-additions-a-construction-guide).
Keeping Everything Running Smoothly with the Right Tools
Ensuring your home building projects continue to perform well over time requires more than just initial expertise; it involves using the right tools and implementing effective maintenance routines. One essential tool I rely on is a digital moisture meter, such as the Fluke 971, which allows me to accurately monitor humidity levels in walls and crawl spaces. This helps prevent issues like mold and wood rot, saving time and money down the line. I also use a laser measuring device like the Bosch GLM 50 C for quick and precise spatial assessments when inspecting structural elements or planning additions. These devices not only improve accuracy but also speed up regular maintenance checks, enabling early detection of potential problems. As technology advances, incorporating smart home sensors that monitor air quality, temperature, and humidity can provide ongoing insights. In the future, I predict these systems will become more integrated with home automation, allowing for proactive maintenance alerts and even automated adjustments to prevent deterioration.
How do I maintain the integrity of my home over time?
Developing a routine for inspecting critical components—like roofing, insulation, and plumbing—can prolong the life of your structure. Regular visual inspections complemented by diagnostic tools ensure issues are caught early. For example, scheduling quarterly checks with a moisture meter and visual assessment can reveal hidden leaks or insulation breakdown before they escalate. Additionally, keeping detailed records of maintenance activities, including when inspections were performed and any repairs made, helps in planning future upkeep and ensures compliance with local regulations. I also recommend establishing relationships with experienced contractors who can provide periodic evaluations and advise on long-term preservation strategies. Using software like Buildsoft’s Estimating and Project Management tools can streamline scheduling and documentation, making ongoing maintenance more manageable. As the industry evolves, tools that offer real-time data and predictive analytics will further empower homeowners and builders to keep their properties in top condition without costly surprises.
Scaling Repairs Without Overextending
When your home expands or renovations are phased over time, scaling maintenance efforts becomes critical. Modular toolkits that adapt to different project sizes—such as adjustable cordless drill sets, portable scaffolding, and versatile inspection cameras—allow you to address issues efficiently across various scales. I personally favor magnetic tool holders and compact tool chests that keep essential items accessible on-site, reducing downtime. Employing digital project management platforms helps coordinate maintenance schedules with ongoing renovations, ensuring nothing gets overlooked. As building codes and safety standards continue to evolve, staying updated with the latest regulations—via resources like this guide—is vital to ensure that maintenance practices remain compliant and effective. Incorporating a long-term maintenance plan from the outset of a new build or addition helps prevent minor issues from snowballing into major failures, saving you significant costs and stress over time. Begin by evaluating current tools and routines, then integrate scalable solutions that grow with your project’s needs—making maintenance a seamless part of your home ownership journey.
Reflecting on my journey through home building and remodeling, I’ve learned that the smallest overlooked details often have the biggest impact on safety, costs, and timelines. From experience, I can share some lessons that might save you from unexpected hurdles and help you approach your project with a sharper eye for detail.
Lessons That Changed My Approach to New Build and Permits
- Don’t underestimate regional permit variations. Each jurisdiction has its quirks. Staying updated on local regulations has saved me from costly delays and rework, reminding me that a quick call to local authorities can prevent future headaches.
- Always double-check your estimates across the board. Relying solely on initial projections can be misleading. Incorporate regional material costs, labor variability, and potential extra fees to keep your budget honest and your project on track.
- Early permit planning is your secret weapon. Integrating permit requirements into your design early simplifies approvals and keeps your project flowing smoothly. It turns a potential bottleneck into a seamless step.
- Meter and monitor your progress with the right tools. Using practical devices like moisture meters and laser measures allows for proactive maintenance and quality checks, extending your home’s longevity long after the build is complete.
- Think scalable when managing ongoing or phased renovations. Equip yourself with adaptable tools and digital project management solutions to handle expansion and maintenance without missing a beat.
My Go-To Resources for Building Confidence
- ConstructionEdgez’s comprehensive guides — They offer detailed insights into everything from cost estimation to permitting, making complex topics approachable.
- Permit requirement resources — Knowing the latest rules prevents last-minute surprises and keeps your project legally sound.
- Estimating tools — Accurate numbers are the backbone of a successful project, saving money and reducing stress.
Leverage Your Inner Builder and Take Action
The world of home building and renovation is intricate, but with attention to detail and the right knowledge, you can confidently steer your project to success. Embrace the process, keep learning, and don’t be afraid to dive into the specifics that make a difference. Your home’s safety, efficiency, and value depend on it. Are you ready to pay closer attention to those hidden details that can transform your project? Share your experiences or questions below—let’s build smarter together.