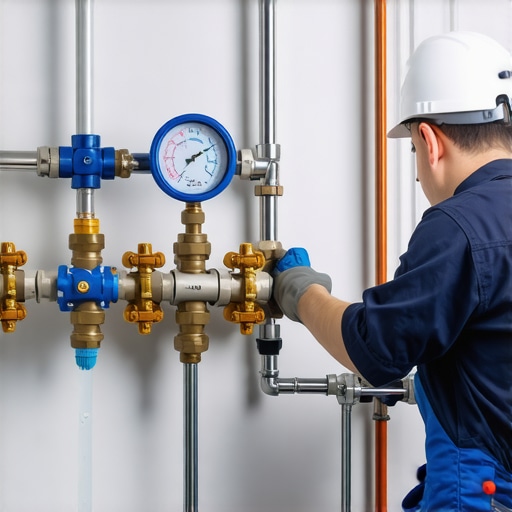
The Water Pressure Test Most Plumbers Skip Before Closing Walls
It happened to me just last year during a new build project. I was excited—everything was on schedule, permits were approved, and the walls were finally going up. Then came the moment I thought I had prepared for: turning on the water to check for leaks. But instead of a steady flow, I was met with silence. No pressure, no drip, just a sinking feeling that I might have missed something crucial. It was a stark reminder that, as a builder and DIY enthusiast, there’s a simple water pressure test that most plumbers tend to overlook before sealing up those walls—a mistake that could lead to costly repairs down the line.
Why Overlooking the Water Pressure Test Can Be a Costly Mistake
In my early days of construction, I assumed that if all the visible pipes looked good and the connections seemed tight, everything was fine. But I soon learned that the real test lies in what you can’t see: the water pressure within those walls. A proper pressure test isn’t just about confirming that leaks aren’t obvious; it’s about *ensuring the integrity of your plumbing system before it’s hidden away*. Skipping this step can mean potential water damage, mold issues, or the need to tear apart finished walls—all of which are expensive, disruptive, and stressful.
Research shows that water leaks behind walls account for a significant percentage of insurance claims related to home damage. According to the Insurance Information Institute, water damage caused by plumbing failures is among the top reasons for homeowners’ insurance claims, often exceeding thousands of dollars in repairs. A thorough pressure test can detect weak spots or faulty connections early, saving you from much bigger headaches later.
So, why do most plumbers skip this step? Sometimes it’s time, sometimes oversight, or maybe the misconception that a visual inspection suffices. But as I learned early on, trusting a visual cue alone is like judging a book by its cover—sometimes, the real issue is hidden beneath the surface.
Have you ever experienced a leak or water damage that was hidden behind walls? If so, you’re not alone. Many homeowners and builders face this challenge due to incomplete testing. That’s why I want to share the practical steps to ensure your plumbing system is pressure-tested correctly before closing those walls.
If you’re ready to avoid my rookie mistake and safeguard your project, let’s dive into how to perform this crucial test properly.
Prepare Your Equipment and Plan
Start by gathering a reliable pressure gauge rated for your plumbing system’s expected pressure range. Ensure all fixtures, appliances, and hoses are disconnected or sealed to prevent false readings. Schedule the test after rough-in plumbing is complete but before insulation or drywall installation, much like checking the foundation before framing is the right moment to catch any issues early.
Seal the System Tight
Close all faucets, toilets, and valves to isolate the system. Use pipe-cap fittings or temporary plugs at open ends. Think of it as sealing a balloon—you need to ensure no air escapes so you can accurately assess the internal pressure. Double-check all connections; a small leak here can skew your results and lead to missed issues later.
Increase Water Pressure Gradually
Turn on the main water supply slowly, watching the pressure gauge closely. Aim for the system’s typical operating pressure—usually around 60 psi—and do not exceed the maximum recommended pressure for your pipes. Monitor the gauge for stability; if pressure drops, it indicates a leak or weak spot. In my recent project, I used a standard pressure washer to pressurize the system, just as a pro would, but at a carefully controlled rate.
Hold and Observe
Maintain the pressure for 15-30 minutes, observing the gauge for any drops. During this time, inspect all visible pipes and fittings for leaks—any spray or drips are immediate red flags. If pressure remains steady, the system is sound, but if it drops, you need to pinpoint the leak. You can use a soapy water solution on connections—bubbles will form where leaks exist, making them easier to spot even behind walls.
Document and Troubleshoot
Record your pressure readings at regular intervals. If a drop occurs, isolate sections by closing off valves sequentially to identify the problematic zone. Think of it like peeling an onion—removing layers until the leak reveals itself. Repair any faults identified before proceeding with wall insulation or drywall if the pressure holds steady; otherwise, address leaks immediately to prevent future damage.
Final Check Before Covering Up
Once the system maintains pressure, slowly release the pressure gauge and document the stable reading. This step confirms the integrity of your plumbing and saves you from costly repairs later. Remember, skipping this step is like ignoring a warning light on your dashboard—don’t let a small oversight turn into a big problem. For detailed insights into the permit and inspection process, check this guide.
When it comes to new construction projects, many professionals and homeowners alike fall prey to oversimplified assumptions that can jeopardize the entire process. While standard advice often emphasizes following blueprints and adhering to code, the real mastery lies in understanding the nuanced pitfalls that can derail your project. For example, a widespread myth is that permits are a mere bureaucratic hurdle, rather than a crucial safeguard for quality and compliance. Overlooking this can lead to costly delays or legal issues down the line, especially if you underestimate the complexity of the permit process, which varies significantly depending on your local jurisdiction. It’s essential to familiarize yourself with the specific requirements early, rather than reacting last minute, to avoid surprises during inspections or approvals. Delving into accurate estimating techniques, many skip the detailed analysis, relying instead on generic multipliers. This often results in underbudgeting, leading to unexpected expenses that strain your project’s financial stability. I recommend consulting expert resources like top estimating strategies to refine your budget projections. Additionally, misunderstood or overlooked data can cause flawed scope assessments—an error that frequently causes project delays or compromised quality. For instance, failing to account for soil conditions or unforeseen site access issues can skew cost estimates and timelines. Conducting comprehensive site assessments and risk analysis can mitigate these issues, as highlighted in soil testing procedures. Another nuanced mistake involves underestimating the time and effort needed for additions, especially in complex zoning environments. Many assume permit approval is a straightforward step, but friction points often emerge due to zoning restrictions or neighborhood covenants. Proactively engaging with local planning authorities and understanding specific criteria—like setback requirements or height restrictions—can save you considerable time and rework. For intricate projects, a miss or delay in approval can turn into months of hold-ups if you’re unprepared. So, what’s a smart approach? Build a detailed timeline that includes permit processing phases, and secure professional guidance from experts who understand local nuances. The critical takeaway? Mastering the complexities of permits, estimating, and project scope requires going beyond basic knowledge—anticipate the unexpected and plan meticulously. If you want to ensure your project runs smoothly, start by educating yourself on these nuanced pitfalls and leverage expert insights. Want to dig deeper? Check out this comprehensive guide to navigating permits for practical tips. Have you ever fallen into this trap? Let me know in the comments.
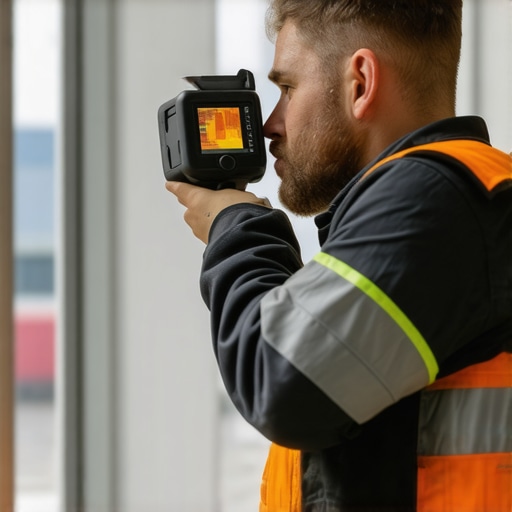
Once your project reaches completion, maintaining the longevity and functionality of your build is critical. Having the right tools and protocols in place can make the difference between a seamless transition into long-term success and costly repairs down the line. Using specialized equipment like digital moisture meters and laser distance guides allows you to keep tabs on your structures and detect issues early. For instance, I rely heavily on a FLIR thermal camera to identify hidden moisture ingress or insulation gaps that could compromise the building’s integrity over time. These tools are invaluable in routine maintenance inspections, especially in areas prone to environmental stressors.
In addition to hardware, software solutions like project management platforms help coordinate inspections, maintenance schedules, and updates efficiently. I personally recommend cloud-based tools such as Buildertrend because they facilitate real-time communication with clients and trades, reducing miscommunication and ensuring no task falls through the cracks.
As construction methods evolve, regenerative maintenance techniques—those that improve a structure’s performance over time—are becoming more prevalent. For example, incorporating sustainable materials and proactive water management strategies extends the life of additions and renovations alike. Expect predictive analytics to play a larger role in maintenance planning, where IoT sensors continuously monitor building health and alert you to potential issues before they escalate.
How do I maintain ongoing performance of my builds? Regularly scheduled inspections using both traditional and digital tools are key. I plan visual checks combined with thermal imaging every six months, especially after seasonal changes that can stress materials. These proactive measures help catch small problems early—such as developing leaks or structural shifts—before they require significant repairs. By investing in a few quality tools and establishing a routine, you safeguard your investment and uphold high standards for quality and safety.
Don’t wait until small issues become huge headaches. Try incorporating a digital moisture meter and scheduling routine thermal inspections into your maintenance plan. These practices will give you peace of mind that your structures will keep performing long after the project ends. Want to streamline this process further? Explore expert tips on adding value through smart additions and maintenance strategies that stand the test of time.
Three Lessons I Wish I Learned Sooner
First, never assume that visual inspections alone can guarantee system integrity; testing is vital. Second, always pressurize your plumbing gradually and monitor closely—the slightest pressure drop can reveal hidden leaks. Third, document your findings meticulously—skipping this step can lead to unresolved issues during early occupancy, costing you time and money.
Tools and Insights That Save My Projects
A reliable pressure gauge is my go-to for accurate readings, while soapy water solutions help locate elusive leaks. I also rely on learning from industry experts to stay ahead on best practices—these resources ensure I catch issues early and keep projects on track.
Building Confidence for Future Builds
Embracing thorough pressure testing has transformed my approach to construction, inspiring confidence that my work will stand the test of time. The key is proactive prevention over reactive repairs; by integrating these lessons, you can avoid unexpected expenses and enjoy peace of mind. Remember, every successful project starts with a solid foundation—both literally and figuratively.
What’s the biggest plumbing inspection challenge you’ve faced? Share your story below, and let’s learn together!
,