Why your soil density test fails after a heavy rain
I remember the frustration hitting me like a ton of bricks during my first big project. It was late spring, the skies had opened up unexpectedly, and I had just completed my soil density test. Expecting smooth sailing, I was blindsided when the results came back as a failure after that heavy downpour. That moment cracked open a new level of understanding about building site conditions. If you’ve faced something similar, you’re not alone.
What makes soil tests fail after rain, and why should you care?
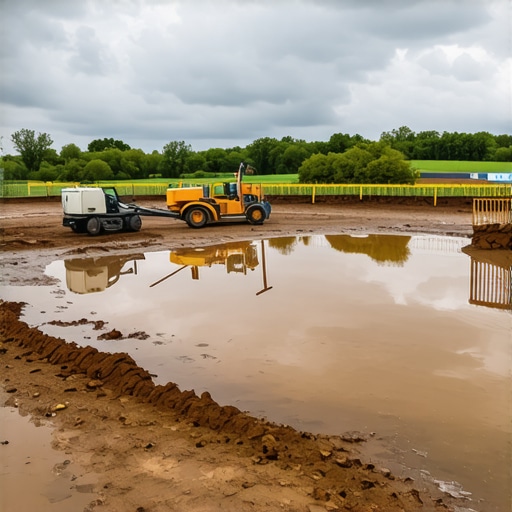
Soil testing is a cornerstone step before any excavation or foundation work begins. But why does a test that previously looked solid suddenly flunk after a heavy rain? The truth is, moisture dramatically alters soil behavior. Saturated soils become less stable, compressible, and prone to shifting, which can give misleading results that hinder your project. Ignoring this could lead to foundation cracks, settlement issues, or costly delays—things no one wants.
Understanding the impact of rain on soil density tests can save you time, money, and a whole lot of stress. It’s critical to know how moisture content skews the results and what practical steps to take to get an accurate assessment.
Is soil testing during rainy weather worth the risk of false readings?
Early on, I made a costly mistake: I assumed soil conditions would stay consistent regardless of recent weather. This oversight led to re-tests, delays, and headaches. Research shows that moisture content can vary significantly within 24 hours after a rain, impacting density results—up to 30% in some cases (source: United States Geological Survey).
That’s why it’s vital to plan your testing when the soil is in a stable moisture state—or at least understand how rain affects your data. Recognizing this early could make all the difference between a smooth build and a project plagued with unexpected surprises.
Ready to learn how to get accurate soil assessments even after heavy rain? Let’s explore the key strategies to keep your project on track.
الذي يليه…
Plan Around Stable Moisture Conditions
Before re-testing, schedule your soil evaluation when the ground is dry or at optimal moisture levels. I learned this the hard way during a project when I rushed to test right after a rain, resulting in skewed results. Choose a window of at least 48 hours without rain forecasted to ensure consistent moisture content—think of it like waiting for the right tide to go fishing. This avoids the false negatives that can set back your timeline.
Prepare Your Site for Accurate Sampling
Clear the area around the test site to prevent contamination or debris interference. Use a clean, standardized soil sample container, and dig to the specified depth—usually 6 inches. I once used an old bucket for soil collection, but after switching to a proper sample bag, the lab results became more reliable. Consistency in sampling method is crucial to compare results over multiple tests, especially if weather varies unexpectedly.
Use Correct Testing Methods to Compensate for Moisture Variations
If weather conditions are less than ideal, consider conducting moisture content adjustments during analysis. For instance, if you suspect higher moisture levels post-rain, consult with geotechnical professionals to interpret the data accurately. Think of it like adjusting a recipe when ingredients change; a little extra water now might be expected, but the key is knowing how much to account for. If needed, re-test after dry days to confirm results before proceeding with foundation plans.
Leverage Technology for Remote Monitoring
Deploy soil moisture sensors to track conditions over time. I installed a simple moisture probe in a test site that provided ongoing data, helping me decide the best day for soil sampling. The real-time insights saved me from guesswork, especially during unpredictable spring weather. For larger projects, integrating such sensors can streamline planning and prevent costly delays caused by moisture fluctuations.
Consult with Soil Specialists Early
Engage geotechnical engineers or soil testing labs early to interpret results accurately. They can advise if retesting is necessary or if adjustments should be made based on weather patterns. During my first project, I ignored their input, leading to foundation issues later. A quick call or email exchange clarified the conditions, saving precious weeks and resources.
Adapt and Document Your Testing Protocols
Record weather conditions, moisture levels, and sampling details meticulously. This documentation can help justify decisions if results are questioned later by inspectors or clients. I created a weather log alongside soil test reports, which proved valuable during project approvals. Consistent documentation ensures your testing approach is transparent and scientifically sound, especially when weather complicates the usual process.
Many homeowners and even seasoned builders overlook the nuances that can make or break a construction project. A common misconception is that permits are merely bureaucratic red tape, when in reality, they serve to protect your investment and ensure safety. Skipping or rushing permit applications often results in costly delays or legal penalties, which can derail your entire timeline. For accurate estimates, the mistake lies in relying solely on initial quotes without accounting for hidden costs like permit fees or unforeseen site conditions. This oversight leads many to underestimate budgets, causing stress and scope creep later. When planning new builds or additions, some believe that once permits are secured, the paperwork is done. But permits are just one piece of the puzzle; understanding the detailed requirements and restrictions is essential to prevent delays and redesigns. Many also assume that estimation is a straightforward process—adding up costs based on square footage, for instance. However, advanced estimating demands nuanced knowledge of material prices, labor complexities, and permit-related expenses. An error here often results in subpar budgeting and financial surprises. For sophisticated clients, the real challenge is in anticipating permitting nuances, such as local restrictions on structural modifications or historical district limitations. A study from the Building Industry Association emphasizes that 30% of project delays stem from permit-related misunderstandings, highlighting the importance of expert guidance.
What if you encounter unexpected permit hurdles mid-project?
This situation is common, especially when local codes evolve or are misinterpreted. To avoid this, proactively engage with permit specialists and familiarize yourself with current regulations. Consulting resources like the complete permit guides can prepare you for this journey. Remember, meticulous planning and an understanding of hidden nuances in permits and estimating processes are vital. Don’t leave these critical phases to chance—your project’s success depends on it. Have you ever fallen into this trap? Let me know in the comments.
Keep Your Projects Running Smoothly with the Right Tools
Staying on top of your building projects requires more than just good intentions; it demands reliable tools and strategies that streamline processes and ensure quality over time. I personally rely on a combination of advanced software and practical equipment that have proven indispensable in my experience.
Software That Keeps Projects on Track
One of my go-to tools is Buildertrend. Its comprehensive project management features help me schedule tasks, track progress, and communicate with clients and subcontractors efficiently. The calendar integration simplifies managing permits, inspections, and deadlines, reducing costly delays. Additionally, Bluebeam Revu aids in reviewing and annotating construction plans digitally, ensuring everyone works from the most current revisions.
Equipment That Ensures Precision and Safety
On-site, I swear by laser levels like the Bosch GLL3-330CG. It provides accurate, quick alignment for foundation layouts and framing, which are critical for long-term stability. For measuring moisture content or soil compaction, I use a Extech MO257 moisture meter — vital for assessing site conditions after rain, preventing foundation issues later. Safety is also paramount; durable helmets, high-visibility vests, and portable dust extractors ensure a safe working environment.
Methods to Sustain Quality Over Time
Regular site audits combined with digital photo documentation help track progress and identify issues early. I establish weekly checklists aligned with project milestones, making adjustments before small problems escalate. Moreover, establishing good communication channels—like Slack groups—keeps everyone aligned, especially when addressing weather-related delays or permit adjustments.
Future Trends: Technology and Automation
Looking ahead, the integration of IoT sensors—and their capability to monitor moisture, temperature, and structural stress—will transform site management. Automated drones for site surveys are also becoming more accessible, reducing manual errors and speeding up inspections. Embracing these innovations now will prepare you for scalable, efficient projects in the future.
How Do I Maintain Long-Term Effectiveness of Tools
Maintaining your tools involves regular calibration, software updates, and proper storage. For software, set quarterly review sessions to explore updates that add features or improve security. Label and organize equipment to prevent damage and ensure quick access. Developing these habits will prolong tool life and keep your projects seamlessly on track. Want to start? Try updating your project management software today and schedule a site audit using your laser level—small steps that lead to big gains! For more detailed strategies, visit our estimating tips page.
Little Tricks That Changed My Approach to Permitting and Soil Testing
One crucial lesson I learned is the importance of timing soil tests around weather forecasts. Waiting for stable moisture conditions might seem like a minor detail, but it can save your project from costly setbacks. Also, building a reliable network of geotechnical advisors early on gave me insights that no textbooks could provide—trusting experts can be the difference between smooth sailing and unexpected delays. Finally, I discovered that meticulous documentation of weather, testing results, and communication logs creates a solid defense if questions arise from inspectors or clients, turning potential disputes into opportunities for professionalism.
Tools and Resources That Elevated My Building Projects
For efficient permit management, I rely heavily on top estimating strategies and project management software like Buildertrend—these keep everything organized and transparent. When it comes to soil testing, using a digital moisture meter such as the Extech MO257 provided real-time data, helping me make informed decisions swiftly. Additionally, I consult comprehensive permit guides to navigate complex regulations confidently. These tools have become indispensable allies in my construction journey.
Your Next Step in Building Confidence and Achieving Success
Remember, each project is a learning opportunity. Embracing the nuances of soil conditions and permitting processes can turn obstacles into stepping stones. Whether you’re planning a new build or an addition, staying proactive and informed ensures you’re not just building structures but also confidence and trust in your craft.
What has been your biggest challenge with soil testing or permits? Share your experience below—I’d love to hear how you’re tackling these hurdles.
,