How to Read Your Local Zoning Map Like an Architect
Have you ever stood in your backyard, gazing at your property lines, and felt completely lost when trying to understand what the local zoning codes mean for your dream project? I remember the lightbulb moment when I realized that most of my frustrations stemmed from not knowing how to read my own neighborhood’s zoning map. It was like trying to speak a language I hadn’t learned yet—confusing, intimidating, and full of assumptions that could cost me delays and extra expenses.
In this post, I’m going to share my personal journey and how I finally cracked the code to reading zoning maps like an architect. By understanding how your local zoning map works, you’ll be able to plan your home additions, renovations, or new builds with confidence—and avoid costly mistakes.
Why Your Local Zoning Map Holds the Key to Smart Building Decisions
Knowing how to interpret your zoning map isn’t just about avoiding citations or setbacks; it’s about empowering yourself to make well-informed decisions. When I first started exploring my neighborhood’s map, I was surprised to discover that my plans for expanding my porch were already restricted by certain setbacks—details I had completely overlooked. These zoning rules can affect everything from lot coverage to building height, and understanding them upfront saves you from running into surprises down the line.
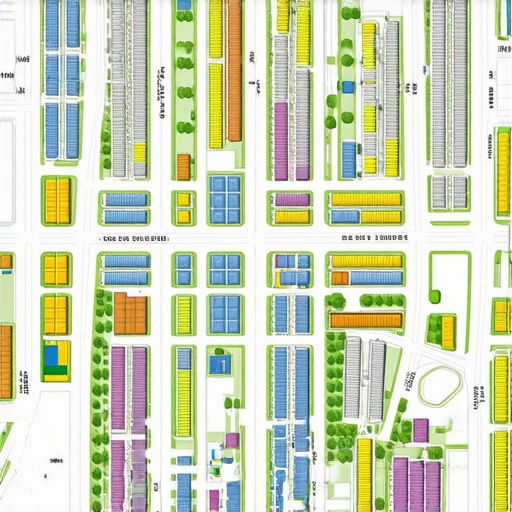
To truly grasp this, you need to learn to identify the various zones assigned to your property. Zoning maps visually depict this with different colors, lines, and labels, indicating what types of structures are allowed and where. Think of it as a blueprint not just of the land, but of its potential and limitations. The more familiar you become with reading these maps, the better your chances of designing projects that stay within legal parameters and gain approval smoothly.
But I’ll be honest—early on, I made a classic mistake. I assumed the map was too complicated and gave up before I truly tried to understand it. That was a costly assumption. According to experts, misreading zoning regulations can lead to project delays, fines, or even having to tear down unpermitted work. That’s why I recommend starting with the basics—get to know your property’s zone, and learn to recognize common map markings and symbols.
If you’re wondering whether it’s really worth spending time on this, just consider this: county and city regulations can change, and zoning maps are often the first indicator of what’s permissible. Actually, a study in urban planning emphasizes that properties with a clear understanding of zoning rules are more likely to see their projects succeed on the first try. And with some practice, reading your zoning map becomes an empowering tool rather than a source of anxiety.
Ready to decode your local zoning map? In the next sections, I’ll guide you through practical steps to interpret your zoning map confidently, so you can plan your improvements with peace of mind—and possibly even save some money. If you’ve faced any confusion or frustration with zoning before, I’d love to hear your story—drop a comment below or reach out through our contact page.
Identify Your Property’s Zone Accurately
Start by locating your property on the zoning map, which is typically available on your city or county’s official website. Look for your parcel number or address to find the exact zoning designation. During a recent project, I spent a morning pulling up various maps and cross-referencing my parcel’s info. Initially, I was overwhelmed by color codes and labels, but I realized each zone’s primary purpose—residential, commercial, or mixed-use—determined what I could build. This clarity prevented me from pursuing design ideas incompatible with zoning restrictions.
Learn Map Symbols and Color Codes
Deciphering map symbols is like cracking a secret code. Colors generally indicate zones: blue for residential, yellow for commercial, green for parks. Lines denote boundaries, setbacks, or easements. For instance, I noticed my property was outlined with a red line representing a setback zone—a line I previously overlooked that limited my porch extension. Understanding these symbols helped me plan within permissible build areas, saving time and avoiding permit rejections.
Determine Allowed Uses and Restrictions
After identifying your zone, review the permitted uses—single-family home, duplex, commercial retail—and restrictions like height limits or lot coverage ratios. I once wanted to add a second story but discovered my zoning limited building height to 25 feet, which was insufficient for my plans. By familiarizing myself with these rules upfront, I adjusted my design early, avoiding costly revisions later.
Check Setbacks and Lot Coverage Limits
Setbacks are distances you must keep from property lines, affecting how much you can build. Lot coverage limits how much of your lot can be occupied by structures. In my case, the map revealed a 15-foot front setback and 25-foot rear setback. Ignoring setbacks led to a failed permit application, but once I understood these requirements, I reconfigured my plans, making sure my addition fit comfortably within the rules.
Use Your Map to Plan Conversion Projects
When considering conversions—like turning a garage into living space—the map clarifies whether such changes are permitted and what restrictions apply. I recalled a friend’s project delayed because they overlooked a zone change requirement. By proactively reviewing the map, I confirmed my conversion met all location-specific criteria, streamlining the approval process.
Practice Reading Maps with Real Examples
Applying these steps on actual maps in your area cements your understanding. I recommend visiting your local planning department’s website or office—many provide interactive maps or GIS tools. During my first review, I identified a utility easement that I had missed, which could have disrupted construction. Noticing such details early saves potential headaches and costs.
Confirm Zoning Changes with Local Authorities
Zoning can change, so always verify current regulations before proceeding. I once discovered a recent zoning update that relaxed setback rules, allowing my larger porch. Contact your local zoning office via this link to confirm your property’s current status. Being proactive ensures your project aligns with latest policies, preventing permit refusals later.
While many homeowners and even seasoned builders focus on the obvious steps like obtaining permits or estimating costs accurately, there’s a deeper level of nuance often overlooked that can significantly impact project success. One prevalent myth I’ve encountered is the belief that permits are purely bureaucratic hurdles rather than essential safeguards. In reality, permits aren’t just red tape—they’re designed to ensure structural safety, code compliance, and long-term value. Skipping or rushing through permit processes can lead to costly infractions, fines, or even the need to dismantle work later. For example, failing to understand the specific requirements for foundation reinforcement or egress windows can jeopardize safety and jeopardize insurance coverage.
A common advanced mistake involves underestimating the complexity of permit applications, especially for retrofits or additions in zones with strict regulations. This isn’t just about submitting plans—it’s about understanding local amendments, recent code updates, and how they intertwine with your property’s unique characteristics. According to a study by the National Institute of Building Sciences, projects that neglect meticulous permit preparation face double the delays and budget overruns.
How Can I Anticipate Hidden Regulatory Traps Before Starting Construction?
One strategy is to thoroughly review current local zoning ordinances and coordinate with experienced permit expediters early in the planning stage. These professionals can identify nuances like specific setback variances, easements, or noise restrictions that podem trip up even well-prepared homeowners. Moreover, engaging with your local planning department via [this contact page](https://constructionedgez.com/contact-us) can reveal recent interpretive changes not yet reflected in public documents.
For estimating costs accurately, many assume that square footage or standard unit prices suffice. However, advanced estimation requires accounting for site-specific factors such as existing underground utilities, soil conditions, or historical preservation overlays. Overlooking these can cause estimates to be off by 20% or more, which is significant. To improve accuracy, leverage detailed resource guides like [Mastering New Build Estimating](https://constructionedgez.com/mastering-new-build-estimating-… ), which emphasize the importance of incorporating such hidden variables.
Another pitfall is neglecting the importance of clear communication with subcontractors and suppliers about these nuances. Misunderstandings here can lead to delays or quality issues that surpass initial budget expectations. Ultimately, the key is thorough research, proactive consultation, and leveraging expert guidance to navigate the complex web of regulations and estimations involved in modern construction projects—something I’ve learned from years on the field. Do you recall a project where unexpected regulation delayed your progress? Share your story in the comments!
Finally, remember that local regulations are not static. Regularly review updates through [navigating permit requirements](https://constructionedgez.com/navigating-permit-requirements-for-additions-in-2025) and stay engaged with your city or county planning offices. The more you understand the subtle, often hidden, regulatory landscape, the better your chances of completing your project smoothly and successfully.
Keeping Your Construction Projects Running Smoothly Over Time
Building a structure is just the first step; maintaining it to ensure longevity and value is equally important. In my experience, leveraging the right tools and adopting systematic maintenance routines can save you significant time and money down the line. One tool I swear by is BuildSmart, a project management software that seamlessly integrates scheduling, budgeting, and documentation. It helps me keep track of maintenance schedules and permits renewal deadlines, preventing overlooked tasks that could compromise your project’s integrity.
Another essential is SiteGuard, a durable, weather-resistant drone that I use for regular site inspections. It provides high-resolution imagery, allowing me to identify potential issues like small cracks or drainage problems early before they escalate. Drones are transforming maintenance routines by offering quick, detailed overviews without the need for costly scaffolding or manual inspections. Trends suggest that incorporating AI-driven analytics into drone footage will become standard, enabling predictive maintenance based on real-time data.
Predicted Trend: As technology advances, expect even smarter tools—think IoT sensors embedded in your building’s infrastructure to monitor stress, temperature fluctuations, or moisture levels continuously. This real-time data will empower homeowners and builders to respond proactively, extending the lifespan of their investments.
How do I maintain my additions to adapt to changing needs?
Periodic reviews and proactive upkeep are vital. I recommend scheduling semi-annual inspections, especially for aspects like roofing, gutters, and foundation integrity. Tools like InspectPro, a digital checklist app, help me track maintenance tasks and set reminders for things like sealing joints or repainting surfaces to prevent deterioration. Keeping detailed records of all inspections and repairs also simplifies future updates or modifications.
Additionally, consider investing in high-quality finishing materials—such as weather-rated siding or corrosion-resistant fasteners—whose durability reduces long-term maintenance efforts. When planning additions, always ensure that the initial build conforms to current standards, which makes future upkeep less cumbersome. For scalable projects, modular components are advantageous—they allow easier replacement or upgrades without major structural alterations.
Remember, consistent maintenance not only preserves your property’s value but also minimizes costly emergency repairs. To stay ahead, review your local regulations periodically—permitting requirements evolve, and staying compliant ensures your project remains in good standing. For reliable guidance, consult resources like this comprehensive permit approval guide.
Tools I Recommend for Efficient Maintenance
Beyond software and drones, I also rely heavily on modular, rot-proof scaffolding systems that simplify regular inspections and repairs. QuickFrame offers adjustable, mobile scaffolds that can be assembled easily, reducing labor costs and increasing safety during ongoing maintenance. For smaller touch-ups, my go-to is EcoWipe, an eco-friendly cleaning solution that keeps surfaces in top condition without harsh chemicals.
In the end, adopting a proactive approach with the right toolkit ensures your build remains safe, functional, and beautiful for years to come. As technology continues to advance, integrating IoT sensors and AI analytics will become a norm, enabling even better predictive maintenance. I urge you to try implementing a drone inspection routine with SiteGuard—it’s a game-changer for early problem detection and peace of mind.
The Surprising Lessons I Didn’t Expect to Learn
One of the most eye-opening revelations was realizing how often overlooked details—like small easements or recent zoning amendments—can make or break a project. I once discovered a utility easement after breaking ground, which delayed my plans significantly—something I could have avoided by careful map review. The second lesson involved permit fine print; I thought I understood all requirements, only to find out that a minor mistake cost weeks in revisions. The third insight was the importance of proactive communication with local authorities; their quick guidance saved my project from costly missteps. Lastly, I learned to trust my intuition when something seemed off in the documentation—it often pointed to overlooked regulations or upcoming code changes that could impact my build.