The Smoke Alarm Interconnect Rule for Multi-Room Renovations
I remember the moment clearly—standing in the middle of my new addition, realizing I had overlooked a simple yet critical safety code requirement. My heart sank as I watched the inspector shake their head, pointing out the missing interconnected smoke alarms. It hit me then: small mistakes can lead to big delays and added costs, especially when navigating the complex world of home renovation permits.
Why This Rule Can Make or Break Your Renovation
Every year, countless homeowners find themselves caught off guard by the Smoke Alarm Interconnect Rule, particularly during multi-room renovations. This regulation isn’t just bureaucratic red tape; it’s a vital safety feature designed to protect everyone inside your home. Yet, its technical nature often leads to confusion, mistakes, and worst of all, permit delays that push back your project timeline and inflate costs.
Having gone through the frustration myself, I want to share how understanding this rule early on can save you hours of stress. For example, I once assumed that simply installing smoke alarms would suffice—only to learn I needed them interconnected to ensure all alarms sound simultaneously in case of fire. That oversight cost me a re-inspection and a few more weeks of construction. Learning from that, I dived into the permit process guides and discovered that a correctly wired interconnect system is both simple and crucial, preventing dangerous gaps in fire safety coverage.
The key is knowing exactly what the code requires and how to implement it efficiently. I’ve found that many homeowners make avoidable mistakes because they don’t understand the nuances of the rule—like assuming wireless alarms qualify, when many jurisdictions still require hardwired interconnections.
Would your project face setbacks because of this? Have you already encountered confusion around fire safety code requirements? If so, you’re not alone—many are surprised by these details. The good news is that with the right approach, you can avoid these pitfalls and keep your project moving smoothly.
Think skipping the details is harmless? Think again.
Early in my renovation journey, I skipped thorough research on local fire alarm codes. That cost me extra inspections, delays, and a nagging feeling that I’d overlooked something critical. Professional resources like this guide can help clarify these requirements and steer you clear of costly errors.
Now, let’s explore how to navigate this rule with confidence, starting with the essentials of proper wiring and compliance.
Begin by mapping out your electrical circuits to identify power sources for each alarm. Use quality, UL-listed smoke alarms with interconnect capabilities. During my own project, I laid out the wiring plan on paper, marking each connection point clearly to prevent confusion. This step is like planning a road trip; a clear map prevents dead-ends and detours.
Next, run dedicated wiring from the main panel to each alarm. Use gauge-specific, insulated wiring suitable for your home’s electrical standards. For one room, I used a spaghetti-like mess of wires; organizing them with cable ties kept my workspace safe and manageable, which made troubleshooting easier later on.
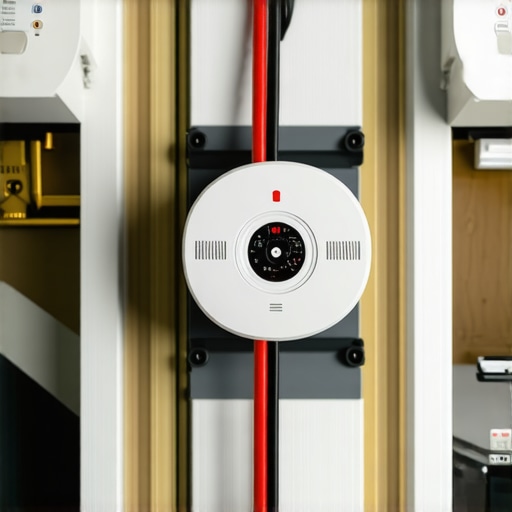
Connect the alarms in a series loop, ensuring each unit can communicate with the others. This involves connecting the interconnect wire terminals together. During installation, I tested each connection with a voltage tester. This proactive step saved me from future false alarms and ensured compliance with safety codes, preventing inspection failures.
Power up the system and test each alarm individually and in unison. Press the test button; all alarms should sound simultaneously. In my case, one unit failed to respond because of a loose wire. Catching this early prevented delays during the final inspection and gave peace of mind that the system meets code requirements.
Many jurisdictions still prefer hardwired interconnects because they’re more reliable in emergencies. Wireless alarms are tempting for retrofit ease but may not qualify legally. I initially thought wireless alarms were enough, but after consulting permit requirements, I replaced my wireless units with wired ones, ensuring my project stayed on track without re-submitting permits.
Take photos and keep detailed notes as you go. This documentation simplifies the permit inspection process and helps address any questions from code officials. When I submitted my paperwork, organized photos of my wiring plan and test results expedited approval, avoiding costly redo visits.
Remember, adherence to the specific wiring standards and using approved materials is non-negotiable. Double-check with local codes or permit guides before finalizing your setup. My experience taught me that cutting corners here leads to project delays, rework, and safety compromises. Taking these steps meticulously ensures your safety system complies and functions perfectly, saving you time and expense during inspections.When it comes to new construction or additions, many homeowners and even some contractors fall into a trap of oversimplification. A common myth is that once permits are approved, the project is smooth sailing. However, this oversimplification neglects critical nuances that can make or break your timeline and budget.
One advanced mistake is underestimating the complexity of local code nuances, especially when dealing with modern energy efficiency standards or historic preservation regulations. For instance, adhering to the insulation R-value rules isn’t just about saving energy; it can also be a cause for permit rejection if overlooked, as highlighted in recent studies on building compliance (see insulation R-value rules).
A pervasive but false belief is that permit costs are fixed or predictable. In reality, permitting fees can vary significantly based on the scope, location, and recent regulatory changes. Failure to double-check updated fee schedules can lead to budget overruns. To get a reliable estimate, I recommend consulting detailed guides on estimating permit costs.
Here’s a critical ‘oops’ factor: assuming your initial plans will pass without extensive review, which can be a deadly oversight. Many projects are halted or delayed because of overlooked details—such as inappropriate setback calculations or failing to verify utility easements—leading to re-submission and additional fees. The best approach is early, thorough plan review with local officials, as discussed in this resource.
Ever wonder about the nuances behind estimating costs accurately for large projects? The difference between a good estimate and an inaccurate one can be the gap between profit and loss. Advanced estimators focus on factors like material waste percentages, unexpected site conditions, or labor inefficiencies—details that are often underestimated. For more on this, see new build estimation strategies.
Lastly, the importance of documentation shouldn’t be underestimated. Properly tracking every communication, change, and inspection can prevent costly disputes and rework, especially when navigating complex permit requirements. Remember, your thoroughness now saves headaches later.
Have you ever fallen into this trap? Let me know in the comments. Staying vigilant and informed can turn your building project from a gamble into a success story.
Invest in Reliable Monitoring Equipment
One of the most effective ways to ensure your renovation stays on track is to use dedicated monitoring tools. I personally rely on the Fluke T5-600 Electrician’s Multimeter for checking wiring continuity and voltage before and after installation. Its accuracy and durability mean I catch potential issues early, preventing costly rework and delays. Unlike generic multimeters, the Fluke model features True RMS measurement, essential for troubleshooting complex wiring problems in your addition.
Leverage Construction Management Software
Managing permits, schedules, and inspections can be overwhelming, but tools like Buildertrend have become indispensable in my projects. I use Buildertrend not just for communication but also for tracking permit statuses and scheduling inspections. Its real-time updates help me anticipate delays, especially around compliance milestones like fire safety inspections, which can halt work if overlooked. As construction tech continues evolving, integrating software with permit tracking capabilities promises even greater efficiencies in future projects.
Maintain a Detailed Inspection Log
Keeping meticulous records of each inspection—dates, contact persons, and any modulations—has saved me countless times. I post photos and notes to a dedicated folder, which simplifies addressing inspector questions and re-inspections. For instance, after installing fire alarm systems, I documented the wiring configurations and test results, which speeded up approvals and prevented rework. This attention to detail is crucial, especially when change orders or variances occur, as explained in this guide.
How do I keep these tools effective over time?
Regular maintenance is key. For example, I calibrate my multimeter annually and update my project management software to access new features. Staying current with updates, like those in estimation tools for 2025, helps ensure accuracy and efficiency as standards evolve. Long-term success depends on investing in quality gear and continuously learning new digital skills—an advantage that makes complex projects manageable.
Anticipate Future Trends
As smart home integration advances, I predict that IoT-based monitoring—like connected smoke detectors and energy sensors—will become standard in home additions, providing real-time compliance alerts. This proactive approach can catch issues before inspection day, saving time and reducing rework. Embracing these innovations now allows you to stay ahead of regulatory changes and technological shifts, ensuring your home improvement projects are future-proof.
Try implementing a digital inspection log or upgrading to a smart monitor; these small steps can dramatically improve your project’s reliability and compliance. The key is to use tools designed for accuracy and ease of use, like the best safety monitoring systems available. As technology progresses, keeping your tools calibrated and updated will be essential to maintain safe, compliant, and smooth-running additions.
Three Surprising Lessons From My Permit Journey
One of the most eye-opening lessons I learned was how overlooking seemingly minor details, like the type of interconnected smoke alarms, can lead to significant delays. I used to assume wireless alarms sufficed, but understanding the specific wiring requirements saved me time. Additionally, I discovered that early communication with local inspectors can prevent misunderstandings that cause rework, saving both time and money. Finally, I realized that detailed documentation and meticulous testing are your best allies; they not only streamline inspections but also give you confidence in your compliance efforts.
Tools and Resources That Transformed My Approach
Building an efficient permit process requires the right toolkit. I rely heavily on this comprehensive permit guide, which demystifies local regulations and helps me prepare thoroughly. For estimation, this step-by-step estimator ensures I stay within budget while meeting all permit requirements. Additionally, digital inspection tracking from this platform keeps me organized and proactive. Trusting these trusted resources has profoundly improved my project outcomes.
Seize the Opportunity to Elevate Your Home Addition
Taking control of your permit process may seem daunting at first, but it’s a powerful step toward safeguarding your investment and ensuring safety. By embracing detailed planning, leveraging the right tools, and staying informed about evolving regulations, you set your project up for success. Remember, every stage—from understanding code nuances to thorough documentation—is an opportunity to turn challenges into achievements. Your home renovation deserves this level of care and expertise. Are you ready to apply these insights and make your project smoother and safer? Drop your experiences or questions below—I’d love to hear how you’re approaching permit compliance in your home addition journey.