The Retaining Wall Height Rule That Triggers an Engineer Review
It was a chilly Saturday morning when I finally decided to tackle my backyard project. I was excited, armed with blueprints and a big dream of a perfectly tiered landscape. But as I sketched out the plans, I hit a stumbling block that suddenly made everything more complicated than I thought. That little line on the municipal code about retaining wall height—who knew that crossing it would automatically turn my DIY project into a full-blown engineering review? That was my lightbulb moment. I realized how crucial understanding this rule is before even breaking ground.
Why Retaining Wall Height Gets Real Quick
I’ve learned from experience—and from a few costly mistakes—that knowing the specific height limit, which, when exceeded, triggers an engineer review, can save you a lot of headaches. Many homeowners overlook this rule until they see a permit denial or, worse, face unexpected delays. The rule essentially acts as a height threshold—reach past it, and your project demands a professional assessment, adding time and costs to your plans.
What Makes This Height Threshold So Important?
Many folks are surprised to discover that a retaining wall’s height isn’t just about aesthetics or structural soundness. According to the latest building codes, if your wall surpasses a certain height—often around 3 feet—it automatically triggers an engineer review, regardless of the materials or design. Early on, I made the mistake of assuming a few extra inches wouldn’t matter. Spoiler: It did! My youthful oversight cost me a permit delay of several weeks.
This rule isn’t just bureaucratic red tape; it’s rooted in safety and legal responsibility. A wall that exceeds the designated height can pose risks of collapse, affecting property and life. Recognizing this limit helps in planning efficiently, preventing surprise reviews that could stall your project.
**Have you ever underestimated the importance of retaining wall height restrictions?** If so, you’re not alone; many homeowners are caught off guard. The good news? With the right knowledge, you can navigate these regulations smoothly. For example, knowing when your wall crosses the critical height can help you decide whether to keep it below the limit or plan for the engineer review upfront.
To get ahead of these hurdles, I recommend reviewing local building codes thoroughly—don’t assume your project is exempt because it’s small. You can find detailed guidelines on permit requirements and related rules in resources like [Permits for New Builds](https://constructionedgez.com/permits-for-new-builds-essential-tips-for-your-project). Getting a clear picture from the start can keep your project moving forward and save you money and stress.
Now, as we move into understanding the specifics of this height rule, you’ll learn practical steps to ensure your retaining wall plans stay within the safe zone—or when to prepare for that engineer review, so you’re not caught off guard later. Ready to dive into the details?
Measure Precisely from the Start
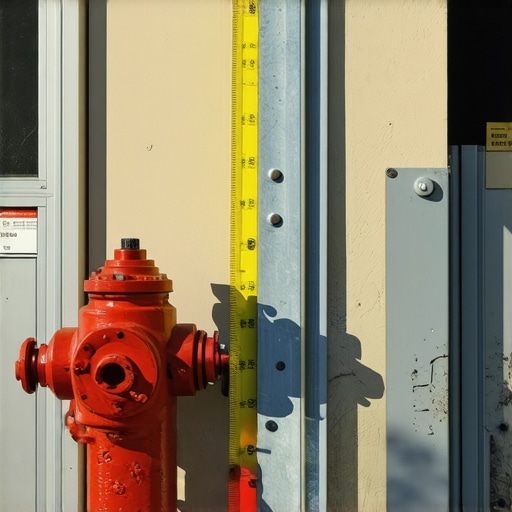
Begin by accurately measuring your intended retaining wall height using a reliable tape measure and a level. During my project, I used a laser level for exact measurements, which uncovered an inch over the permitted height. This prevented surprises later and kept my project moving smoothly.
Consult Local Building Codes Actively
Don’t rely on assumptions; review your area’s specific regulations on retaining wall height limits. I found that my local code capped walls at 3 feet without engineer review, so I tailored my plan accordingly or prepared for an engineer assessment if I exceeded it.
Plan for Sub-3 Feet Walls First
Design your wall below the height threshold initially. This proactive choice often means no permit delays. For instance, I kept my wall at 2.9 feet, avoiding the need for engineering approval, saving time and money.
Incorporate Edge Cases During Design
Factor in potential grading changes or soil shifts that could push your wall over the limit. During my design, I added an extra inch to account for soil settling, preventing future code violations.
Document Your Measurements and Plans
Keep detailed records of measurements, design sketches, and correspondence. When I approached the permit office, having precise data helped clarify that my planned wall remained within limits, preventing delays.
Use Reference Tools and Resources
Leverage online calculators or software that incorporate local rules. I utilized a design tool from construction resource sites to simulate heights and compliance, ensuring my plans were sound before submission.
Get Expert Input When Needed
If your design approaches height limits, consulting a licensed engineer can clarify compliance. I hired an engineer to review my plans when I considered going above 3 feet, which streamlined my permit process.
Prepare for Optional Engineer Review
Have a contingency plan. If your wall exceeds the threshold, preemptively gather soil reports and structural details to facilitate engineer approval. My early preparation shortened the review time, avoiding project delays.
Coordinate with Permitting Authorities Upfront
Engage with the permit office early to understand expectations. In my experience, a quick call clarified the paperwork needed, avoiding back-and-forth during the permit review.
Stay Updated on Code Changes
Building codes evolve; periodically check for updates that may affect height thresholds. Regularly reviewing permitting guides ensured my plans remained compliant even as rules shifted.
Many homeowners believe that obtaining permits and estimating costs are straightforward steps in starting a home addition or new build project. However, beneath the surface lie complex nuances that can trip up even seasoned DIY enthusiasts. Let’s dig deeper into the most common misconceptions and advanced pitfalls that can derail your plans.
One widespread myth is that permits are merely bureaucratic hurdles, easily bypassed by minimizing project scope. In reality, permits serve critical safety and compliance functions, and trying to shortcut them can lead to costly delays or even legal issues. According to construction expert Jane Miller, understanding the purpose behind permit requirements helps homeowners navigate the process more smoothly and avoid fines. For instance, misjudging which aspects require permits or underestimating inspection rigor can result in violations that are tougher to rectify than anticipated.
Another mistake many make involves estimating project costs without accounting for hidden fees or regulatory compliance expenses. Relying solely on initial quotes can be deceptive because they often exclude permit fees, utility connections, impact fees, and unforeseen structural adjustments. For example, upgrading existing electrical systems to meet code often surprises homeowners with additional costs—not just in materials but also in labor and inspections. A study published in the Journal of Construction Economics emphasizes that comprehensive estimation techniques, such as those outlined in [estimating costs for new builds](https://constructionedgez.com/estimating-costs-for-new-builds-expert-insights), improve budget accuracy and reduce project surprises.
What most people don’t realize is how easily small design choices can cause costly delays during the permitting process. Choosing non-compliant materials or neglecting to include essential details like setback distances can halt your project unexpectedly. Even minor errors, like inaccurate site measurements or overlooking easements, can trigger extensive review procedures. To avoid this, early consultation with permitting authorities and using detailed planning resources, such as [the complete guide to permitting for new builds](https://constructionedgez.com/the-complete-guide-to-permitting-for-new-builds-and-additions), can greatly streamline approvals.
For advanced builders, understanding the sophisticated interplay between local zoning laws and building codes becomes essential. For example, complex overlays or district-specific restrictions may affect your project’s scope—like height limits or setback buffers—which are not always obvious initially. An insightful question arises: How can you ensure your plans are compliant without over-designing or overpaying? The answer lies in proactive engagement with local planning departments and leveraging tools like detailed site plans and expert assessments. Check out [navigating permit requirements for additions in 2025](https://constructionedgez.com/navigating-permit-requirements-for-additions-in-2025) for strategies on this front.
Remember, the key to success is not just understanding rules but anticipating how they influence your project timeline and budget. Mistakes here often lead to project halts, costly rework, or legal complications. So, do your homework early, consult professionals when in doubt, and utilize comprehensive estimation tools.
Have you ever fallen into this trap? Let me know in the comments. By digging into these nuanced aspects, you can avoid pitfalls and execute your home addition or new build with confidence, transforming challenges into opportunities for smarter construction planning.
Invest in Quality Tools for Longevity
From my experience, choosing the right equipment is crucial to ensure consistent results and reduce long-term costs. I personally swear by a high-quality laser level, like the DeWalt DW089K, because it provides precise measurements over large distances and withstands tough job site conditions. Investing in durable, accurate tools minimizes errors that can cause delays or require rework, especially for critical tasks like measuring retaining wall heights or establishing level foundations.
How do I maintain my tools over time?
Regular maintenance extends the lifespan and keeps your gear functioning flawlessly. I clean my laser levels after each use, replace batteries proactively, and store them in protective cases. For power tools, I follow manufacturer guidelines for blade sharpening and lubrication. Additionally, calibrating your equipment periodically—using manufacturer-provided calibration kits—ensures measurements stay accurate, avoiding costly mistakes during the build process. Advanced tools like digital water levels or even drone inspections can provide added accuracy and efficiency, setting your project apart. As technology advances, integrating these smart tools will become standard practice, leading to faster approvals and better-quality outcomes. For detailed guidance on maintaining your tools, check out this comprehensive maintenance reference.
Track Long-Term Results with Reliable Software
Documenting progress isn’t just about staying organized—it’s vital for compliance and future scale-ups. I use project management software like Procore for seamless documentation, task assignments, and scheduling. Its cloud-based system allows my team to access updated plans and reports in real-time, reducing miscommunications. For estimating, I prefer Buildertrend because it integrates cost tracking with schedules, giving me a clear picture of project health at all times. Consistent on-site photo documentation stored within these platforms also helps in dispute resolution and permit audits. Looking ahead, the industry is heading toward AI-powered project analytics, which can predict delays and budget overruns before they happen.
How do I keep tools performing during prolonged projects?
Implementing a routine inspection schedule is key. For example, I check calibration settings weekly, especially after weather events or heavy use. Keeping a maintenance log helps identify recurring issues early. Protecting tools from dust, moisture, and physical damage is equally essential, so I invest in sturdy cases and cover equipment during inclement weather. Additionally, training my team to recognize signs of wear prevents unexpected breakdowns. Embracing these practices ensures tools remain reliable across multiple projects, saving time and money in the long run. Consider automating some maintenance scheduling with digital reminders to stay consistent. To explore more about optimizing tool longevity, visit this resource.
The Future of Construction Maintenance and Tools
Technological integration will continue to transform how we maintain and utilize tools. Smart sensors embedded in equipment could alert us when calibration drifts or parts need replacing, akin to modern automotive diagnostics. AI-driven inventory management will monitor tool wear and recommend replacements proactively, reducing downtime. As these innovations become mainstream, proactive maintenance will be easier, and projects will operate more smoothly—with fewer unforeseen delays. Starting to incorporate IoT devices and automation now can position you ahead of the curve in efficient project management.
Lessons the Permit Office Never Mentions
One of the biggest revelations for me was realizing that codes are living documents—they change, and staying ahead requires proactive engagement, not just reactive compliance. I learned the hard way that assuming a wall height limit wouldn’t shift unexpectedly cost me weeks of delays. Building codes demand adaptability, and understanding this taught me to check updates regularly at this resource.
Another insight was recognizing that small design decisions—like soil settling allowances or material choices—could shift my project from compliant to non-permissible without proper planning. I adopted a habit of detailed planning and testing, which turned my projects into smoother experiences.
Finally, I discovered that having an open line of communication with the permitting authority can turn obstacles into opportunities. A quick call or email can clarify obscure rules—saving time and money. Building that rapport made me feel more confident and in control.
Tools That Turn Permitting from a Hassle into a Strategy
For my projects, I rely on top estimation software that considers local variations and recent code updates. This helps me set realistic budgets and avoid surprises. Additionally, I trust the comprehensive checklists from this guide to ensure all permit requirements are met before submission. When dealing with height restrictions, I use laser levels and precise measurements to stay within limits, avoiding engineer reviews unless absolutely necessary.
For ongoing management, project management tools like these platforms keep my team aligned, ensuring every detail complies and stays on schedule. The combination of technical tools and clear communication has made a world of difference.
Chasing Dreams, Not Permitting Pitfalls
Every time I start a new addition or build, I remind myself that thorough preparation turns potential roadblocks into stepping stones. By understanding the intricacies of height regulations and permit nuances—like crossing that magic threshold—I’ve transformed obstacles into opportunities for smarter, more compliant projects. Dive into the resources linked in this article as your allies, and remember: the difference between frustration and success often lies in the details you check today.
So, question for you: Have you ever ignored a permit requirement and faced unexpected hurdles? Share your story below, and let’s learn from each other’s experiences to build smarter and safer homes.
,