The Foundation Anchor Bolt Rule Most DIYers Forget
One afternoon, I was buried under a pile of blueprints and construction specs, sweating more than I expected—not from the heat, but from that sinking feeling in my gut. I had overlooked a tiny detail on the building permit application. It was the kind of mistake that could delay my project for weeks, or worse, get it rejected altogether. That moment was a lightbulb flickering on: I realized I’d been ignoring one crucial rule about foundation anchor bolts, a rule most DIYers and even some pros tend to forget or overlook.
Why Skipping this Foundation Step Can Cost You Big
Here’s the thing: foundation anchor bolts might seem like just a small piece of the puzzle, but they play a pivotal role in ensuring your entire structure is secure, especially in areas prone to seismic activity or high winds. Missing or improperly installing these bolts isn’t just a minor oversight—it can compromise the safety of your entire build. I learned this the hard way during my first self-build, when I neglected to verify that my anchor bolts met local code requirements. The inspection failed, and I had to tear out part of my foundation to correct it.
What I didn’t realize back then was how widespread this mistake is among DIYers. According to a recent report from the Construction Edgez team, many underestimate the importance of proper anchor bolt placement and size. This oversight doesn’t just threaten the integrity of your structure—it can cause costly delays, permit issues, and even safety hazards down the line.
Is Your Foundation Bolt Installation Actually Up to Code?
Initially, I thought I could wing it, relying on generic instructions and online tutorials. That’s exactly where I went wrong. Early on, I made the mistake of assuming all anchor bolts are created equal, and that ‘close enough’ would pass inspection. Spoiler alert: it **won’t**. Building codes specify exact sizes, spacing, and depth requirements for anchor bolts that are often overlooked by DIYers eager to save time or money.
Understanding and adhering to these rules is critical. For instance, in seismic zones, the International Building Code (IBC) mandates specific bolt sizes and embedment depths to withstand seismic forces. Failing to comply can lead to failed inspections, costly rework, and dangerous structural weaknesses. Curious how to avoid these pitfalls? Stick around because in the next sections, I’ll walk you through the essential steps to ensure your foundation is bolted correctly and meets all code requirements.
Start with Accurate Measurements
Before digging the foundation, gather your local building code requirements for anchor bolts. Use a measuring tape and a level to identify precise locations on your foundation layout. During my first project, I initially guessed the bolt locations, which led to non-compliance. Once I switched to measuring meticulously and marking each spot with a chalk line, I avoided costly rework and passed inspection smoothly.
Select the Right Materials for Your Climate
Choosing appropriate anchor bolts is like picking the right shoes for a hike; it must match your terrain. For seismic zones or areas with high winds, opt for high-strength steel bolts that meet or exceed code specifications. During my recent build in a wind-prone area, upgrading to galvanized, high-tensile bolts prevented future corrosion and ensured safety.
Install Bolts with Precision and Care
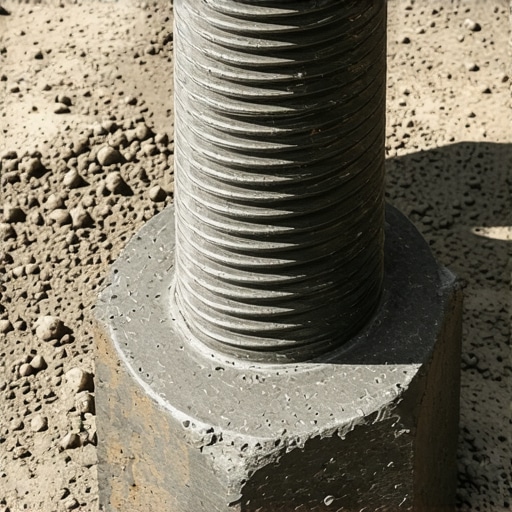
Proper installation involves embedding the bolts at the correct depth—generally 7 inches below grade—and ensuring they are plumb and aligned. Use a rebar chair or alignment template to keep bolts upright during pour. I once tried to secure bolts after the concrete set, which was a mess. Instead, I used a simple cardboard form template during pour, allowing the bolts to stay perfectly vertical and at the right height.
Verify Conformance to Codes During Placement
Double-check bolt spacing, size, and embedment depth with a tape measure and a level after installation. Compare your setup with the specified dimensions in your permit documentation or the permitting guidelines. During my inspection, I caught a spacing error—saving me from a failed inspection and time-consuming corrections.
Document Your Work for the Inspection
Take clear photos of your bolt installation, measurements, and materials used. Keep a detailed log of each step—dates, measurements, and any issues encountered. When my inspector arrived, providing a well-organized photo report and notes helped me pass the check quickly, minimizing delays.
Schedule and Prepare for Final Inspection
Coordinate with your local building department ahead of time by reviewing their requirements listed on their resources. Ensure all bolts are accessible and visible for inspection. During my last project, preparing a printout of measurements and photos beforehand made the process swift and painless, avoiding the reinspection fees.
< >When planning a new build or home addition, many homeowners and even some professionals fall into the trap of oversimplifying the process. The common belief that accurate estimates and proper permits are straightforward often leads to overlooked nuances that can derail a project. Let’s dig deeper into some misunderstood aspects and advanced mistakes that can cost time, money, and frustration. One major misconception is that sticking to generic cost estimates guarantees success. In reality, every project’s specifics—like soil conditions, local code complexities, and material fluctuations—demand tailored evaluations. Relying solely on standard figures from online calculators can result in significant underestimations, leading to budget overruns before you even start digging. To avoid this, consider consulting detailed, customized estimates from experienced sources or tools such as cost estimation guides that account for site-specific variables.
A hidden nuance that many overlook involves the permit process itself. While most see permits as a bureaucratic hurdle, they are actually crucial for ensuring safety and compliance. A trap here is neglecting to review local amendments or special regulations that could impact your project. For example, some jurisdictions impose unique setback or height restrictions that, if ignored, can lead to permit denial or costly rework. Advanced builders recommend thoroughly reviewing permit requirements early on and engaging with planning departments proactively. This approach helps you spot potential issues before they become costly delays.
Another mistake is underestimating the importance of precise scoping—assuming that all tasks are equal and that quick estimates suffice. This oversight becomes evident when unforeseen issues like concealed wiring, unanticipated soil instability, or material shortages emerge mid-project, causing delays and budget hikes. Experts emphasize conducting comprehensive site assessments and detailed scope definitions upfront. For instance, factoring in contingencies for material waste or unexpected subsurface conditions—usually 10-15% above initial estimates—can safeguard your project timeline and finances. Learn more about refining your estimates with step-by-step estimation methods.
Is your team prepared for these hidden challenges? Deep knowledge of local regulations, thorough site evaluations, and customized budgeting strategies are critical for a successful project. The difference between a smooth construction process and a costly failure often hinges on these advanced considerations. Remember, a well-prepared plan anticipates pitfalls before they strike. Have you ever fallen into this trap? Let me know in the comments or reach out through the contact page. Proper planning isn’t just about avoiding mistakes—it’s about mastering the nuances that keep your project on track and within budget.
Invest in Reliable Equipment and Software
Maintaining a construction project requires more than just careful planning; it demands the right tools that can withstand the rigors of daily use. Personally, I swear by a high-quality laser level like the **Bosch Cross Line Laser**. It ensures your foundation and framing are perfectly aligned, saving you time and reducing costly rework. For project management, I rely on **Procore**, a comprehensive software that centralizes communication, scheduling, and document storage. It’s a game-changer because it keeps everyone on the same page, especially when coordinating with inspectors or subcontractors.
How do I maintain equipment and software over time?
Regular calibration of tools like laser levels and using software updates are essential. Keep a maintenance log for machinery, scheduling routine checks to prevent breakdowns mid-project. Additionally, backing up project data and updating your software licenses help avoid unexpected disruptions. As trends evolve, expect more integrated solutions—like IoT-enabled tools that monitor usage and performance remotely—to become standard. Staying ahead means investing in training, too; knowing the latest features and best practices ensures smooth operations.
Long-Term Results stem from Consistent Maintenance
After project completion, maintenance doesn’t end—it just shifts focus. For example, sealing foundation cracks promptly prevents water intrusion and extends the longevity of your build. I make a habit of inspecting critical sites every six months, especially after severe weather. Using durable sealants and rust-resistant hardware ensures your additions stay in top shape over years.
What tools facilitate effective ongoing maintenance?
For routine inspections, I recommend a digital moisture meter like the **Fluke 62 MAX Plus**. It’s invaluable for detecting hidden issues behind walls or beneath slabs. Power washers and corrosion-resistant brushes also help in periodically cleaning exposed surfaces, preventing long-term deterioration. Embracing smart home sensors for structural health monitoring is the future—these devices can alert you to shifts or damage before they become obvious.
Scaling with Confidence Through Strategic Additions
As your needs grow, so should your toolkit. Proper planning involves assessing which tools and methods scale well. For new builds or home additions, investing in modular equipment—such as extendable scaffolding or adaptable power tools—can save costs and time. I’ve found that using a **remote-controlled drone** for site surveys dramatically reduces inspection time, especially in hard-to-reach areas. It’s an example of how technology streamlines scaling efforts.
Why is consistent maintenance crucial for scaling?
Neglecting regular upkeep can lead to equipment failures that halt progress, or worse, cause safety hazards. Reliable tools keep projects on schedule and budgets intact. For instance, referencing guides like this resource helps prioritize critical safety checks that protect everyone involved.
Start incorporating a maintenance routine today—schedule monthly tool inspections, keep batteries charged, and stay updated with new methodologies. These habits ensure your project remains on track from start to finish. Don’t wait for a breakdown—proactive care saves money and frustration in the long run. Ready to upgrade your toolkit? Try deploying a drone for your next site survey and experience immediate efficiency gains.
Reflecting on my journey with home additions and new builds, I realize that some of the most critical lessons are learned not from successes alone but from mistakes. One insight that transformed my approach was understanding that ensuring your foundation anchor bolts are installed correctly can be a game-changer—not just for passing inspections but for the long-term safety and stability of your home.
Lessons That Changed My Construction Perspective
- Prioritizing Quality Over Speed: Rushing through bolt placement often leads to overlooked details that compromise safety. Taking the time to measure precisely and double-check ensures compliance and durability.
- Local Code Knowledge Is Non-Negotiable: Each area has specific requirements for bolt size, spacing, and embedment depth. Familiarity with these details prevents costly rework and delays.
- Materials Matter More Than You Think: Choosing corrosion-resistant, high-tensile bolts suited for your climate can protect your foundation for decades.
- Documentation and Verification Are Your Allies: Recording measurements and installing clear photos can streamline inspections and confirm adherence to regulations, saving time and stress.
- Anticipate and Address Hidden Challenges: Soil conditions, existing structures, and local amendments can appear as minor hurdles but have the potential to cause major setbacks if ignored.
Tools and Resources That Save the Day
- Cost estimation guides: Helping me tailor budgets according to site specifics.
- Permit resources: Ensuring I understood the approval process early on.
- Step-by-step estimation methods: A vital tool for accurate planning and avoiding surprises.
- Modern estimation strategies: Keeping my projects competitive and realistic.
- Permit tips: Making the approval process smoother and less stressful.
Embrace Your Building Journey with Confidence
Every successful project begins with a foundation of knowledge, preparation, and a willingness to learn from every step. Remember, mastering the details like foundation anchor bolts doesn’t just help you pass inspections—it creates a home that’s safe, resilient, and built to last. Keep pushing forward, stay curious, and don’t hesitate to seek out the best tools and resources that align with your goals.
What has been your most eye-opening lesson in home construction or renovation? Share below—I’d love to hear your experiences and tips for fellow builders embarking on their own projects.