Why Your Site Must Be Silt-Fenced Before Any Digging Begins
It was a morning like any other on my construction site, until I looked out and saw a muddy flood rushing towards my freshly poured foundation. That lightbulb moment hit me hard: if only I had installed a silt fence first, this chaos could have been avoided. For years, I learned the hard way that neglecting simple erosion control measures can turn a straightforward project into a costly nightmare. In today’s post, I want to share why ensuring your site is properly silt-fenced before any digging starts isn’t just good practice—it’s essential for protecting your investment, the environment, and your peace of mind.
Protect Your Site and Save Money from the Start
Building or renovating involves a lot of moving parts—and plenty of unforeseen issues. One of the most overlooked steps early in the process is installing a silt fence. Yet, it plays a critical role in preventing soil erosion, which can cause not only environmental damage but also hefty permit violations and fines. I still remember a project where we skipped this step initially, thinking it was just an optional precaution. That mistake cost us a week of delays and a fine for runoff pollution. Since then, I’ve become an advocate for proactive erosion control, especially silt fencing, to keep projects running smoothly and avoid unexpected expenses.
Will Installing a Silt Fence Actually Make a Difference?
Great question. I used to think that a sturdy tarp or temporary barriers could do the trick. But the truth is, a properly installed silt fence designed to trap sediment can significantly reduce soil runoff. According to the Environmental Protection Agency, sediment runoff from construction sites is one of the leading causes of water pollution, affecting local ecosystems and water quality. Installing a silt fence might seem like a minor detail, but it’s your first line of defense—and a legal requirement in many jurisdictions—to keep your project compliant and environmentally responsible.
Early on, I made the mistake of underestimating how quickly soil erosion can spread—especially during rainstorms. If you’ve ever faced a muddy mess or been caught unprepared by runoff, you’ll know how disruptive and expensive it can be. That’s why I recommend planning for silt fencing well before excavations begin, not as an afterthought. It’s a small investment that pays off multiple times over in smooth project flow and peace of mind.
Ready to learn exactly how to set up your site for success? Let’s dive into the practical steps that will help you get your erosion control measures right from the start, ensuring your project stays on track and within compliance. For additional details on permits and legal requirements, check out our comprehensive guide on [permits for new builds](https://constructionedgez.com/permits-for-new-builds-essential-tips-for-your-project) to make sure you’re covered from the first shovel of dirt.
Pinpoint Your Site Boundaries for Accurate Placement
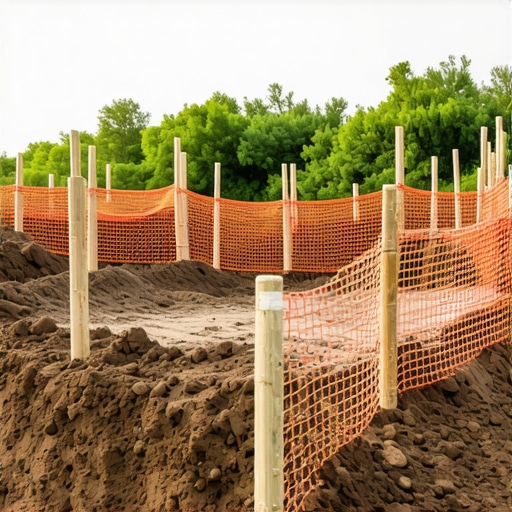
Begin by marking the exact limits of your construction zone using stakes and string. This helps ensure the silt fence aligns perfectly with the runoff control plan. I learned this the hard way on a project where misaligned fencing caused sediment to escape; marking borders with bright paint and durable stakes kept everything in check and saved me from regulatory headaches.
Choose the Right Silt Fence Material and Tools
Opt for heavyweight woven fabric designed specifically for erosion control. Have pliers, stakes, and a sturdy hammer on hand. For a recent project, I used geotextile fabric that resisted tearing, which proved critical when a storm hit unexpectedly, preventing the fence from collapsing.
Dig a Suitable Trench for Secure Installation
Create a continuous trench about 12 inches deep along the fence’s planned line. This trench will provide a secure foundation for the fabric. I recall a site where neglecting the trench led to the fence sagging and overtopping after rain; digging an even, firm trench prevented that and kept sediment contained.
Unroll and Install the Fence with Precision
Unroll the fabric along the trench, ensuring it overlaps at seams by at least 6 inches. Stake the fabric into the trench, then bury the top edge and the bottom foot to reinforce stability and prevent animals from crossing. During installation, I made sure to secure stakes tightly; it paid off during a heavy rain, where many hastily installed fences failed.
Secure and Reinforce with Strategic Stakes
Drive stakes at 4- to 6-foot intervals, making sure the fabric is taut but not stretched. Proper tension prevents sagging and reduces the risk of sediment escape. Once, I underestimated this spacing, and the fence sagged in the middle, allowing sediment to flow through during a downpour—lesson learned the hard way.
Maintain and Inspect Regularly
After installation, schedule daily inspections especially after storms. Look for tears, leaning stakes, or overtopping. I once skipped a quick afternoon check, which resulted in a broken section that let sediment escape—regular maintenance is key to long-term effectiveness.
By following these concrete steps, you not only comply with environmental standards but also protect your project and save money in the long run. Remember, a well-installed silt fence acts as your first line of defense against erosion, just like I experienced firsthand during uncontrolled runoff that threatened to delay my entire schedule. For detailed permit requirements, refer to our guide on understanding permit processes, which emphasizes the importance of erosion measures.
Many homeowners and even some builders operate under misconceptions about the complexities of adding new spaces or navigating permits and estimating. Let’s dig deeper into some overlooked nuances that can make or break your project. For instance, a prevalent myth is that permits are merely bureaucratic hurdles. In reality, permits are designed to ensure safety, compliance, and long-term value. Ignoring these requirements can lead to costly fines, delays, or even legal issues. According to a study by the National Association of Home Builders, projects that overlook permitting stages experience an average delay of 3 to 6 months, significantly increasing costs and frustrating homeowners. This reveals that understanding and properly managing permits from the start isn’t just about compliance—it’s a strategic move to safeguard your investment.
Another common misconception revolves around estimations. Many assume that online calculators or rough guestimates are sufficient. However, estimates that don’t account for hidden costs—like site-specific challenges, material price fluctuations, or scope creep—often balloon beyond budget. For example, homeowners frequently underestimate foundation or framing costs, which can be 15-20% higher than initial estimates if not carefully examined. To avoid this trap, consulting detailed estimation guides or professionals with experience in similar projects is crucial. For comprehensive strategies, explore our guide on adding value with expert home additions.
Now, you might wonder: what about the nuances that even experienced builders often overlook? One such subtlety involves soil analysis prior to foundation work, which can significantly impact costs and timelines if neglected. Soil stability tests reveal issues like high clay content or poor drainage, necessitating special foundations or drainage solutions. Without this insight, you risk structural problems down the line, which are far more expensive to fix than the initial testing.
Furthermore, many underestimate the importance of detailed planning for setbacks and boundary restrictions. For example, a missing understanding of local setback rules—minimum distances from property lines—can result in project redesigns or legal disputes, delaying completion. For detailed insights on navigating permit requirements and avoiding these pitfalls, refer to our article on navigating permit requirements.
Finally, be aware of the trap of scope creep—progressively adding features or changes without adjusting budgets or timelines. This sneaky factor often causes projects to stretch beyond initial estimates, especially when proper change management isn’t in place. Effective communication and documented agreements are vital to prevent this.
In summary, moving beyond the basics involves recognizing that permits are safeguards, estimates are more nuanced than they appear, and soil or boundary considerations can silently derail your project. By digging into these details and consulting comprehensive resources, you can avoid costly surprises and ensure your project’s success. Have you ever fallen into this trap? Let me know in the comments or check out our guide on estimating for home additions to stay informed.
Keep Projects Running Smoothly with the Right Tools
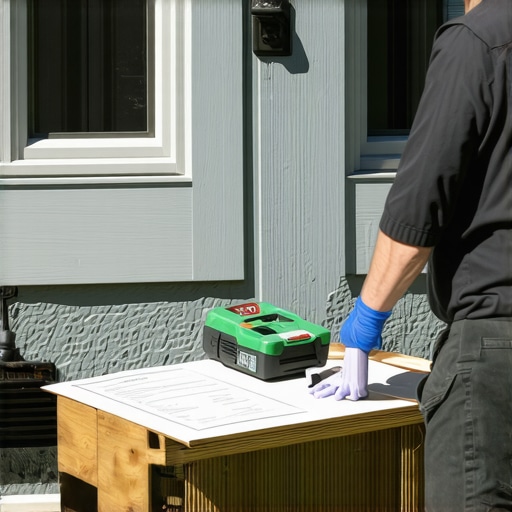
In my experience, maintaining momentum during a construction project hinges on leveraging precise, reliable tools. One staple in my kit is the deWalt DW089K laser distance measurer. It allows quick, accurate measurements of spaces and elevations, reducing errors that can cause delays or budget overruns. Unlike traditional tapes, this laser tool is immune to user inconsistencies and works well in dim or hard-to-reach areas, which are common on sites. Investing in quality measurement equipment streamlines progress and minimizes rework. For complex planning and estimating, I rely heavily on construction estimating software like Buildertrend. It helps keep track of costs in real-time, integrating with project schedules to flag potential overruns early. As automation advances, I see a future where AI-driven project management tools will proactively anticipate delays, recommend solutions, and optimize resource allocations.
How do I maintain effective communication and documentation over time?
Documenting each stage with high-resolution photos using a rugged tablet like the Samsung Galaxy Tab Active3 ensures I have instant visual records for reference or disputes. These devices, coupled with cloud storage solutions like Dropbox, keep data synchronized across teams, fostering transparency and accountability. Regularly updating project logs and sharing them via collaborative platforms helps prevent misunderstandings. Maintaining such a disciplined approach minimizes delays and keeps the project aligned with permits and budgets, especially when managing additions or new build components. Additionally, I stay ahead of the curve by adopting intuitive project management platforms like efficiently managing additions from planning to execution, which unify scheduling, budgeting, and reporting into a single dashboard.
What exactly should you look for in long-term maintenance strategies?
Establishing routine inspections and preventive measures, such as using moisture meters like the Protimeter MMS2, can identify issues before they escalate, saving significant costs. For instance, early detection of moisture intrusion helps prevent structural decay—crucial for additions or remodelling where existing structures may be vulnerable. Planning for future scaling involves versatile tools like modular scaffolding systems, designed for easy reconfiguration as your project scope expands. These investments not only expedite current tasks but also lay a foundation for ongoing efficiency. As construction technology evolves, integrating IoT sensors into building systems offers real-time performance data, enabling proactive maintenance and ensuring the longevity of your investments.
Will digital tools revolutionize maintenance and scaling?
Absolutely. The trend leans towards intelligent, integrated systems that communicate across platforms, delivering instant alerts and data analytics. For example, smart HVAC systems connected via IoT can predict mechanical failures, allowing for scheduled maintenance without disrupting occupancy. Future projects will likely involve comprehensive dashboards that synthesize structural integrity, energy consumption, and material health, lending a new level of control and foresight. Staying updated on these innovations is critical for forward-thinking builders aiming to extend their project lifespan and adaptability.
To harness these advanced practices effectively, I highly recommend experimenting with comprehensive measurement devices like the accurate estimation tools. They can dramatically reduce unforeseen costs and keep your project within scope. Remember, the cardinal rule of construction maintenance is consistency—regularly revisiting and updating your toolkit and methods ensures long-term success and scalability in your dealings with additions, permits, new builds, and estimation challenges. Don’t be afraid to incorporate these sophisticated strategies into your workflow today—your future self will thank you.
Lessons That Caught Me Off Guard
One of the biggest surprises in my journey was realizing how often overlook small details can lead to big setbacks. Installing a silt fence might seem minor, but neglecting it once caused muddy water to flood my site, resulting in delays and extra costs. That lightbulb moment taught me that early attention to erosion control measures isn’t just about compliance—it’s about safeguarding your entire project.
Another lesson came from underestimating rain’s power. I’ve seen storms turn unprotected soil into a runoff nightmare within minutes. It made me understand that proactive planning with proper fencing and drainage is the key to keeping your site functional, even when the weather turns sour.
Lastly, I learned that the best contractors and builders don’t skip steps—they anticipate issues before they happen. Proper site boundary marking, material selection, and regular inspections are habits that pay dividends in the long run. Taking the time to implement these lessons turns small measures into significant advantages, preventing costly surprises down the line.
Tools and Resources That Make a Difference
For anyone serious about managing additions, permits, or new builds, I rely on a handful of trusted tools. The estimating guides have helped me avoid budget blowouts by providing structured methods to forecast costs accurately. I also swear by the permit management platforms that keep track of deadlines and requirements, reducing administrative headaches.
When it comes to measuring and site prep, my go-to is the laser distance measurer. It boosts precision and speeds up planning, especially for complex additions or foundation work. Additionally, detailed soil analysis reports, like those found in soil stability tests, help me design safer, longer-lasting structures from the start. These resources have truly transformed my approach from reactive to proactive, making projects smoother and more predictable.
Your Next Step Starts Now
Building or renovating doesn’t have to be fraught with unexpected obstacles. By applying practical lessons learned, leveraging smart tools, and continuously expanding your knowledge, you lay a solid foundation for success. Remember, tackling additions, permits, and new builds with confidence begins with awareness and preparation. It’s about making every decision count, safeguarding your investment, and ensuring projects stay on track.
Are you ready to put these insights into action on your next project? Share your experiences or questions below—I’d love to hear how you’re planning to improve erosion control or streamline your permit process!