Why Your Backyard Slope Needs a Specialized Site Plan
The first time I tried to set up a backyard patio on uneven ground, I underestimated how much a slope could complicate things. I thought I could just level the area out and be done with it. Boy, was I wrong. Within months, I faced erosion, water pooling, and even some minor foundation issues. That eye-opening experience taught me a vital lesson: slopes are not just aesthetics or minor inconveniences—they’re an integral part of your property’s health and your project’s success.
The Hidden Power of a Proper Site Plan for Sloped Backyards
If you’ve got a hillside, a gentle incline, or any uneven terrain, you might be tempted to skip the detailed planning phase. It’s tempting to cut corners—to save some money now, and deal with problems later. But that approach often leads to bigger costs and headaches in the long run. A tailored, comprehensive site plan considers how your slope impacts drainage, structural stability, and even local regulations.
Let’s be honest: when I first approached my backyard project, I didn’t realize how much a slope could dictate the entire scope of my build. I made the mistake of assuming I could flatten the land without addressing underlying drainage issues, which only worsened over time. That oversight could have been avoided if I had understood the importance of a specialized site plan designed specifically for sloped land.
Did you know that improper handling of slopes can lead to soil erosion, water runoff, and even damage to your foundation? According to a recent study by the Soil Science Society of America, improperly managed slopes can cause significant environmental and structural problems if not planned with care. That’s why a site plan isn’t just a document—it’s a blueprint for a stable, healthy landscape.
Have you faced challenges with your backyard slope that made you wonder if you’re missing something crucial? If so, you’re not alone—and thankfully, there’s a way to prepare properly.
Next up, we’ll explore the key elements of a site plan tailored specifically for sloped properties—so you can avoid costly mistakes and turn your hillside into an asset rather than a hurdle. Interested in mastering your project from the ground up? Check out this guide on understanding permit processes to ensure everything stays compliant from start to finish.
Developing a Solid Site Plan
Start by assessing your land precisely. Use a laser level or GPS tools to map out the slope’s contours. This step is like drawing a blueprint for a complex puzzle, ensuring every piece fits properly. During my own project, I rented a laser level and painstakingly noted the variations in elevation, which revealed hidden low spots prone to water pooling. This insight helped me design drainage pathways that prevented future erosion.
Designing Effective Drainage Systems
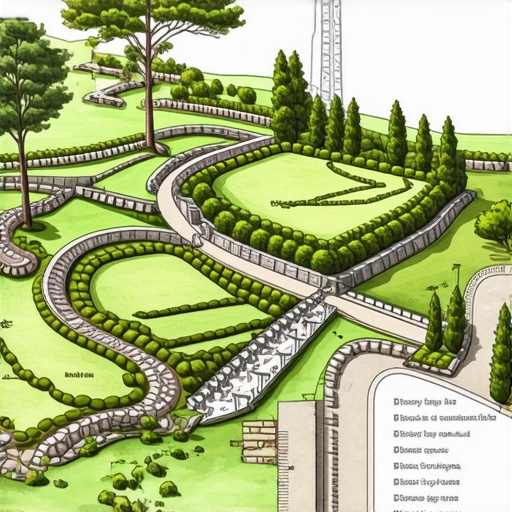
Identify natural water flow paths and reinforce them with swales or French drains. Think of it as guiding water along predetermined routes, like designing channels for an irrigation system. I installed perforated pipes surrounded by gravel at key slope points, which directed water away from the foundation—saving me from costly repairs down the line. Incorporate these elements into your plan to avoid water damage and soil erosion, which are common pitfalls on slopes.
Building Retaining Walls Correctly
Choose the right materials—such as concrete, treated wood, or natural stone—and understand their load capacities. Position walls where the terrain is most unstable, stabilizing the soil and creating level terraces. When I built my retaining wall, I consulted a structural engineer and followed guidelines for wall height and drainage integration, which prevented future bulging or collapse. It’s essential to design for both stability and drainage to maintain long-term integrity.
Utilizing Terracing for Usable Spaces
Break the slope into manageable levels. Each terrace acts as a mini-landscape, reducing soil movement and providing flat areas for patios or gardens. I created three terraces—each reinforced with soil anchors and integrated drainage—to transform my hillside into functional zones. This approach distributes weight evenly and minimizes erosion, vastly improving the usability and aesthetics of your backyard.
Implementing Erosion Control Measures
Cover exposed soil with mulch, hydroseeding, or ground cover plants promptly. Use geotextiles or fabric mats on steeper slopes to hold soil in place during heavy rain. I learned this the hard way when neglecting quick erosion prevention, which led to mudslides after a heavy storm. Now, I always add erosion control layers immediately after earthworks to secure the landscape and prevent costly fixes later.
Integration of Permits and Regulations
Before you start, verify local requirements for structures like retaining walls or drainage systems. This process is like following a recipe—missing a step could mean delays or fines. I used resources from understanding permit processes to navigate the paperwork smoothly. Always check with your city or county for specific codes and necessary permits to keep the project compliant.
Estimating Costs Accurately to Avoid Surprises
Break down each element—materials, labor, permits—and add a contingency buffer. Think of budgeting as packing a backpack for a journey: you want enough supplies without overburdening yourself. I used detailed estimates from estimating costs for new builds to plan my project financially, which helped me avoid unexpected expenses halfway through.
Many homeowners and even seasoned contractors often believe that permits, estimating, and new build processes are straightforward, but this oversimplification can lead to costly mistakes. One widespread misconception is that permitting is just a bureaucratic hurdle rather than a critical safety and compliance measure. In reality, missing or misunderstanding permit requirements can cause delays, fines, or even invalidation of your project, as highlighted in a recent analysis by the National Association of Home Builders. Especially in complex projects like additions or custom builds, skipping detailed permit research can be a trap, leading to rework or legal issues.
Another myth involves estimating costs: many assume that standard square footage or rough quotes suffice for accurate budgets. However, without granular, itemized estimates—like those explained in our guide on estimating costs for new builds—you’re prone to unexpected expenses. Overlooking factors such as site-specific challenges, permit fees, or specialty materials can inflate budgets by 20-30%.
Advanced mistakes often stem from neglecting nuanced site conditions. For example, assuming a flat lot equates to a simple build disregards unique soil conditions or water table issues that affect foundation depth and materials. A site with a high water table, for instance, demands specialized waterproofing and foundation designs, as detailed in expert soil assessment reports. Failing to incorporate this complexity into estimates leads to underestimated budgets and structural risks.
Building on this, a common oversight in the realm of permits and estimates is underestimating the time needed for approval processes. While many think permits are a quick formality, several major cities now enforce extensive review periods, especially for projects involving slopes, historic districts, or environmental regulations. Streamlining permit acquisition—by understanding local requirements and leveraging expert guidance—can cut approval times significantly, as discussed in our article on streamlining permit acquisition.
For those venturing into new builds or additions, it’s vital to recognize that permits are not just about compliance—they’re integral to project success. An overlooked detail, such as requiring specialized inspections or understanding setback rules, can delay or invalidate your work. By approaching permits as an opportunity for review and quality assurance, you preempt problems later.
Consider also the role of accurate site measurements and soil testing in preventing costly errors. A real-world example: misjudging soil stability can lead to foundation failures, as soil reports recommended. Proper due diligence here, often underestimated by DIYers, can save thousands and prevent structural hazards.
In summary, debunking these myths requires a nuanced understanding of construction processes—view permits, estimates, and site conditions as interconnected components of a successful project rather than hurdles to overcome. Dive deeper into how to master these aspects in our expert tips on estimating and permitting guides. Have you ever fallen into this trap? Let me know in the comments.
Keeping It Working: My Go-To Tools and Techniques
Maintaining a successful build isn’t just about initial planning; it’s about implementing reliable methods and tools that stand the test of time. Over the years, I’ve honed a set of equipment and software solutions that have become indispensable for ensuring my projects stay on track and operate smoothly. For instance, I rely heavily on laser levels like the Leica DISTO D2 for precise measurements—this tiny device has saved countless hours by eliminating guesswork and reducing errors in layout and alignment. Similarly, I use drone surveying tools such as the DJI Phantom 4 RTK to capture aerial site data, providing an accurate topographical map that aids in long-term site management and future scaling considerations.
On the software side, I recommend using construction estimation platforms like Construction Edge’s estimating tools. These programs not only help generate detailed budgets but also track changes and predict costs over time, which is critical when planning for additions or permits. By integrating these digital tools, I’ve minimized surprises down the line and stayed aligned with project goals.
To keep everything operational, routine maintenance routines are essential. For any mechanical equipment—like compressors or scaffolding—I schedule weekly inspections, checking for wear and tear, lubrication needs, or debris buildup. This proactive approach prevents breakdowns that could delay a project and inflate costs. Additionally, creating a digital maintenance log with apps like Evernote ensures I track all service dates and parts replaced, simplifying repairs and future upgrades.
How do I maintain tools and methods over time?
Consistency is key. I set aside regular intervals—monthly or quarterly—to calibrate measurement tools and update software to their latest versions. Staying engaged with industry updates, such as new code requirements or technological innovations, helps me adapt and refine my practices. For example, I keep tabs on local permit regulations through resources like this regulatory guide. This ensures my project methods are compliant and up-to-date. Looking ahead, I believe the future will bring even smarter tools—like AI-driven site analysis—which will further streamline maintenance and scaling efforts. Starting to incorporate these technologies now could set you apart in managing complex builds efficiently.
If you haven’t already, try integrating a drone survey into your next project plan. It’s a game-changer for site management and will give you a comprehensive overview that static measurements can’t match. For detailed insights on long-term planning, check out this guide on adding value through smart construction.
Lessons That Changed My Approach
One of the most valuable insights I gained was that slopes demand respect and detailed planning. I used to think a simple grading would suffice, but discovering the intricacies of drainage and soil stability taught me that small oversights could snowball into significant issues, costing both time and money.
A vivid lightbulb moment was realizing that installing a retaining wall isn’t just about aesthetics—it’s about strategic engineering. Choosing the right materials and placement can prevent failures that threaten years of landscape work. This understanding was pivotal, transforming my approach from DIY improvisation to thoughtful design.
Another lesson was the importance of adaptive thinking when unexpected situations arise. During construction, discovering hidden underground water flows was daunting, but analyzing their patterns allowed me to design solutions that integrated seamlessly, rather than battling against Mother Nature. Flexibility coupled with knowledge proved essential.
Tools and Resources That Make the Difference
My go-to for precise measurements has been the Leica DISTO D2 laser level, which ensures accuracy without the fuss. Pairing this with drone mapping tools like the DJI Phantom 4 RTK provides a comprehensive view of my site—saving countless hours and reducing guesswork.
For planning and budgeting, I rely on construction estimation platforms such as Construction Edge’s estimating software. These tools have helped me align expectations and avoid surprises that can derail even well-intentioned projects.
A reference that shifted my entire outlook is the guide on adding value through expert home additions. It emphasizes the importance of integrating permits early, designing for future expansion, and managing costs wisely—principles I now incorporate into every project, big or small.
Inspiring Action: Transform Your Sloped Land Today
Don’t let the challenges of uneven terrain discourage you. With the right planning, tools, and mindset, even the most daunting hillside can become a stunning, functional part of your outdoor space. Remember, every slope is an opportunity waiting to be harnessed, not a problem to hide. Start by assessing your land carefully, and use what you’ve learned here to turn your backyard into a masterpiece of stability and beauty.
What questions do you have about turning your sloped backyard into a durable haven? Share your experiences below—I’d love to hear how your projects unfold!