How to Check Your Zoning District for Home Business Additions
It was a frustrating Saturday afternoon when I realized my plans for a backyard home office were hitting a wall—literally. I had spent months dreaming about turning that neglected shed into a productive workspace, only to find out I was on the wrong side of local zoning laws. That lightbulb moment made me realize something crucial: the importance of knowing your zoning district before breaking ground. If you’ve ever faced a similar surprise—be it delays, fines, or redesigns—you know the sinking feeling that comes with realizing you jumped the gun.
The First Step to Home Addition Success Begins With Your Zoning Map
Navigating local zoning rules can feel like deciphering an ancient script. But trust me, the effort is *absolutely worth it*. Ensuring that your proposed addition aligns with your zoning district is the foundation for a smooth project. I learned this the hard way early on, by rushing to get permits without verifying district restrictions. That mistake cost me valuable time and dollars—something I definitely don’t want you to repeat. Today, we’ll walk through the key steps to accurately check your zoning district, so your home addition can move forward without unnecessary roadblocks.
Seek Your Local Zoning Map with Precision
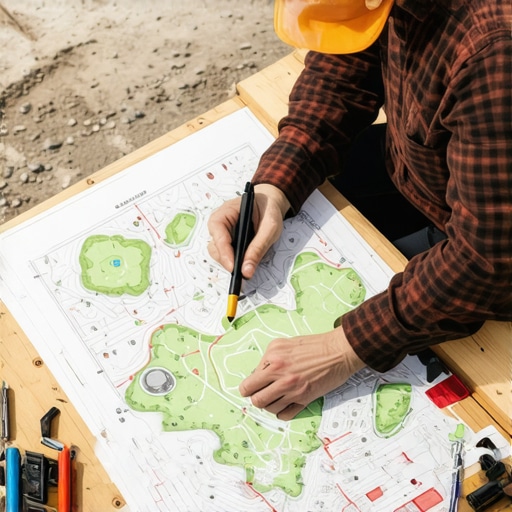
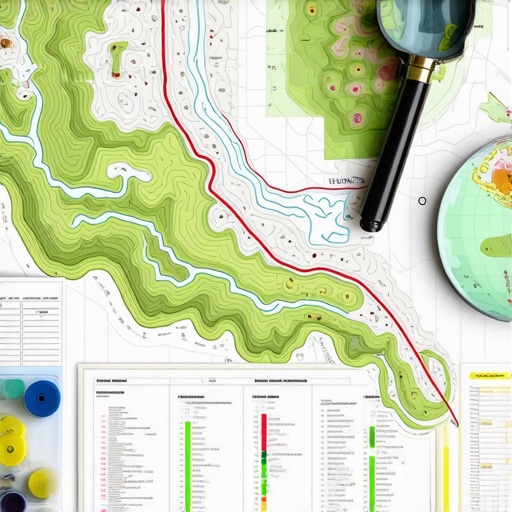
Start by locating your municipality’s official zoning map, often available on the city or county website. Use this digital resource much like an online GPS—enter your address, zoom in, and pinpoint your property boundary. During my own project, I downloaded my city’s GIS data, which displayed color-coded zones. Initially, I thought my property fell into a single zone, but upon closer inspection, I realized a design error—this misstep costed me two weeks of redesigns. To avoid this, double-check whether your property sits near zone boundaries and note any overlay districts that might impose additional restrictions.
Decode the Zoning Code to Understand Restrictions
Once you’ve identified your zone, dive into the local zoning ordinance. These documents act like a rulebook—defining setback distances, height limits, and land use allowances. Navigating these codes can feel like learning a new language. In my case, I found a section specifically about accessory structures, which clarified that my planned shed had height restrictions I wasn’t aware of. Carefully review these restrictions, and if unclear, consider requesting clarification from local planning staff—this step saves time and prevents costly violations later.
Verify Zoning Compatibility for Your Plans
Compare your project intentions with the permitted uses in your zoning district. For instance, if you plan a two-story addition, ensure your zone allows for such height and footprint. Think of your zoning district as a terrain map—some areas are open plains, others dense forests. In my experience, I once proposed a porch addition in a zone originally thought to be residential but, in fact, designated as a conservation area. This oversight would have derailed my permit process. To cross-verify, use the zoning map alongside the ordinance, or consult a zoning professional—many companies, like Construction Edgez, offer expert guidance on this.
Use Local Resources to Clarify Ambiguous Zones
If your property’s zone is unclear or complex, contact your local planning department directly. Agencies often provide GIS specialists or planning officials who can interpret maps and ordinances for you—think of them as your project’s GPS satellite. In one case, I called my city’s zoning office, and after a brief discussion, I learned my property was in a special overlay district requiring additional setback approvals. This knowledge informed my design approach upfront, preventing delays.
Plan Accordingly to Prevent Future Delays
After confirming your zoning district, incorporate this information into your project timeline and budget. Recognize restrictions early, much like a builder selecting materials compatible with local weather—it’s about proactive planning. This foresight helped me avoid work stoppages and hefty redesign fees. Remember, neglecting this step often results in a domino effect—delays, fines, and redesigns that could have been prevented with due diligence.
Trust Your Data and Document Findings
Keep a record of all zoning maps, ordinance sections, and correspondence with planning officials. These documents serve as your proof of compliance in case of inspections or disputes. During my initial project phase, I saved screenshots and official documents, which later proved invaluable when clarifying permit requirements. This level of organization can be the difference between a smooth approval process and a prolonged legal scramble.
Many homeowners believe that estimating project costs, securing permits, or planning new builds is straightforward—just gather your quotes, submit paperwork, and start digging. However, this oversimplification often leads to costly mistakes. The truth is, most people overlook key nuances that can make or break a project. For example, relying solely on initial quotes without understanding the scope or hidden charges can leave you with surprises on your bill. As an experienced builder, I’ve seen countless projects falter because of overlooked details or assumptions that seem minor but turn out to be major hurdles.
Why Do Most Homeowners Get Permitting and Estimation Wrong All the Time?
It’s tempting to think that permits are just a formality, or that estimates are set in stone. But in reality, permits often come with fine print—additional inspections, delayed approvals, or specific restrictions—that can delay or alter your plans significantly. Similarly, initial cost estimates tend to omit hidden costs like utility upgrades or site-specific challenges. A common myth is that the lowest bid is always the best; in my experience, that can lead to cutting corners or missing critical scope items, which become costly later on. To avoid this, you need to deepen your understanding of permit processes and estimation strategies. Check out detailed guides like this step-by-step estimation guide for a comprehensive approach.
Imperfect estimation can also stem from misjudging site conditions or material requirements. For example, a homeowner might underestimate foundation reinforcement costs after discovering underground rocks or utility lines that require rerouting. These surprises can considerably inflate your budget if not accounted for beforehand. Many professionals recommend proactive site assessments, like detailed soil testing or utility surveys, to mitigate these risks.
Advanced homeowners and planners ask: How can I accurately account for potential hidden costs before they hit me? The answer is to integrate contingency allowances into your planning. Industry experts suggest allocating at least 10-15% of your project budget for unforeseen issues—this buffer can save you from massive headaches. To get a solid starting point, see this resource on estimating costs.
Another crucial but often overlooked aspect is understanding local codes and regulations beyond just the permit process. Some restrictions, like easements, setbacks, or historical preservation laws, might not be explicitly covered in initial planning. Missing these can lead to project delays or redesigns. Consulting with local planning officials early can help reveal these nuances. In my experience, a simple site visit or conversation can uncover valuable insights—never underestimate the power of local expertise.
In summary, let’s debunk the common misconception that permits and estimates are just bureaucratic hurdles. Instead, view them as integral parts of your project planning—integrating deep knowledge and proactive steps will save you time, money, and headaches down the line. Want to master this art? Explore this guide on new-build estimation strategies and take control of your project. Remember, every mistake avoided is a step closer to your dream home. Have you ever fallen into this trap? Let me know in the comments.
Invest in the Right Equipment for Long-Term Success
Maintaining your home addition projects requires more than just good planning; it hinges on having dependable tools that can handle the task consistently. I personally rely on a high-quality cordless drill like the DeWalt DCD991P2 because its brushless motor offers longevity and power without cord restrictions, crucial for tight spaces and extended use. For measuring and leveling, I prefer a Bosch GSL 2 Professional Line Laser; its precision within 1/8 inch over 30 feet has saved me countless troubleshooting hours, especially when aligning walls and fixtures. Choosing the right tools isn’t just about quality—it’s about matching their capabilities to your project’s specific demands.
Establish a Routine for Equipment Maintenance
Regular upkeep extends tool life and ensures safety during operation. My routine includes cleaning blades and bits after every use and lubricating moving parts bi-weekly. For power tools, I schedule monthly inspections to check for loose wiring or worn batteries, replacing parts proactively. This approach reduces unexpected breakdowns—saving both time and money. Remember, neglecting maintenance can lead to costly repairs or replacements, derailing your project timelines. To stay ahead, I recommend journaling your maintenance schedule or using digital reminders, which can help track service intervals efficiently.
Harness Technology to Track Progress and Costs
Managing multiple tools and phases is easier with project management software like Construction Edgez’s planning tools. These platforms help you record tool inventories, maintenance logs, and project milestones. For example, I log every tool check-in and check-out, so I know precisely when a tool was last serviced or replaced—minimizing downtime. As projects grow, scaling your tracking system ensures you maintain control over resources and costs. Embracing such technology can be a game-changer, making the difference between a chaotic process and a streamlined effort.
How do I maintain tools over time?
Keeping your tools in prime condition demands discipline and knowledge. Always use recommended cleaning agents; for example, Avoid harsh solvents on plastic parts—mounting deterioration can set in quickly. Store tools in a dry, organized space, ideally in a dedicated toolbox or climate-controlled storage, to prevent rust and electrical issues. Periodically professional servicing, especially for larger equipment like compressors or generators, maintains their efficiency and safety. Over time, I’ve learned that investing in quality storage and adhering to manufacturer maintenance guidelines—such as those detailed in official manuals—extends the lifespan of critical equipment. Establishing this routine doesn’t just protect your investment; it ensures that your tools are ready when you need them most.
Predicting Future Trends in Tool Technology
As technology advances, automation and smart tools are becoming mainstream, promising even greater efficiency. Think autonomous laser levels and AI-powered measurement devices that sync with your smartphone—these innovations will streamline setup and minimize human error. Keeping an eye on developments like cutting-edge construction tech can give you a competitive edge. I recommend early adoption of proven smart tools—testing them within your workflow can uncover invaluable time-saving features. Embracing these trends today sets you up for long-term success in an evolving project landscape.
Take the challenge and try implementing a preventative maintenance schedule for at least your most-used power tools this month. Not only will this improve their performance, but it will also extend their service life—saving you money and hassle over time.
The Hardest Lesson I Learned About Additions, Permits, Estimating, and New Builds
One profound realization was that rushing through permit verification or not dedicating enough time to accurate estimation could turn a dream project into a legal or financial nightmare. I once underestimated the importance of boundary easements, which led to costly redesigns. The biggest lesson? Proactivity saves a lot of headaches—know your restrictions inside out before breaking ground.
3 Myths About Home Additions and Permitting That Held Me Back
Initially, I believed permits were a simple paperwork hurdle, and all estimates were set in stone. Both assumptions proved false. I learned permits often involve unexpected inspections, and estimates can hide hidden costs—understanding this helped me plan better and avoid surprises. Questioning these myths was crucial to my success.
What Experts Won’t Tell You About Estimating and Building Your Home Addition
Many professionals keep quiet about the hidden costs—like utility upgrades or site-specific challenges—that can inflate budgets. They also know that integrating contingency allowances—at least 10-15%—can safeguard against unforeseen issues. Trusting insider insights made my planning more resilient and realistic.
My Essential Toolkit for Precise Planning
I rely heavily on reputable tools such as Construction Edgez’s estimation guides for accurate budgeting, as well as local GIS maps for zoning verification. These resources are trustworthy because they combine expert knowledge with real-world data, helping me avoid costly mistakes.
Where to Go from Here
If you’re serious about transforming your space intelligently, invest time in understanding your zoning restrictions and detailed estimates. Use trusted resources, communicate proactively with local officials, and always keep records of your findings. These steps turn your project from a gamble into a well-planned journey—helping you avoid common pitfalls and achieving your home dreams efficiently.
Your Turn to Try
Embarking on a home addition or renovation can be overwhelming, but with the right knowledge and tools, you’re well-equipped to succeed. Remember, every precaution you take now sets the foundation for smooth sailing ahead. Don’t wait for surprises—start smart today and turn your vision into reality.
Have you ever encountered unexpected permit issues or underestimated costs in your projects? Share your experiences below and let’s learn together.