The Staircase Riser Error That Kills Your Permit Approval
Ever experienced that cold sense of dread when your permit application hits a snag over something as seemingly minor as staircase riser heights? I remember my first project; I was confident, ready to transform my basement, only to be halted by an unexpected permit rejection. The inspector pointed out that my riser heights didn’t meet local code—something I overlooked in my haste to finish the design. That moment was a lightbulb, reminding me how tiny details can cause big delays.
The Hidden Danger of Improper Stair Riser Heights
When it comes to building permits, attention to detail isn’t just recommended—it’s essential. One of the most overlooked pitfalls is ensuring your staircase riser heights are within code specifications. Failing to get this right can lead to permit denial, schedule delays, and added costs. Why does this small measurement make such a difference? Because building codes are designed to ensure safety and uniformity, preventing trips and falls. A riser that’s too tall or too short can be a hazard, and inspectors are quick to reject plans that ignore these standards. According to the building code authorities, non-compliance with stair riser heights is among the top reasons for permit rejection.
Early in my journey, I made the mistake of assuming all stair steps were created equal. I used a generic measurement from an online guide without cross-checking local amendments. The fallout was a drawn-out process of re-evaluations and revisions. That experience taught me the importance of understanding the specific requirements for your area—and how a detail as simple as riser height can make or break your permit approval.
Are you worried your staircase plans might fall into this trap? If so, you’re not alone. Many homeowners and builders overlook this statutory detail, only to face setbacks down the line. Luckily, once you know what to look for, adjustments are straightforward. In the upcoming sections, I’ll walk you through the practical steps to ensure your staircase design complies with local codes, helping you avoid delays and get your project off the ground smoothly.
Measure Precisely from the Start
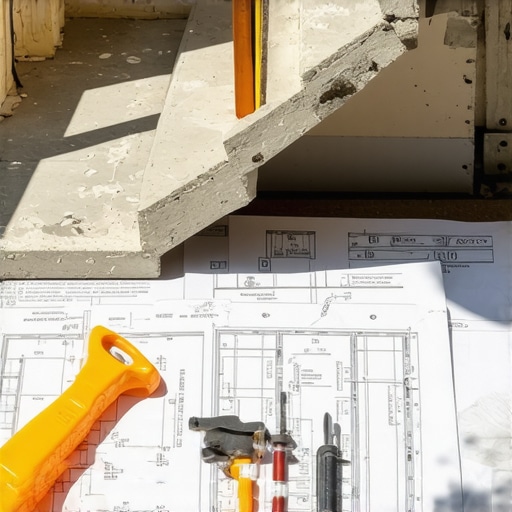
During my second build, I decided to double-check all stair riser measurements before submitting my plans. Using a reliable digital caliper, I measured the actual riser heights on an existing staircase, noting the difference from my preliminary design. This step helped me spot discrepancies early, preventing costly revisions later. Always refer to your local code’s maximum and minimum riser heights, and verify measurements on-site to ensure accuracy.
Consult Your Local Building Codes
In my case, I visited the permits guide to review specific requirements for riser heights. Local regulations can vary significantly, influenced by climate, safety standards, and regional preferences. I recommend downloading the latest code documents, noting any recent amendments, and cross-referencing them with your design plans. This reduces the risk of non-compliance during review.
Design with Flexibility for Adjustments
When drafting your staircase plans, include slight margins above the minimum and below the maximum riser heights allowed. I once designed my stairs with flexibility—adding adjustable templates during framing—which allowed me to fine-tune riser heights on-site. This approach minimizes the need for rework or plan revisions, streamlining the permit process. Remember, even minor variations can trigger inspections or rejections if outside code parameters.
Use Accurate Planning Tools
Invest in digital modeling or CAD software that integrates code compliance checks. In my project, I used a tool that flagged any dimension outside prescribed ranges, instantly alerting me to potential issues. This preemptive check saves time compared to waiting for inspector feedback. For home builders, such software can be a game-changer, providing clarity and confidence before submission.
Document Every Measurement and Adjustment
Keep detailed records of all measurements, adjustments, and communications. During my project, I maintained a log with date-stamped photos and notes. When discrepancies occurred, I had clear documentation showing my adherence to standards, which proved invaluable during inspections. Consistent documentation reduces disputes and provides a trail demonstrating your commitment to compliance.
Coordinate with Inspectors Early
Reach out to your local building department head or inspector before finalizing plans. I scheduled a quick consultation, sharing preliminary drawings, and received direct feedback about riser height expectations. Early engagement clarifies ambiguities, saves time, and often expedites approval. Plus, inspectors appreciate proactive communication, which fosters cooperation.
Adjust and Re-verify Before Submission
After making modifications based on local codes and site conditions, perform a final on-site measurement. I used a tape measure and a level to double-check riser heights across multiple stairs, ensuring uniformity. Variations as small as 1/16 inch can matter; consistent measurements prevent inspection delays and rejections.
Learn from Practical Experience
My first project faced delays because I underestimated the importance of on-site verification. Once I adopted these meticulous steps—measuring carefully, consulting codes, and documenting—I saw a marked improvement in permit approval times. Applying these concrete methods transforms a daunting process into a manageable one, helping you stay compliant and on schedule.
Many enthusiastic homeowners and even seasoned contractors often wrap their heads around the basics of new construction and permits, but there’s a sneaky layer of nuance that frequently goes unnoticed. Everyone talks about getting permits early or accurately estimating costs, yet few realize the subtle pitfalls lurking in the process that can derail projects if overlooked. Let’s dig deeper into what most get wrong and how to prevent costly mistakes.
One common myth is that following the standard code requirements guarantees smooth approval. In reality, local jurisdictions often have unique amendments or additional standards that aren’t widely circulated. For instance, a study by estimating experts emphasizes that failing to cross-verify local amendments can lead to rejected permits, extra inspections, or project delays. Relying solely on generic code templates sets you up for surprises, especially when regional climate or soil conditions impose different requirements.
Another overlooked aspect is the importance of granular estimating. Many estimate based on broad figures—cost per square foot, for example—without considering hidden variables like site-specific access issues or material shortages. This oversight can cause budget overruns and underfunded change orders mid-project. The top strategies suggest detailed, itemized estimating and even building contingency buffers into your budget for unexpected costs.
But what about the permit process itself? Here’s the twist—most assume permits are just a bureaucratic hurdle to be completed before construction begins. In reality, the permit process can be a diagnostic tool revealing underlying project risks. For example, delays or rejections often stem from incomplete or inaccurate documentation, which might seem minor but can halt your project for weeks. Advanced builders advocate for proactive communication with inspectors and even pre-application consultations. This step, which is often skipped, ensures your submission aligns precisely with local expectations, reducing the risk of rework.
An area often misunderstood is the relationship between estimating and permit documentation. A detailed set of plans with precise measurements and specifications not only speeds up the permitting but also minimizes adjustments during review, which can be costly. When plans lack clarity, reviews become drawn out, and inspectors may require multiple revisions, delaying approvals and increasing fees. Therefore, investing in high-quality, well-documented plans pays off in the longer run.
Furthermore, a subtle trap lies in overlooking the influence of neighborhood or zoning overlays. You might have a permit approved based on initial understanding, but if you fail to check overlays for setbacks, height restrictions, or special use permits, you risk violating regulations. This oversight can lead to expensive modifications or even demolition orders. It’s advisable to perform thorough due diligence, consulting with local planning departments or using tools like property boundary maps—something many skip.
Finally, a critical insight for the advanced builder involves recognizing that permit approval is just the beginning. Once permits are in hand, many focus solely on construction and ignore ongoing compliance, such as inspections during different phases, which if missed, can result in fines or needing to redo work.
Have you ever fallen into this trap? Let me know in the comments. Navigating these nuances requires vigilance and knowledge, but understanding them puts you ahead in your project planning and execution. For comprehensive insights on streamlining your process, check out Managing Additions and similar guides.Maintaining efficiency during your construction projects relies heavily on the right equipment and software. I personally rely on *AutoCAD* for precise planning, enabling me to visualize every detail before breaking ground, which minimizes costly revisions later. For site measurements, I swear by the *Leica Disto* laser distance meter; its accuracy and speed save me hours during initial assessments and ensure compliance with code-specific measurements like riser heights. Additionally, integrating *Procore* into project management streamlines communication among all stakeholders and keeps documentation organized, ensuring every measurement, adjustment, and permit detail is logged and accessible. For fabricating custom components, I use *SketchUp* as a quick, intuitive modeling tool, especially handy when visualizing additions or modifications before construction begins. Looking ahead, I believe these tools will evolve with AI integration, further optimizing project workflows, reducing errors, and accelerating approval timelines. How do I maintain these tools over time? Regular calibration of measurement devices like the Leica Disto and software updates for programs like AutoCAD and Procore are essential to maintain their accuracy and efficiency. I make a quarterly schedule to review calibration standards and update my software licenses, which guarantees I’m always working with the latest features and compliance checks. Investing in training sessions for these tools also pays off—training ensures you utilize advanced features, further enhancing productivity and reducing errors. For example, mastering the new 3D modeling features in SketchUp has allowed me to catch potential code conflicts early, avoiding costly modifications during inspections. If you haven’t already adopted these advanced tools, I strongly recommend starting with AutoCAD’s recent AI-assisted drawing suggestions—they can help anticipate compliance issues before submitting plans, saving precious time. To stay ahead, I also keep a close eye on updates from industry leaders like the *International Code Council* to stay informed about evolving standards, ensuring your tools and practices align with current codes. Learn more about streamlining permit acquisition and how it complements the use of these tools. Remember, embracing and properly maintaining these technologies is a long-term investment that will pay dividends in smoother permitting processes, fewer mistakes, and faster project completion. So, take a moment to audit your equipment, schedule regular updates, and invest in training—your future projects will thank you.
What I Wish I Had Known About Tiny Details Early On
One eye-opening lesson was realizing how small measurements, like riser heights, could make or break my permit approval. Focusing on every detail from the start, rather than rushing through preliminary plans, saved me from costly reworks and delays. It’s a reminder that in construction, precision in the little things often leads to big successes.
Another revelation was the importance of cross-verifying local amendments to building codes. Relying solely on generic standards can leave you vulnerable to surprises during inspections. Staying proactive and consulting local authorities early helped me navigate complex zoning overlays and avoided unexpected setbacks.
I also learned that combining reliable design tools with on-site measurements creates a safety net. Using digital calipers alongside modeling software allowed me to anticipate compliance issues before submitting plans, streamlining the process remarkably.
My Essential Resources for Building Success
AutoCAD has been indispensable for creating detailed, code-compliant plans. Its ability to simulate real-world scenarios means fewer surprises during inspections. Leica Disto laser measures provide quick, accurate site measurements, saving hours and ensuring compliance with strict standards.
In addition, the ConstructionEdgeZ guide on understanding permit processes offers a wealth of insights tailored to specific local regulations, helping me avoid common pitfalls. Finally, Procore has kept communication transparent and documentation organized, which is crucial for smooth project progression.
Your Next Step—Embrace the Challenge
Building a project from scratch involves navigating a maze of regulations and details, but with the right mindset and tools, it becomes an empowering experience. Every project is a chance to learn, improve, and create something meaningful. Don’t let hidden pitfalls deter you—approach each detail with curiosity and confidence, knowing you’re building not just structures, but your expertise.
Have you ever overlooked a tiny detail that caused a major delay? Share your story below—your experience might help someone else avoid the same mistake.