The Garage Firewall Mistake That Inspectors Never Ignore
I vividly remember the moment I almost failed an inspection because I overlooked a tiny detail that seemed insignificant at the time—the garage firewall gap. It was a blazing hot day, and I was rushing to wrap up a new build project, confident that I’d dotted all the i’s and crossed all the t’s. But then, during the final walkthrough, the inspector pointed out something I’d completely missed: a small, unsealed gap where the garage wall met the attic, compromising fire separation. That lightbulb moment hit hard. I realized that even the most minor oversight like that could cause major delays or costly rework.
The Garage Firewall Mistake That Can Cost You Big
In my early days, I believed once I had the permits and plans in hand, I was good to go. Turns out, one little mistake in firewall installation can trip up your entire project. Inspectors know this trick and never overlook these gaps or unsealed penetrations that compromise fire barriers. Why? Because fire safety isn’t just a box to check—it’s a matter of life safety and legal compliance. Overlooking such details can lead to project delays, increased costs, or worse, safety hazards.
But don’t worry—I promise that today, I’ll share how to spot and avoid this common pitfall. It’s a mistake I made early on, and learning to identify this issue has saved me countless headaches. If you’ve ever faced delays or re-inspections, this could be the game-changer you need.
Is Your Garage Firewall Actually Safe or Just Looks Good?
Many folks assume that as long as they follow the general fire code guidelines, they’re safe. The truth is, inspectors are trained to look for tiny gaps or unsealed penetrations that can nullify the firewall’s effectiveness. Early in my career, I underestimated the importance of sealing every joint and penetration, thinking a simple sealant or drywall patch would suffice. That was a costly mistake. It’s crucial to understand that fire-rated assemblies require meticulous detailing—something I now emphasize to all my clients.
For comprehensive insights, you might want to look into detailed permit requirements or common pitfalls, which can be found in resources like [The Complete Guide to Permitting for New Builds and Additions](https://constructionedgez.com/the-complete-guide-to-permitting-for-new-builds-and-additions). Building awareness about these details is essential because, as per the National Fire Protection Association, fire barriers are only as good as their weakest seal or connection.
In the following sections, I will guide you through practical steps to identify, seal, and verify your garage firewall, making sure it holds up under inspection and keeps the structure safe. But first, let’s talk about why this tiny gap is often overlooked and how you can prevent it from happening in your project.
Prep the Firewall Area Before Final Inspection
Start by thoroughly inspecting the entire garage firewall, paying close attention to all joints, seams, and penetrations. Use a bright flashlight and a mirror to spot tiny gaps or unsealed openings that could compromise fire safety. During my last project, I caught a small gap behind the attic access panel that would have been overlooked—sealing it immediately saved me a re-inspection.
Identify All Penetrations and Gaps
Map out every place the firewall intersects with wires, pipes, or structural elements. Use a checklist based on local code requirements or refer to this comprehensive permit guide to ensure nothing is missed.
Place masking tape around each penetration to mark areas needing sealing. This process helps prevent accidental unsealed spots during subsequent steps.
Seal Penetrations Methodically
Apply fire-rated caulk or sealant specifically designed for fire barriers—these are critical to maintaining the firewall’s integrity. For bigger gaps or penetrations, use firestop putty or expanding foam rated for fire resistance, ensuring it fills all voids completely. I recall a case where a small gap around conduit fittings was left unsealed; sealing it with intumescent caulk prevented the entire firewall from failing inspection.
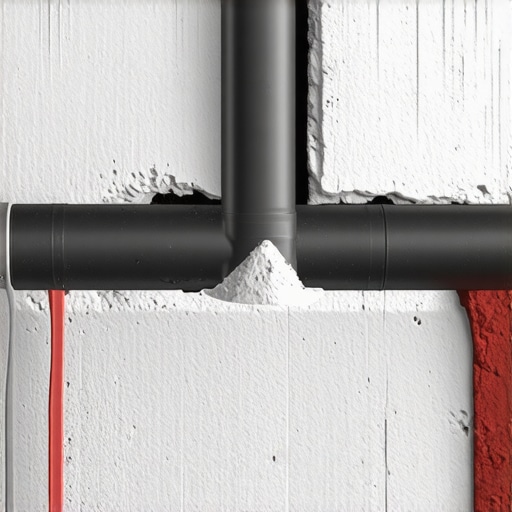
Double-Check Sealed Areas
After sealing, use a flashlight and visual inspection to verify all gaps are adequately filled. Light should not pass through any sealed joint. For additional confidence, perform a smoke test by gently blowing non-toxic smoke near seams; absence of smoke passage confirms proper sealing.
Remember, inspectors are trained to look for even the tiniest unsealed punctures or cracks. Missing them can cause delays or rework, so meticulous double-checking is essential. I learned this firsthand when an inspector caught a nearly invisible crack near the ceiling joint—I sealed it with intumescent sealant, and the project moved forward smoothly.
Verify with Local Code Compliance
Ensure your sealing methods align with local fire safety codes. Some jurisdictions require specific types of sealants or fire-resistant drywall lining over penetrations. Consult permit resources or local fire department guidelines to confirm.
Document your sealing process with photos and a detailed checklist. This documentation not only helps during final inspection but also provides a record of compliance should questions arise later.
Coordinate Final Walkthrough with Inspectors
Before the official inspection, arrange a pre-inspection walk with your local authority or a qualified inspector. This proactive step allows you to address any overlooked details, which I experienced firsthand when a quick review revealed a forgotten sealant around the garage door opening—quickly rectified, resulting in approval.
Applying these precise, methodical steps transforms a potentially risky oversight into a non-issue during inspections. Remember, the devil is in the details, and taking the time to seal every gap thoroughly can make the difference between a smooth approval and costly delays.Many builders and homeowners rely on surface-level estimates and permits, assuming that standard practices and local codes cover all bases. However, the reality is more nuanced. One common myth is that adding contingency funds to your estimate is enough to cover unforeseen expenses. In fact, seasoned estimators know that this approach often masks deeper inaccuracies and can lead to significant overruns. Accurate estimation requires granular, item-by-item analysis, considering factors like regional material price fluctuations and labor availability, which are often overlooked in DIY or inexperienced estimates. For instance, a study by the Construction Industry Institute highlights that detailed, activity-based estimating methods reduce inaccuracies by up to 30%, emphasizing the importance of precision over assumptions.
Achieving accuracy in estimating, permits, and long-term project management isn’t just about initial planning—it’s about having the right tools and routines in place to ensure ongoing success. One indispensable tool I rely on is BuildSoft, a comprehensive estimation software that allows me to input detailed material costs, labor hours, and regional price adjustments. It helps prevent the common pitfall of underestimating expenses and ensures my budgets are resilient over time. I personally set up custom templates within BuildSoft for different project types, enabling quick adjustments and real-time updates, which I find invaluable during scope changes or unforeseen site conditions. In the future, I predict that AI-integrated estimation tools will further reduce errors by learning from past projects, making long-term accuracy even more attainable.
Explain Why I Use Specific Equipment and Software
For example, I use top estimation strategies to refine my budget calculations. These strategies emphasize detailed activity-based costing, which I implement in BuildSoft to break down tasks into granular components. This level of detail catches potential oversights early, saving time and money down the line.
How Do I Maintain Projects Over Time?
Regular review sessions, at least monthly, are essential. I keep a dedicated field journal and digital logs where I track progress, note deviations from the plan, and update estimates based on recent actuals. This disciplined approach ensures that my estimates stay current, helping me avoid surprises when it’s time for permits or scale adjustments. As I often advise, incorporating efficient management practices into your routine can significantly enhance long-term project health.
What About Scaling or Adding New Build Elements?
Scaling requires flexible tools capable of adjusting estimates and schedules dynamically. I recommend using project management platforms like Procore, which integrate with estimating software, permitting seamless updates. When planning additions, consult the latest permit requirements to avoid delays—resources like this guide can be instrumental. Remember, detailed documentation and regular compliance checks are key to scaling successfully without eroding your project’s integrity.
Start implementing these specific tools and routines today, and you’ll create a more resilient, accurate, and efficient workflow that stands the test of time and scale. For tailored advice or to discuss your specific project, visit our contact page.

Beyond permits and plans, the crucial details of fire safety often hide in plain sight—like the tiny unsealed gap I once overlooked in a garage firewall. That drop of sealant and keen inspection saved me from costly rework and potential safety hazards, reminding me that meticulous attention to every detail is vital in construction projects. Whether sealing penetrations or verifying code compliance, understanding these small but impactful elements elevates your craftsmanship and peace of mind.
Lessons That Changed My Approach to Estimating and Permitting
- Minor Details Have Major Impacts: I underestimated the importance of sealing tiny gaps early in my career, leading to re-inspections and delays. Now, I inspect every joint and penetration, understanding that fire safety hinges on these details.
- Continuous Education Is Non-Negotiable: Common myths, like assuming standard sealants suffice, can be costly. Deepening my knowledge through resources like comprehensive permit guides ensures I stay ahead of code changes and inspector expectations.
- Double-Checking Isn’t Overkill—It’s Essential: Visual inspections combined with light and smoke tests help verify integrity. My experience taught me that a second look often uncovers overlooked flaws, avoiding future setbacks.
- Documentation Protects You: Recording sealing procedures and inspections helps during final review, proving compliance and preventing disputes. This habit fosters professionalism and accountability in every project.
Tools and Ideas That Bolster Fire Safety and Project Success
- Fire-Resistant Sealants and Putty: Just like I utilize high-quality fire-rated caulk for penetrations, staying updated with top estimating strategies can inform better material choices and budgeting.
- Checklists and Visual Guides: Custom checklists for sealing and inspection help me stay systematic. Combining these with resources such as latest permit requirements keeps my projects compliant.
- Regular Site Walks and Pre-Inspections: Pre-progress reviews with inspectors catch issues early. My proactive approach minimizes surprises and builds confidence, much like preparing for a successful permit approval.
- Personalized Documentation Systems: Digital logs and photo records form a reliable archive. They’re invaluable when verifying that every seal and sealant meets fire safety standards and permits.
Seize the Chance to Elevate Your Craft and Safety
Getting the details right in estimating, permitting, and especially fire safety isn’t just about ticking boxes—it’s about building trust, safety, and efficiency into every project. I encourage you to examine the small elements with the same rigor I learned from sealing a tiny wall gap, because those are the steps that turn good projects into great ones. Remember, continuous learning and attention to detail pay off in quality and peace of mind. If you’re ready to refine your process further or share your experiences, I’d love to hear your stories—drop a comment below and let’s grow together in mastery.