Why Your Attic Conversion Might Require a Floor Joist Upgrade
There was a weekend when I climbed into my attic, expecting to breathe in some fresh insulation dust and perhaps find a forgotten box of holiday decorations. Instead, I was met with a creaking floor and a sudden realization—that my old, worn-out floor joists might not be up to the task of supporting a full attic conversion. That lightbulb moment made me question everything I thought I knew about remodeling projects. Why was I ignoring the most critical part of the structural puzzle?
Why Ignoring Floor Joist Strength Could Cost You Big Time
It’s a common oversight among homeowners dreaming of turning their attic into a functional space. Many jump straight into insulation, drywall, or even wiring, without giving a second thought to the foundation underneath. But if your floor joists are inadequate, it doesn’t matter how beautiful your new room looks; it could end up being unsafe or even unusable.
Upgrading floor joists isn’t just about avoiding squeaks or sagging floors; it’s about ensuring safety, structural integrity, and compliance with local building codes. A weak floor can lead to uneven flooring, expensive repairs down the line, or worse, safety hazards. Early on, I made the mistake of assuming my home’s existing joists would handle the extra load—an assumption that could have turned disastrous.
What You’ll Learn Today
In this post, I’ll walk you through how to identify whether your attic’s floor framing needs an upgrade, and what steps are involved in reinforcing or replacing those vital beams. I’ll also share tips to help you avoid common pitfalls and ensure your project proceeds smoothly. If you’re considering an attic conversion, this is one area you can’t afford to overlook—trust me, I learned it the hard way.
So, have you already faced this problem? Or are you just starting to plan your attic transformation? Either way, understanding the importance of a solid floor foundation can save you a mountain of trouble. For more insights on estimating home improvements accurately, check out this comprehensive guide.
How to Recognize If Your Floor Joists Need Reinforcement
Assessing Your Existing Floor Joists
Begin by measuring the span, depth, and spacing of your current joists. Use a tape measure and a level to check for sagging or unevenness. For example, I once took detailed measurements in my attic and discovered that my joists spanned 12 feet with a depth of 2×6 inches, spaced 16 inches apart, which was borderline for supporting an extra load. Document these measurements meticulously—it will be vital for planning reinforcement.
How to Identify Weak Points
Look for visible signs of damage such as cracks, rot, or insect damage. Tap the joists with a hammer; hollow sounds indicate deterioration. During my inspection, I found some joists with signs of rot near the ends, which required immediate attention. Don’t forget to check the connectors and ledger boards for corrosion or looseness.
Planning Reinforcement Strategies
Effective reinforcement options include sistering joists or installing additional support beams. Sistering involves attaching a new, engineered lumber piece alongside the existing joist to effectively double its capacity. I chose to sister the weakest joists with 2×10 lumber, bolted securely every 24 inches. Make sure to consult local building codes; your county’s permit requirements might specify minimum sizes and fastening methods, which you can verify at permit guidelines.
Choosing the Right Materials
Use dimensional lumber appropriate for your load calculations—typically No. 2 or better grade. For added strength, consider engineered wood products like LVL or LSL beams. During my project, I opted for pressure-treated Southern Yellow Pine, which provided both strength and durability. When selecting materials, compare prices and specifications carefully to avoid overpaying or under-specifying.
Executing Reinforcement Safely and Efficiently
Start by supporting the existing load with temporary shoring—props or adjustable steel jacks. This prevents accidental collapse during work. For sistering, align the new lumber directly over the original joist, and secure with high-strength galvanized bolts or screws every 16 inches. I used a cordless impact driver for efficiency. Always wear appropriate safety gear and verify your work with a level to ensure flatness.
Securing Permits and Ensuring Code Compliance
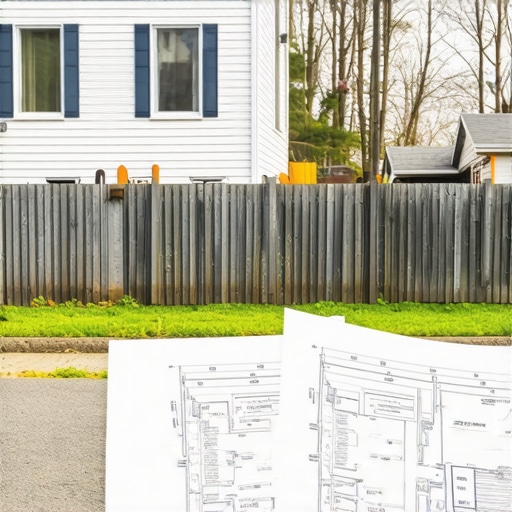
Before beginning, obtain your home improvement permit to stay compliant. Engage with your local building department early; they can provide specific requirements for your reinforcement methods. For my attic project, I submitted detailed plans and framing diagrams, which sped up approval. Learning how to navigate permit processes can save you from costly rework and delays. Visit this guide for tips on simplifying permit approvals.
Final Inspection and Load Testing
Once reinforced, verify the joist strength through visual inspection and, if necessary, load testing. You can simulate weight by walking on the floor with a load equal to anticipated future furnishings. During my inspection, I noticed some unevenness after sistering; I adjusted the supports accordingly. This step confirms your work ensures safety and durability for years to come.
Incorporating these detailed steps ensures your attic’s structural foundation is solid before adding finishing touches. Remember, a well-executed reinforcement plan not only protects your investment but also keeps your family safe for generations.
Many homeowners and even seasoned contractors share the misconception that estimating new builds and additions is simply about summing material prices and labor hours. However, this oversimplification can lead to significant budget overruns or permit delays. A common myth is that adding a contingency fee suffices for unforeseen expenses, but in reality, the intricacies of permitting and site-specific challenges demand a more nuanced approach. Failing to account for variables like site accessibility, zoning nuances, or hidden fees can turn a smooth project into a costly nightmare.
Another trap many fall into involves underestimating the time and resources required for permit approval. While some believe permits are just bureaucratic hurdles, expert insights reveal that understanding and navigating permit nuances can accelerate your project timeline if approached correctly. For instance, factors such as soil condition reports, environmental reviews, or neighbor objections often aren’t visible at first glance but can derail progress if not anticipated. According to industry research, nearly 30% of delay costs stem from permit-related issues rather than actual construction challenges.
Why Does Permitting Get So Complex, Anyway?
It’s because permits aren’t solely about approval; they’re a reflection of adherence to local codes, safety standards, and site-specific constraints. Misjudging this complexity often leads to rework or even project shutdowns. To avoid this, proactive strategies like consulting local building departments or referencing detailed guides—like this resource—can be game-changers. Equally important is understanding that permits often have hidden costs, such as impact fees, separate utility tap charges, or special inspections, which many overlook during initial estimates.
For detailed approaches on how to incorporate these factors into your planning, check out this step-by-step guide. Being aware of these nuances ensures you’re not blindsided by unexpected expenses or delays. Moreover, engaging with professionals early—be it architects, surveyors, or permit consultants—can help refine your estimates and streamline approval. Remember, a thorough estimate isn’t just about getting the numbers right; it’s about understanding the full scope—site conditions, zoning laws, hidden fees—that influence your project’s success.
Have you ever fallen into this trap? Let me know in the comments. Being aware of these hidden nuances can save you thousands and keep your project on track from start to finish.
Keep It Running: Tools and Tips for Longevity
Ensuring that your home improvement projects remain functional and efficient over time requires a combination of the right tools, routine maintenance, and proactive troubleshooting. Personally, I rely on specific equipment and software to monitor and maintain my upgrades, which saves me time and costly repairs down the line.
One essential tool I recommend is a digital moisture meter. Using a device like the Extech MO290 allows me to quickly assess the moisture levels in framing members or walls, helping prevent rot or mold issues before they escalate. This proactive approach is vital, especially if your project involves insulation or new framing where unseen moisture can cause long-term damage. Regular inspections with such tools can catch problems early, extending the lifespan of your upgrades.
Alongside hardware, maintenance software plays a crucial role. I personally utilize a project management app like Trello, customized with checklists for routine inspections and maintenance tasks. For example, I schedule seasonal evaluations of my roof, gutters, and foundation to identify potential issues before they develop into costly repairs. Setting recurring reminders ensures these tasks are not overlooked amid busy schedules.
Anticipate Future Trends in Home System Maintenance
Looking ahead, I believe the integration of IoT (Internet of Things) devices will revolutionize home maintenance. Smart sensors embedded in critical components—like HVAC filters, water lines, or electrical panels—can send real-time alerts when issues arise. This proactive monitoring will shift maintenance from reactive to predictive, drastically improving the durability of home improvements.
How do I maintain home systems over time?
The key is establishing a routine schedule for inspections, utilizing digital tools for tracking, and adopting emerging technologies like smart sensors. Additionally, keeping detailed records of maintenance activities—whether in a dedicated app or a physical binder—helps you anticipate future needs and plan budgets accordingly. Remember, early detection through regular checks outweighs fixing problems after they cause significant damage.
For example, according to the U.S. Department of Energy, regular HVAC filter replacements and duct inspections can improve energy efficiency by up to 15%, extending system life and reducing costs. Implementing a combination of routine inspections and digital alerts ensures your home’s systems remain reliable and efficient for years to come.
If you’re curious about how to incorporate advanced tools into your maintenance routine, I suggest trying out moisture meters combined with seasonal checklists. This small step can lead to significant savings and peace of mind. For comprehensive strategies, visit this guide and start optimizing your home’s longevity today.

Image prompt: A homeowner using a digital moisture meter on a wooden beam in an attic, with tools and maintenance logs nearby. Alt: Homeowner inspecting attic framing with moisture meter. Title: Monitoring Structural Health for Long-Term Durability.
Embarking on an attic transformation is an exciting journey, but the real mastery lies in mastering the nuances that often go unnoticed. Through my own experience, I’ve uncovered some invaluable insights that can make or break your project—lessons that aren’t always obvious in guides or tutorials.
The Hidden Truths That Changed My Approach
- Always double-check your existing structure before planning upgrades; assumptions can be dangerous. I once trusted my home’s foundation, only to discover hidden rot during installation, leading to delays and increased costs.
- Don’t underestimate the value of local building codes—they’re not just bureaucratic hurdles but safeguards for your safety and investment. Learning to interpret permit requirements early saved me significant headaches.
- Invest in a detailed assessment—measure twice, cut once extends beyond carpentry. Precise measurements of your joists and framing can prevent surprises down the line.
- Communication with professionals can uncover pitfalls before they become costly. Engaging with inspectors or structural engineers early provided perspectives that shaped my reinforcement strategy effectively.
- Embrace the complexity of permits as opportunities, not obstacles. A proactive approach, including referencing resources like this guide, accelerates approvals and reduces stress.
Tools and Resources I Hold Close
- Moisture meters: Devices like the Extech MO290 help me monitor hidden threats like rot or mold, ensuring long-term durability.
- Project management apps: Tools such as Trello keep my inspections, measurements, and maintenance tasks organized, saving time and preventing oversight.
- Permitting references: Staying updated with step-by-step guides ensures I navigate local requirements smoothly.
- Structural assessment checklists: These help me verify every critical element, from joist strength to load capacity, before proceeding to finishing stages.
Take the Leap with Confidence
Transforming your attic into a cherished space is within your reach, but success hinges on attention to those hidden details. Remember, a well-informed plan combined with the right tools paves the way for a project that stands the test of time. Don’t hesitate to take that first step—your future self will thank you for the effort now.
What’s the one structural concern you’re most anxious to tackle? Share your questions below, and let’s navigate this journey together!