How to Ensure Your Addition Matches the Original Foundation Depth
It was a sinking feeling I couldn’t shake. During my renovation project, I discovered my recent addition didn’t match the original foundation depth. It was a costly mistake that could have been avoided with a bit more attention to detail. Have you ever faced a moment where a small oversight turned into a major headache? If so, you’re not alone. Ensuring your new structure seamlessly aligns with existing foundations can be a tricky puzzle, but with the right approach, it’s absolutely manageable.
Why Matching Foundation Depth Matters More Than You Think
When I first started my addition, I thought verifying the surface level was enough. Turns out, that’s just scratching the surface. The foundation depth isn’t just a small detail—it’s the backbone of your entire project. If your addition’s foundation isn’t at the correct depth, you risk uneven settling, cracking walls, or worse, structural failure. This isn’t just about aesthetics; it’s about safety and maintaining the value of your home. According to civil engineering standards, mismatched foundation depths can lead to differential settlement, which increases long-term repair costs significantly (source). So, how do you get it right?
Is It Really That Important to Match Exactly?
Honestly, I once thought a small discrepancy wouldn’t matter, but that was a mistake I paid for dearly. Early on, I overlooked verifying the existing foundation’s depth, assuming it was standard. This oversight taught me that even minor differences can become major headaches later. To avoid making my mistake, I learned that carefully measuring the foundation’s depth and consulting structural plans is essential. Want to learn the best methods to verify your foundation depth? Visit this guide for expert insights. By the end of this post, you’ll know exactly how to ensure your addition matches the original foundation, saving you time and money—and most importantly—peace of mind.
Measure Precisely: Start with the Foundation
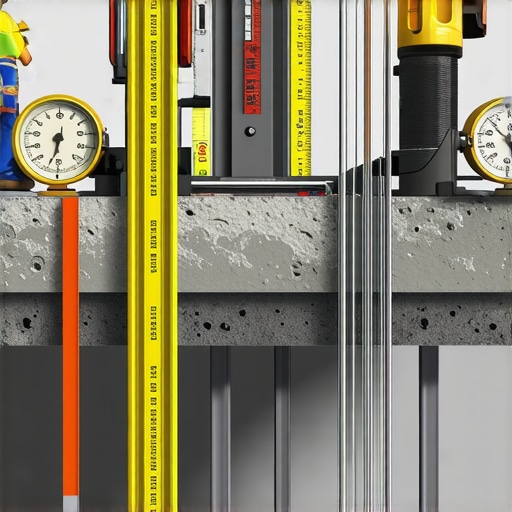
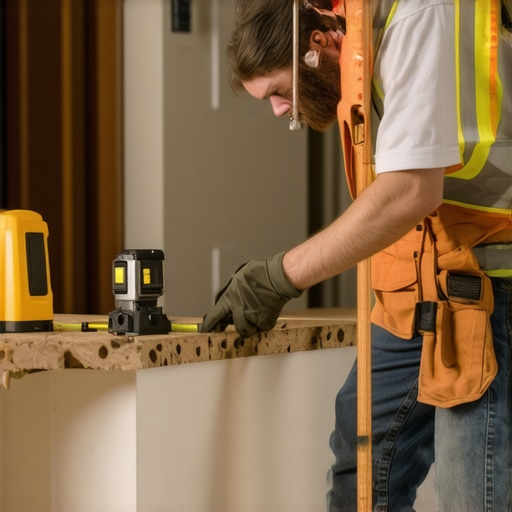
During my second attempt, I used a laser level and a long measuring rod to verify the existing foundation’s depth, cross-referencing with blueprints. This approach eliminated guesswork and highlighted subtle discrepancies that would have been costly if overlooked. To get this right, invest in reliable tools like laser levels and durable measuring tapes, and cross-verify readings at multiple points around the perimeter.
Consult Structural Plans Early
Next, I obtained detailed structural plans from the original builder or city records. Reviewing these documents clarified the original foundation specifications and saved me from unexpected surprises. Utilize resources like permit process guides to access blueprints and permit histories, ensuring your measurements align with legal standards.
Use Fixed Reference Points in the Field
In a memorable project, I set up reference stakes on the property boundary and marked elevation points with spirit levels connected to survey-grade markers. This created a consistent reference system to compare measurements across different sides. Like calibrating a scale before weighing, establishing fixed points prevents cumulative errors. Remember, a single mismeasurement can lead to foundation mismatch, so double-check all reference points.
Account for Soil Variability
Understanding soil consistency was crucial in my experience. I performed test pits at multiple locations, noting differences in compaction and moisture. These factors influence foundation settling and depth requirements. Before proceeding, review local soil reports or hire a geotechnical engineer, especially in areas with variable terrain. This step helps tailor your foundation depth to actual conditions rather than generic standards.
Coordinate with a Structural Engineer
After gathering measurements and reviewing plans, I scheduled a consultation with a structural engineer. Presenting your data allowed them to validate or suggest adjustments. This partnership is invaluable because engineers can interpret complex measurements and ensure your extension’s foundation matches the original for long-term stability.
Verify and Mark the Final Foundation Depth
Before pouring, I marked the exact depth on the formwork using a chalk line and measured again with a level before placing concrete. This final check confirms the foundation aligns perfectly with the existing structure and blueprints. Don’t rush this step; a meticulous verification process prevents costly corrections later.
Keep Documentation for Future Reference
Throughout this process, I documented all measurements, plans, and communications. Maintaining comprehensive records simplifies future inspections and helps resolve any disputes. Also, cross-reference your findings with local building codes, which often specify minimum foundation depths based on soil and climate zones (see here).
Applying these concrete steps, I reduced the risk of foundation mismatch. Remember, precision isn’t just about avoiding headaches; it’s about building a safe, durable structure that stands the test of time.
 Most homeowners and even some builders hold a common misconception that estimating costs and securing permits are straightforward tasks, but this couldn’t be further from the truth. In reality, many underestimate the nuances that influence project success, leading to costly surprises and delays. For example, a frequent myth is that once you gather a rough cost estimate, it won’t change significantly throughout the project. However, experienced contractors know that unforeseen site conditions, material price fluctuations, and permit complexities can alter budgets dramatically. Relying solely on initial figures is a mistake; comprehensive, flexible planning is essential. A trap many fall into involves ignoring the permit process’s intricacies, such as restricted work hours, inspection schedules, or specific local requirements. Overlooking these can lead to project shutdowns or fines that drain resources. Dive into detailed permit guidelines early—many sources, like these permit process guides, help prevent such setbacks. Advanced estimators also recognize the importance of accounting for contingency allowances, typically 10-15% of total costs, to buffer against unexpected expenses. A study by the Construction Industry Institute underscores that projects with well-included contingencies have 20% fewer overruns. Moreover, common mistakes include underestimating labor or material lead times, especially with supply chain disruptions. This oversight can result in missed deadlines and increased costs. To mitigate this, it’s wise to build in extra buffer time and have alternative suppliers identified. When approaching new builds or additions, don’t just rely on generic estimates; leverage cost-effective estimating techniques tailored for your project’s specifics. Applying these nuanced strategies—and questioning assumptions—will save you headaches down the road. Remember, precise planning isn’t just about numbers; it’s about understanding the full scope, permitting intricacies, and potential pitfalls. Have you ever fallen into this trap? Let me know in the comments.Maintaining progress in a building project requires precision, reliable equipment, and efficient management tools. Investing in high-quality laser levels, such as the Leica Disto series, offers unmatched accuracy when verifying foundation depths or leveling structures, saving time and reducing errors. Using software like Buildertrend or Procore can streamline communication, scheduling, and documentation, which are crucial for long-term success. These platforms enable real-time updates and seamless collaboration among contractors, clients, and inspectors, facilitating smoother permit approvals and inspections. Moreover, adopting digital estimating tools like Costx or PlanSwift allows for quick adjustments when project scope changes or unforeseen conditions arise, ensuring your budget remains accurate and manageable. Going forward, integrating Building Information Modeling (BIM) software will become essential as it enables visualization of complex designs and clash detection, reducing costly rework. How do I maintain these tools effectively over time? Regularly updating software versions, backing up data, and training team members on new features are key practices. For example, scheduling quarterly reviews of your digital tools and keeping hardware well-maintained minimizes downtime. To optimize your management strategy, consider creating a standardized checklist for tool calibration and data backups, making sure your team is always prepared for inspections and troubleshooting. Don’t overlook the importance of documentation—maintain detailed records of equipment maintenance, software updates, and training sessions; this not only helps with troubleshooting but also keeps you compliant with permit and inspection requirements (see here). As technology continues to evolve, staying ahead with the latest management and estimation tools will give you a competitive edge, ensuring your project stays on schedule and within budget. Practice regular tool audits and training, and you’ll find your workflow becomes more efficient and less prone to costly setbacks. Why not try integrating a BIM review session into your next planning meeting? It could dramatically reduce future errors and project delays.
Lessons That Took My Projects from Mistakes to Masterpieces
One of the most eye-opening lessons I learned was the value of double-checking every measurement against blueprints and site conditions. Relying solely on initial measurements without cross-verifying led to costly adjustments later. Now, I always incorporate a third-party review, knowing that an extra pair of eyes can catch subtle discrepancies before they turn into structural issues.
Another insight emerged from understanding soil variability. I used to assume uniform conditions across the site, but real-world testing revealed differences in compaction and moisture, which directly impacted foundation depths. Investing in soil testing and consulting geotechnical engineers has saved me from future settling problems and repair expenses.
Lastly, working closely with structural engineers transformed my approach. Their insights helped me interpret measurement data accurately and tailored foundation designs to actual conditions. This collaboration ensures each project is rock-solid and adheres to code, providing peace of mind from planning through completion.
Tools and Resources That Changed My Workflow
For precise measurements, I trust laser levels like the Leica Disto series—reliable, accurate, and easy to use. Combining these with digital plans from software like Buildertrend streamlines communication and documentation, making permit approvals smoother. For estimation, tools such as Costx help adjust budgets on the fly, accommodating unforeseen site conditions without chaos. To grasp complex permit requirements, I frequently refer to these permit process guides which clarify regional nuances in an understandable way.
Implementing BIM technology in my projects has also been transformative. Visualizing potential clashes before breaking ground reduces rework, saving time and money. Remember, the right combination of tools and expert advice turns complex projects into manageable, satisfying experiences.
Your Next Move Could Change Everything
Building with confidence begins with mastering foundation matching and understanding the full scope—from permit intricacies to soil conditions. Every successful addition starts with precise planning and collaboration, setting the stage for long-term durability and safety.
What steps are you taking now to ensure your foundation depths align perfectly? Share your experiences below—your insights might help someone else avoid a costly mistake!