Why Your Bathroom Addition Needs a Dedicated Circuit
It was a hot summer day when I realized I had made a rookie mistake during my bathroom remodel—plugging in that new heated towel rack and immediately hearing the breaker trip. That lightbulb moment hit hard. A simple addition, yet it overwhelmed my existing wiring setup, causing frustration and delays. Have you ever experienced something similar—an unexpected outage that stalls your renovation or worse, risked safety? You’re not alone. Many homeowners dive into bathroom upgrades without considering the electrical demands, leading to nuisance trips or, worse, potential hazards. Today, I promise to guide you through why installing a *dedicated circuit* for your bathroom is not just a good idea—it’s essential. This approach ensures safety, efficiency, and peace of mind.
Understanding the Power Needs of Your Bathroom
Is a Dedicated Circuit Overkill or a Smart Move?
Early in my project, I made the mistake of assuming that the existing kitchen or laundry circuits could handle extra bathroom appliances. Turns out, this was a costly misconception. According to the National Electrical Code (NEC), bathrooms require their own dedicated circuit, especially for high-power devices like space heaters, water heaters, or hair dryers. Relying on shared circuits can lead to frequent breaker trips and, in the worst cases, electrical fires. Having learned this the hard way, I now emphasize the importance of planning your circuit layout with care.
Installation of a dedicated circuit isn’t just about code compliance—it’s about protecting your home and loved ones. When adding new outlets or fixtures, consider the total load they will carry and whether your existing wiring can support it. This step may seem small, but it saves headaches and safety concerns down the line. For detailed insights on estimating your electrical loads accurately, I recommend checking out https://constructionedgez.com/how-to-accurately-estimate-costs-for-home-improvements.
Are you currently facing a situation where your electrical system is strained? If so, understanding the importance of a dedicated circuit becomes even more crucial. It’s a move that pays dividends in safety and convenience. Next, let’s address some common doubts homeowners have about this process—because skepticism is natural when dealing with electricity. I’ve been there, and I want to make sure you’re armed with the right information.
Assess Your Electrical Load
Start by mapping out all electrical devices in your bathroom, from lighting to high-power appliances. Use a load calculator or consult a professional to ensure your existing wiring can support new demands. Remember, overloading circuits not only causes breaker trips but also poses safety hazards. For accurate load estimation, review expert insights at Estimating Costs for Home Improvements.
Plan Your Circuit Layout
Design a dedicated circuit that powers only your bathroom fixtures and appliances. Think of it as creating a separate lane on a highway—no interruptions from other traffic. This can involve running new wires from your main panel to the bathroom location. When planning, consider future add-ons to avoid rerouting wiring later. For a comprehensive overview of permit requirements, visit Permits for New Builds.
Poke and Probe with a Circuit Tester
Before disconnecting anything, shut off the main power and test all wires with a circuit tester to confirm no live current. Use this step to identify existing circuits and avoid accidental shocks. Remember George’s mix-up: he thought the existing bathroom outlets were on another circuit, but found out too late during wiring! Accurate identification prevents costly mistakes and electrical hazards.
Run New Wiring Carefully
Use appropriate gauge wire for your load—usually 12 or 14-gauge. Secure the wiring along framing, avoiding sharp edges or potential damage sources. Use wire staples neatly to prevent movement over time. If you’re unfamiliar, consider consulting a wiring diagram online or hiring a licensed electrician. For guided wiring techniques, see Home Additions Construction Guide.
Connect to the Breaker Panel
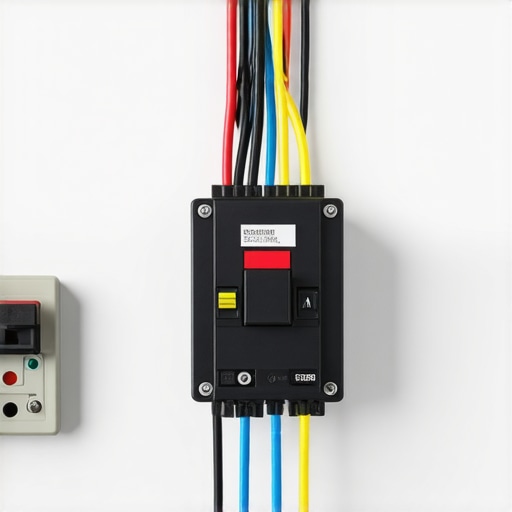
Attach the new circuit wire to a dedicated breaker, sized according to your load. Use a circuit breaker that matches your panel specifications—no makeshift solutions here. Once connected, double-check all connections for tightness and insulation. Power up and test the outlets and fixtures to confirm proper functioning. If unsure, reach out through Contact Us for expert assistance.
Secure Necessary Permits and Inspections
Before turning the power back on, secure your permit from local authorities. This step is crucial to meet safety codes and avoid potential fines. Submit detailed plans, including your new wiring diagram, for approval. For guidance on the permit process, review Understanding Permit Processes.
Test and Finalize the Installation
After inspection approval, restore power and run thorough tests on all outlets and fixtures. Check for proper grounding and that no circuits are overloaded. Use a GFCI tester for outlets to ensure compliance with safety standards. Keep a record of your work and inspection reports for future reference or resale. Proper testing guarantees safety and reliable operation for years to come.
Many homeowners and even seasoned builders fall prey to common misconceptions when it comes to new builds, additions, and permit processes. One widespread myth is that straightforward calculations and standard procedures suffice for accurate budgeting and smooth permitting. But in my experience, this oversimplification can lead to costly surprises and delays. The key nuance often missed is that construction estimation isn’t just about adding up material costs and labor hours; it requires an understanding of the project’s dynamic and the intricate permit approval process, which varies significantly by location. For example, some permit offices might have unpublicized requirements for specific documentation or inspections that, if overlooked, cause project halts. Additionally, many underestimate the importance of factoring in unforeseen issues, such as soil conditions or hidden structural problems, into their estimates. This often results in budget overruns and project delays. Experts like those from constructionEDGE emphasize that detailed, conservative cost estimation coupled with proactive permit navigation strategy can save time and money. Moreover, a common trap in estimation is assuming that permit approval is a mere formality; in reality, permit reviews can uncover latent code violations or planning conflicts that may require redesigns. It’s also crucial to understand the variance in local building codes, which can dramatically impact scope, cost, and timeline. Failing to recognize these nuances could lead to construction halts or legal issues. Be wary of projects where initial contractor bids are significantly lower than the market average; such bids often exclude critical permits or safety considerations, potentially causing rework costs later. Always consult authoritative resource like permit guidance tips before starting. Remember, accurate budgeting and smooth permitting hinge on comprehending the deeper layers of construction planning—beyond surface-level figures. Recognize that hidden complexities and local regulatory subtleties can make or break your project. Do you think your current plans account for these hidden factors? Let me know in the comments!
Pick Your Go-To Equipment and Software Wisely
When managing a home construction or renovation project, having reliable tools and smart software can make all the difference. I personally swear by a high-quality digital multimeter and a reliable circuit tester to verify wiring connections before making any changes. These tools ensure safety and help prevent costly mistakes. For project management, I use software like Procore because it keeps all documentation, schedules, and communication in one place, reducing misunderstandings and delays. Transitioning into the future, I predict that integrated smart tools—like IoT-enabled sensors—will become standard, allowing homeowners and builders to monitor systems remotely and detect issues early.
Maintaining Systems: The Long Game
Keeping your electrical system functional over time involves regular inspections and proactive upgrades. For instance, I recommend testing GFCI outlets quarterly to ensure they haven’t gone bad, especially in humid areas. Also, every few years, evaluate your electrical panel for age and capacity—upgrades might be necessary as you add fixtures or appliances. Establish a routine that includes visual inspections of wiring and connections, checking for signs of wear or corrosion. Remember, early detection of issues saves money and maintains safety. If you want to streamline permit acquisition and avoid unnecessary hold-ups, check out this resource for expert tips.
How do I keep my electrical setup running flawlessly over time?
One effective strategy is maintaining a detailed maintenance log and scheduling regular professional inspections. Don’t forget to document any changes or upgrades you implement, so you have a clear history of your system’s health. As projects grow, scaling your wiring infrastructure appropriately becomes crucial. When adding new fixtures, always verify that your wiring and load capacity can support the increased demand—overloading is a common pitfall. Think ahead about potential expansions; including extra circuits at the outset can save future headaches. To better estimate long-term costs and plan for future additions, review this guide. For detailed planning, consulting a licensed electrician for periodic reviews remains invaluable.
Also, consider integrating smart home monitoring systems that alert you to issues like voltage drops or outages in real time. These systems are becoming more affordable and user-friendly, providing peace of mind and preventing minor issues from escalating. Remember, investing in quality tools and regular maintenance not only extends the lifespan of your infrastructure but also helps avoid costly emergency repairs. Try implementing a quarterly inspection schedule with your digital multimeter and keep an updated maintenance log—these small steps can yield big dividends in safety and efficiency. Want more tailored advice? Reach out via our contact page and let’s get your project humming smoothly.
The Hidden Lessons That Saved My Bathroom Upgrade
One unexpected hurdle was realizing that even meticulous plans can overlook the nuances of local electrical codes, leading to costly reworks. I learned that engaging with a knowledgeable electrician early on can uncover permit complexities I would have missed. Another insight was that overestimating the load capacity of existing circuits helped me avoid overloads that could cause outages or hazards. Finally, maintaining detailed documentation throughout the project proved invaluable when navigating inspections and future troubleshooting. These insights transformed my approach from trial-and-error to confident planning, ensuring safety and efficiency in my bathroom remodel.
The Tools and Resources That Made My Journey Easier
For anyone tackling similar electrical upgrades, I recommend investing in a high-quality digital multimeter and a reliable circuit tester—these are game-changers for safety and precision. I also rely on comprehensive online guides like Estimating Costs for Home Improvements to set realistic budgets. To streamline permit processes and ensure compliance, resources such as Permit Approval Tips have been invaluable. Lastly, consulting a licensed electrician for a periodic review keeps my system safe and up-to-date—an investment in long-term peace of mind.
Your Next Step Towards a Safer, Smarter Bathroom
Empowered with the right knowledge, tools, and resources, you’re better equipped to handle your bathroom electrical project with confidence. Remember, taking the time to plan thoroughly and adhere to safety standards isn’t just about compliance—it’s about protecting your home and loved ones. Embrace these lessons learned, enjoy the process, and know that each step brings your vision closer to reality. Ready to transform your space? Share your experiences or ask questions below—let’s build smarter, safer homes together.