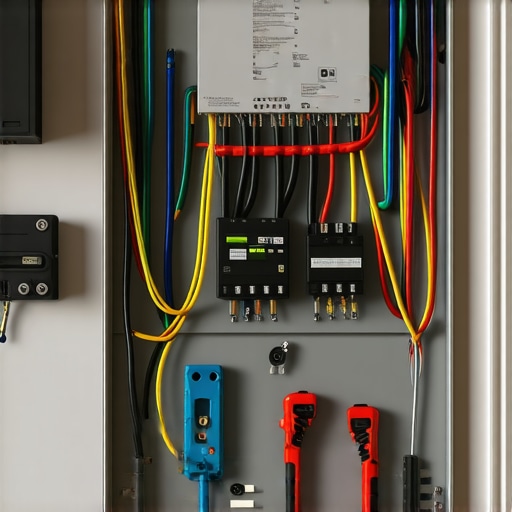
The hidden cost of relocating a main electrical panel
I remember the moment clearly—a contractor arrived to upgrade my home’s electrical system and casually mentioned that relocating the main electrical panel might be more complicated than I anticipated. My stomach sank. It wasn’t just about physical space; suddenly, I realized there were hidden costs lurking beneath the surface. Those costs can add up faster than you think and catch even experienced DIYers off guard.
If you’re planning a remodel, an addition, or even just a simple upgrade, understanding the true expense of relocating your main electrical panel is crucial. Today, I want to share my personal experience and shed light on the often-overlooked factors that can turn a seemingly straightforward job into a surprisingly expensive project. My goal is to help you avoid the common pitfalls and prepare for the real costs involved.
Why Moving Your Electrical Panel Can Drain Your Budget Faster Than You Expect
Relocating a main electrical panel isn’t just about physical labor; it’s about navigating a labyrinth of permits, code compliance, and hidden fees. When I first looked into it, I assumed the process was a simple matter of rerouting wires and installing a new box. Boy, was I wrong. Early on, I made the mistake of underestimating how much planning and preparation it would require, especially concerning permits and inspections.
One of the biggest surprises was the cost of upgrading the grounding system to meet current electrical codes. This isn’t optional if you want your home to be safe—and it can be expensive. According to industry estimates, permit fees alone can sometimes account for up to 20% of the total project costs, not including labor or materials. For detailed information on permisos and how they impact your project, check out this guide on permits.
Furthermore, local regulations might require specific work to be performed by licensed electricians, which naturally increases labor costs. I learned this the hard way when I considered a DIY approach, only to find out I would void warranties and potentially run afoul of code. It’s a valuable lesson: always consult with professionals for critical steps. If you’re wondering about the legality and requirements, here’s how to understand the permit process.
Are you facing a similar dilemma? Have you ever been surprised by hidden costs in an electrical upgrade or renovation? Knowing what to expect can save you time, money, and headaches.
In the next sections, I’ll walk you through the key factors impacting the cost of relocating your electrical panel and share practical tips to keep your project on budget without sacrificing safety or compliance.
Start with a Precise Site Assessment
Before making any decisions, walk through your property and identify the current electrical panel location, wiring routes, and potential obstacles. My first step was evaluating whether the new location would require rerouting existing wiring or adding new conduits, which directly influences costs. Use a laser measure to record distances accurately and sketch a diagram highlighting existing electrical pathways. This step helps prevent surprises later on.
Gather Detailed Project Estimates
Next, I reached out to licensed electricians to get detailed estimates. It’s essential to ask for itemized quotes breaking down materials, labor, permits, and miscellaneous costs. During my experience, I compared multiple bids and scrutinized each line item to detect any inflated figures or redundant services. Consulting resources like estimating costs for new builds can give you a benchmark for budgeting accurately.
Develop a Clear Permitting Strategy
Understanding permit requirements is critical. I reviewed local regulations and discovered that some jurisdictions mandated specific permits for panel relocation, grounding upgrades, and electrical rerouting. I used this permit process guide to clarify procedures. Applying for multiple permits simultaneously saved me time, but I made sure each application was complete to avoid delays and extra fees.
Document the Work Thoroughly
I compiled detailed drawings and written descriptions of the proposed electrical changes. Accurate documentation proved vital during inspections, preventing costly rework. I also prepared permits and approval letters to keep records organized. Remember, incomplete or vague submissions often lead to re-inspections, which inflate costs.
Coordinate with Professionals
Employing licensed electricians ensured compliance with the latest electrical codes, including grounding and panel specifications. During my project, I scheduled check-ins to verify work progress and clarify any uncertainties. Professional oversight minimized errors that could trigger code violations and fines, which can be expensive to fix post-inspection. For in-depth guidance, this resource on navigating permit requirements is invaluable.
Monitor Costs During Construction
I maintained a budget tracker, noting actual expenses against initial estimates. Unexpected costs, such as additional grounding work or unforeseen code upgrades, surfaced mid-project. Being adaptable and having contingency funds prevented financial strain. Regular communication with your contractor helps manage change orders effectively and keeps the project within budget.
Final Inspection Preparation
Before the inspector arrives, double-check that all work complies with permits and safety standards. I conducted a thorough walk-through, ensuring all wiring was correctly installed and documented. Addressing issues proactively avoids re-inspections, which can significantly increase total costs. Familiarize yourself with permit approval tips to streamline this phase.
Many homeowners believe that estimating costs for new builds and additions is straightforward—simply add up materials, labor, and permits. However, this oversimplification ignores critical nuances that often lead to budget overruns. One prevalent misconception is that permit fees are a minor expense, but in reality, permits can account for a significant portion of your project costs—up to 20%—especially when complex inspections or multiple variances are involved.
Another myth is that early estimates are sufficient for the entire project. In my experience, accurate costing requires continuous reassessment throughout construction, as unexpected issues—such as hidden soil conditions or unforeseen code requirements—inevitably arise. A study by the National Association of Home Builders confirms that unforeseen site conditions and permit delays are among the top causes of budget escalation in residential projects.
Many assume that permits and code compliance are purely bureaucratic hurdles. In fact, overlooking detailed permit strategies can lead to costly rework, fines, or even project halts. For instance, an improper grounding upgrade or missing inspection approvals can trigger expensive corrections. To avoid this, proactive planning using resources like step-by-step permit guides is essential.
One advanced mistake is underestimating the impact of local regulations on your timeline and budget. Some jurisdictions require special approvals for certain structural changes or additions near property lines, which can delay work and inflate costs if not anticipated. Consulting with experienced professionals and checking local ordinances early can save you from these pitfalls.
Also, keep in mind that estimated costs often exclude hidden expenses, such as soil testing, site preparation, or utility easements. These hidden costs can surprise even seasoned builders if you’re not diligent. For example, soil conditions might necessitate deep foundations or pilings, dramatically increasing expenses—a detail often missed during initial planning.
For the sophisticated homeowner, understanding the intricacies of estimating isn’t just about getting a number—it’s about building a resilient budget that accounts for variable factors. A comprehensive approach involves detailed site assessments, ongoing communication with professionals, and regular cost audits. Resources like expert insights on estimating costs provide invaluable strategies to refine your forecasts.
In summary, avoiding these common myths and recognizing the little-known nuances can prevent costly surprises. Always remember: the devil is in the details. Have you ever fallen into this trap? Let me know in the comments.Maintaining your home construction or renovation project is critical to ensure long-term success and safety. One of my go-to methods is using **digital project management software like CoConstruct**. I personally rely on it because it centralizes communication, schedules, budgets, and document sharing, reducing errors and keeping everyone on the same page. Its real-time updates allow me to catch potential issues early, saving time and money over the project’s lifespan. Additionally, I utilize **laser distance meters** such as the Leica Disto series. These precision tools help me verify measurements on-site quickly, avoiding costly rework due to inaccurate initial planning. Stability in measurements is crucial, especially when implementing additions or rebuilding parts of your property.
For ongoing maintenance, I recommend adopting **regular inspection routines using infrared thermal imaging cameras**. This allows you to detect issues like heat leaks or electrical faults before they escalate into costly repairs. Devices like Fluke Ti9 are portable and offer instant insights, making routine checks more manageable. I also practice **scheduled drainage and plumbing system evaluations** every couple of years. This proactive approach helps prevent leaks or blockages that can cause significant damage over time.
When scaling your project or planning additions, careful revision of *estimating techniques* is essential. I use **cost estimation software** that incorporates recent market data, such as RSMeans, which enables me to adjust estimates based on fluctuating material costs. Staying ahead with such tools ensures that future expansion remains financially sustainable.
Prediction-wise, the trend toward **smart home integration** suggests that maintenance will involve more automation and IoT devices. These tools will help homeowners monitor systems remotely, predict failures, and optimize energy use, making home management more seamless.
So, how do I maintain projects and systems over time? The key is a combination of **consistent monitoring, leveraging the right technology, and sticking to a scheduled routine**. For example, I set reminders within my project management software for regular system checks, ensuring nothing falls through the cracks. If you’re looking for a comprehensive start, I recommend trying **infrared inspection tools**; they’re a game-changer for early problem detection. Explore more about effective maintenance routines and tools at this resource on managing additions efficiently. Incorporate advanced tools like thermal imaging to identify hidden issues, and you’ll have peace of mind knowing your project remains in good shape long-term. Consistent upkeep combined with modern technology will ensure your home stays safe, functional, and ready for future upgrades.
The Hidden Pitfalls That Bit Me But Can Help You Dodge
One of the most eye-opening lessons I discovered was how overlooked permit complexities can blow up your budget unexpectedly. I used to think permits were just bureaucratic hurdles, but I learned they often determine the pace and cost of your entire electrical upgrade. Missing out on detailed permit research can lead to fines, delays, or rework—lessons I wish I’d known early.
Another personal revelation was the importance of comprehensive site assessments. I underestimated how existing wiring, local regulations, and property conditions could complicate relocating my electrical panel. The lightbulb moment: every project requires a meticulous inspection upfront. Skipping this can result in unforeseen costs that throw your budget into disarray.
Finally, I realized that engaging reputable professionals isn’t just about safety and code adherence—it’s a hedge against costly mistakes. DIY might seem tempting but can lead to re-inspections or invalid warranties, which cost way more in the long run. Trusting experts provides peace of mind and keeps your project aligned with real-world regulations, saving you from surprises down the road.
Tools and Resources That Made the Difference for Me
To navigate these challenges, I relied on a few game-changing tools. First, cost estimation software like RSMeans helped me keep track of fluctuating material prices and forecast future expenses accurately. Second, I used detailed permit guides to understand specific local requirements, reducing the risk of costly delays. Lastly, a reputable licensed electrician and project manager became indispensable, ensuring everything was up to code and on schedule. These resources transformed my approach from guesswork to strategic planning.
You’re Ready to Take the Next Step—Don’t Hesitate
Embarking on a project like relocating your main electrical panel can feel daunting, but with the right knowledge and tools, you’re well-equipped to succeed. Remember, thorough planning, leveraging expert resources, and embracing transparency will turn potential pitfalls into stepping stones. Your home deserves careful attention—so don’t wait to get started on your smarter, safer upgrade journey. How will you incorporate these lessons into your next project? Share your plans below and let’s learn together!