Why your ADU needs a dedicated shut-off valve for the inspector
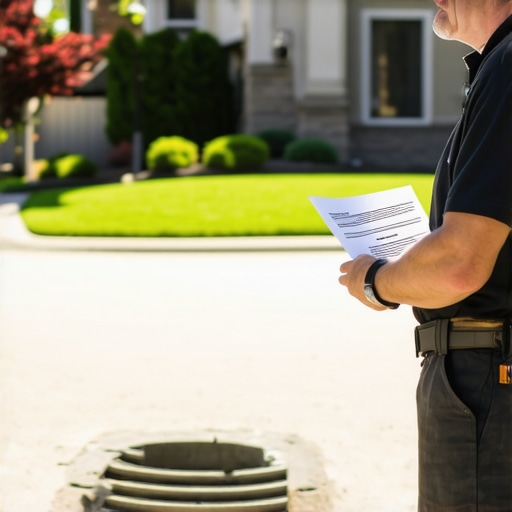
It was a warm Saturday morning when I finally decided to tackle my new ADU project. As I was reviewing my plans, a sudden realization hit me hard—I had no idea where the main water shut-off was located in my garage. It seemed like a minor detail, but little did I know, this oversight would cause significant headaches later. That was my lightbulb moment: every accessory dwelling unit (ADU) I build should have a dedicated shut-off valve accessible to inspectors and homeowners alike.
Understanding the Power of a Dedicated Shut-Off Valve
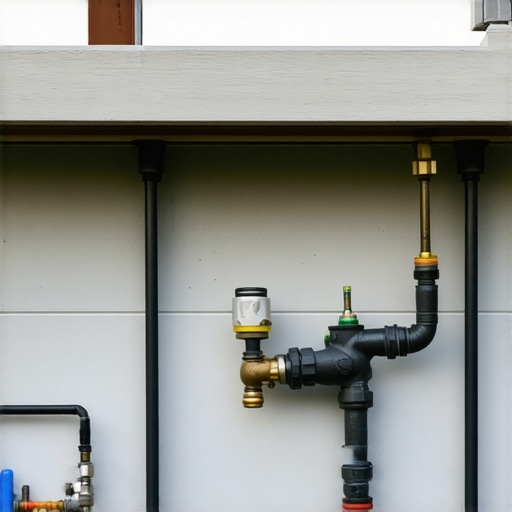
When it’s time for an inspection or emergency shutdown, having a dedicated valve ensures you’re not scrambling to find the main water supply or risking extensive water damage. It’s a simple, cost-effective addition that boosts safety, compliance, and peace of mind. I’ve seen firsthand how overlooked details like this can derail well-planned projects, leading to delays and unnecessary expenses. Ensuring your ADU has this feature can save you from future frustrations over permit approvals and inspections.
Is Installing a Shut-Off Really Worth the Effort?
I understand the skepticism—after all, it seems like a minor step. But trust me, skipping this can cause headaches down the line. Early in my project, I made the mistake of assuming that the existing main valve would suffice. It doesn’t. Local building codes, like those outlined in permits and inspection guidelines, emphasize the importance of accessible shut-offs during inspections. Missing out on this can mean failed inspections or costly retrofits later. This small but mighty valve isn’t just a convenient feature; it’s a critical safety element and a key to smooth permit approvals.
Start with a Clear Scope for Your ADU
Define exactly what you want to build—whether a simple backyard cottage or a multi-room living space—and list all features and fixtures involved. This clarity helps you estimate costs accurately and prevents scope creep, which can inflate your budget and delay permits. I once sketched out my project plan on a spreadsheet, detailing each room, window, and door. When I approached the contractor, they appreciated the detailed scope, reducing guesswork and negotiations. Use resources like cost estimation guides to refine your plan.
Accurate Estimation: Know Your Numbers
Estimating costs starts with breaking down every component: materials, labor, permits, and unexpected contingencies. Think of estimating like packing a suitcase: underestimate, and you risk missing essentials; overestimate, and you pay more than necessary. I learned this the hard way when my initial budget lacked allowance for foundation work, which turned out pricier than expected. To improve accuracy, review recent bids and use up-to-date estimation strategies. This approach ensures your project remains financially feasible.
Navigate the Permit Maze with a Checklist
Permitting can feel like deciphering an ancient map, but a methodical approach simplifies it. Gather all local requirements from resources like permit requirement guides. Start by submitting your plans to the city’s building department, ensuring they match local codes. During my last project, I created a checklist covering zoning setbacks, fire safety, electrical, and plumbing codes. By cross-referencing my plans with this list, I avoided common pitfalls that cause delays. Remember, each permit stage often requires specific documents—keep copies organized for quick reference and follow up regularly to keep things moving forward.
Documentation is Your Best Friend
Accurate, comprehensive plans and reports are essential. Include detailed drawings, structural calculations, and material lists. I found that hiring a qualified structural engineer for evaluating load-bearing walls saved me from costly rework at the permit stage. Use permit process insights to understand what’s required. Well-prepared documentation not only expedites approvals but also reduces the chance of redesigns or compliance issues later.
Work Closely with Experts
Consulting seasoned contractors and permit specialists ensures you follow correct procedures and avoid common mistakes. I reached out to a local permitting expert before submitting my application, which helped me identify a missing fire code detail—saving a resubmission cycle. Establish communication that allows questions and clarifications to be addressed promptly. Consider using professional contacts to streamline this process.
Monitor and Adjust Throughout Construction
Once permits are approved, keep a close eye on your budget and schedule. Track expenses regularly against your estimates using simple tools or software. If you notice deviations, assess whether they’re justified or if scope adjustments are needed. I once faced unexpected soil conditions delaying foundation work, which I managed by revising my schedule and notifying stakeholders promptly. Continuous oversight prevents small issues from snowballing into project-stopping problems and keeps your permit status valid as you progress.
Even seasoned professionals sometimes fall prey to misconceptions about project estimation and permitting in construction. A common myth is that accurate estimates are solely about crunching numbers and relying on recent bids; in reality, they demand a nuanced understanding of market dynamics and unseen variables. One crucial nuance often overlooked is the impact of local permitting nuances—many assume permits are just a formality, but delays or unexpected requirements can substantially alter project timelines and costs. For example, failing to account for permit review times or specific jurisdictional stipulations can lead to budget overruns and schedule setbacks, a mistake I’ve seen repeatedly.
An advanced mistake is ignoring the importance of detailed scope definition. Beginners might be content with vague plans, but in complex projects, a lack of specificity can cause scope creep, leading to underestimated labor and material costs. For instance, assuming that existing infrastructure will suffice without detailed evaluation often underestimates expenses. To avoid this, consult comprehensive resources like adding value with expert home additions and new build estimation strategies.
What about the common misconception that permits are a hurdle to be bypassed? In reality, many underestimate the strategic importance of permit planning—early engagement with local authorities, understanding permit scope, and accurate documentation are key. Skipping this step often results in costly rework or project halts, especially if unanticipated code requirements surface late in the process. A study published by the California Building Standards Commission underscores that proactive permit management reduces delays by up to 40%.
A question that often challenges even experienced builders: How can I anticipate permit requirements that vary widely between jurisdictions? The answer lies in thorough research and leveraging expert advice—local code nuances can dramatically affect your project’s scope and costs. For example, some areas require additional fire safety features or specific setbacks, which, if overlooked, can invalidate your permits altogether. Always cross-reference your plans with local permit regulations.
Harnessing this deep understanding is essential for precise estimation and smooth project execution. Remember, overlooked details and assumptions are often the biggest contributors to budget overruns and delays. Have you ever fallen into this trap? Let me know in the comments.Maintaining the integrity and functionality of your ADU over time requires the right tools and disciplined routines. Invest in a high-quality digital laser distance meter, such as the Leica Disto, which provides quick, accurate measurements for ongoing adjustments and inspections. I personally rely on this device during framing and finishing stages, as it minimizes errors and saves time. Additionally, keeping a comprehensive project management software—like Buildertrend—enables tracking of schedules, change orders, and inspections, ensuring everything stays on course. In my experience, using cloud-based platforms facilitates collaboration with contractors and inspectors, especially when managing permits and compliance documentation.
Regular maintenance checks are vital, especially for electrical systems and plumbing. I recommend setting up quarterly inspections focusing on connections, sealants, and accessible shut-off valves, like the one I emphasized earlier in my project. This proactive approach helps identify potential issues before they escalate, reducing costly repairs later.
As building technology advances, smart monitoring systems are emerging as game-changers. These systems can track moisture levels, detect leaks, and monitor structural stresses remotely. In the future, I predict that integrating IoT devices into ADUs will become standard, providing homeowners and builders with real-time data to ensure long-term durability.
### How do I maintain my ADU’s systems to ensure long-term performance?
One effective method is establishing a routine schedule for system inspections and using specialized tools like moisture meters and leak detectors. This hands-on maintenance is complemented by digital documentation of inspections, making future troubleshooting easier. For instance, I keep a detailed log using Evernote, annotating each check with date, findings, and action items. This habit has proven invaluable during annual reviews and when preparing for resale.
Furthermore, staying ahead with software updates and hardware upgrades helps your systems remain efficient. For example, updating your electrical load management software ensures compatibility with new appliances and reduces energy waste. Similarly, replacing worn-out components proactively—such as aging valves or sensors—extends their lifespan and maintains safety standards.
For permit compliance, maintaining organized records of inspections and modifications is critical. Regularly review local regulations—like those outlined in adding value with expert additions—to ensure ongoing adherence. Incorporate periodic professional evaluations, especially before major climate seasons, to verify the system’s readiness.
Embracing new tools and disciplined routines now sets the stage for a resilient, compliant, and sustainable ADU. Don’t hesitate to try implementing a smart monitoring system; it could save you thousands in future repairs and peace of mind.
The Hidden Pitfalls That Teached Me More Than Books Could
One of my biggest learnings was realizing how overlooked details, like accessible shut-off valves, could quickly escalate into project delays. I once underestimated the importance of close inspection of permit requirements, only to discover last-minute surprises that cost me both time and money. These experiences underscored the value of thorough site assessments and proactive planning, saving me from costly retrofits later.
Another lightbulb moment was understanding that detailed scope definitions are not just bureaucratic steps but foundational for accurate estimates. Vague plans led to scope creep, which bloated my budget and stretched timelines. Clarity in planning—breaking down each feature and fixture—proved essential for staying on track and within budget.
Finally, I learned that early, honest engagement with experts like permit specialists and experienced contractors created a smoother journey. Their insights prevented missteps, from code violations to permit rejections, which can derail even well-designed projects. Building this collaborative network is perhaps the most valuable lesson from my ADU journey.
Explore These Tools That Transformed My Approach
- ConstructionEdgez’s Permitting Guides: This resource provided step-by-step pathways for navigating complex permit requirements, saving me countless hours. Their tailored advice on local code nuances made permit approval faster and less stressful.
- ConstructionEdgez’s Cost Estimation Strategies: Reliable and recent bid comparisons helped me refine my budget, avoiding surprises. Their tools emphasize the importance of market research and contingency planning, which proved invaluable.
- Project Management Software Like Buildertrend: By tracking schedules, change orders, and inspections digitally, I maintained control over every phase. Using cloud-based tools ensures everyone stays aligned, minimizing miscommunications.
- Moisture Meters and Leak Detectors: These practical tools allowed for ongoing system monitoring, preventing small issues from becoming major repairs, and ensuring long-term performance of my ADU systems.
It’s Your Turn to Make the Leap
Building an ADU is a rewarding challenge that demands patience, knowledge, and a little bit of courage. Remember, every detail, from permits to system maintenance, shapes the success of your project. Embrace the lessons learned, leverage the right tools, and don’t hesitate to reach out for expert advice. Your future self will thank you for taking these steps today—securing a functional, compliant, and enduring addition to your property.
What’s the one step you feel most excited—or most nervous—about tackling first? Let me know below!