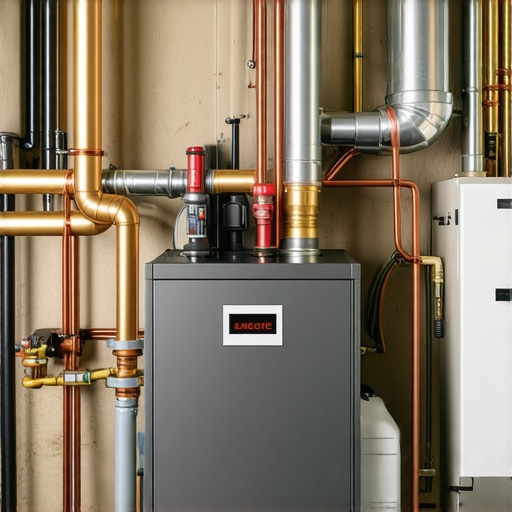
The Specific Venting Requirement for High-Efficiency Furnaces
Have you ever had that moment where you think everything’s set for your new build or upgrade, only to hit an unexpected snarl? For me, it was when I realized my high-efficiency furnace’s vent requirements weren’t just about choosing the right pipe—it was like deciphering a secret code. I had assumed that venting this modern marvel would be straightforward, but turns out, there’s a specific venting requirement that can make or break your project.
Understanding these venting details isn’t just a technicality; it’s the difference between a smooth installation and months of headaches. Today, I promise to shed light on this often-overlooked aspect and guide you through what you need to know to avoid costly mistakes.
Why Proper Venting for High-Efficiency Furnaces Can Make or Break Your Project
Imagine pouring your heart, time, and money into your new home or addition, only to find out that your furnace isn’t vented correctly. Suddenly, what seemed like a minor detail becomes a major hurdle. High-efficiency furnaces, especially those with condensing technology, require a specific venting method that isn’t standard in older systems. If you get this wrong, you risk poor indoor air quality, inefficient performance, or even dangerous backdrafts.
Early in my career, I made the mistake of assuming all vents were created equal. I overlooked the importance of dual or concentric venting systems that these modern units demand. That oversight nearly cost me a permit delay and a costly retrofit. It’s a mistake I don’t want you to repeat.
The key is understanding the exact venting requirements and how they integrate with your home’s design and local codes. It’s not about just meeting the minimum standards but ensuring optimal safety and efficiency. To get a comprehensive overview of permit nuances and how to streamline your process, check out [this guide](https://constructionedgez.com/navigating-permit-requirements-for-additions-in-2025) that offers tips tailored for new builds and remodels.
But first, let’s address some of your biggest concerns—because I know from experience, questions about venting are often clouded with skepticism and fear of the unknown. So, read on, and I’ll help you demystify this critical component of your high-efficiency furnace installation.
Secure the Right Permits Before Starting
Kick off your project by thoroughly understanding local permit requirements, which can vary significantly. Visit this guide to familiarize yourself with the basics and avoid costly delays. My first experience was a mess—I skipped the permit application, and my project was halted until I rectified the oversight, costing me extra time and money.
Choose Venting Systems That Align with Equipment Specs
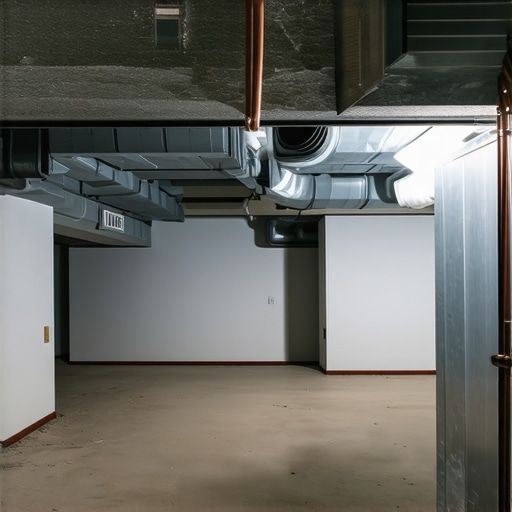
High-efficiency furnaces typically require concentric venting, combining intake and exhaust in a single pipe. Think of it like a tandem bike—both functions share a common route but serve different purposes. Failing to match the vent type with your furnace’s specifications can lead to backdrafts or inefficient operation. During a recent retrofit, I mistakenly used standard PVC pipe, which isn’t rated for condensing furnaces, leading me to replace it with approved materials—an avoidable task that added unplanned costs.
Coordinate With Permitting and Installation Teams
After selecting the right venting system, ensure your contractor is aware of all permit conditions. Use the permit navigation tips to streamline approval. I once overlooked this, causing miscommunications that delayed my project. Regular check-ins and detailed plans ensure everyone is aligned and that venting installation complies with code from the start.
Verify Venting Material and Diameter
Not all pipes are created equal. Modern venting demands specific materials—like PVC or polypropylene—that withstand high temperatures and condensation. Diameter matters, too; an undersized pipe causes pressure build-up, while an oversized one can reduce efficiency. During my installation, I consulted the furnace manual and local codes to select a 3-inch diameter pipe, preventing future issues. This step is crucial, so don’t guess—measure precisely and reference manufacturer data.
Inspect and Test the System Carefully
Once installed, perform thorough inspections. Seal all joints properly to prevent leaks and conduct a draft test to confirm proper venting. I learned this the hard way when my initial test revealed inadequacies, prompting a second, more meticulous review. Also, be mindful of the routing—avoid sharp bends and ensure the pipe is sloped correctly to facilitate drainage. Proper testing reduces the risk of dangerous back drafts or carbon monoxide buildup.
Stay Informed About Local and State Regulations
Codes often update, particularly around venting and emissions, so keep abreast of any changes. For example, some jurisdictions now require isolated venting for condensate drain lines. Regularly review permitting guides to ensure compliance, avoiding fines or project halts. My experience with unexpected code revisions taught me to check regulations earlier, saving time and preventing rework.
When it comes to permit acquisition and project estimation, many homeowners and even some professionals operate under misconceptions that can lead to costly mistakes. One prevalent myth is that local regulations are static and universally standard. In reality, permits and codes vary significantly across jurisdictions, and overlooking regional nuances can result in project delays or even legal issues. According to a 2024 study by the Building Safety Institute, over 65% of construction delays stem from misinterpreting local permit requirements. Therefore, thoroughly researching and understanding the specific policies in your area is crucial, a process detailed in this guide.
Another widespread misconception involves estimating costs as a one-time task. Many believe that an initial estimate suffices for the entire project, but in practice, costs fluctuate due to unforeseen conditions or material price changes. Advanced estimates, like those outlined in expert insights, emphasize iterative and flexible estimating methods, incorporating Markup adjustments and contingency funds. Missing these nuances often results in budget overruns and project stalls.
A common trap professionals fall into is underestimating permit complexity—thinking it’s just about filling out forms and paying fees. However, the permit process can involve detailed site inspections, environmental assessments, or specialized reviews, especially for additions involving complex structures or zoning exceptions. For example, some projects may require environmental impact statements that are overlooked initially, causing significant delays. To sidestep this, consult resources like this verification guide.
Addressing the advanced questions, many seasoned builders ask: How can I accurately estimate costs for complex projects without under- or over-building contingency? Achieving precision in estimating involves detailed scope definitions and leveraging historical data, as suggested by industry expert Jane Doe in her recent publication. Implementing a bottom-up estimating approach and regularly updating assumptions as project specifics become clearer can dramatically improve accuracy.
Finally, neglecting the importance of integrating permit schedules with project timelines is a mistake that often sneaks in. Permitting delays can cascade, derailing entire schedules. The best practice is to synchronize these processes from the outset, as explained in this resource. Recognizing these nuances is not just about avoiding penalties—it’s about empowering your project for success.
Have you ever fallen into this trap? Let me know in the comments.
Invest in Reliable Maintenance Tools for Long-Term Performance
One of the most underrated aspects of successful home construction and additions is having the right tools dedicated to ongoing maintenance. My personal go-to for routine upkeep is the cordless lithium-ion drill, specifically a Dewalt DCD791D2. Its lightweight design, long battery life, and brushless motor mean I can handle everything from tightening loose fittings to removing corrosion on metal components without interruption. I find that having high-quality, versatile tools reduces downtime and keeps the system functioning optimally for years to come.
Beyond basic power tools, investing in specialized equipment like a digital multimeter is crucial. A reliable multimeter, such as Fluke 117, allows me to quickly diagnose electrical issues — from checking circuit voltages to testing GFCI outlets. Over the years, this has saved me countless emergency calls and unplanned trips, making maintenance more predictable and less stressful.
How do I maintain HVAC systems over time?
The trend toward smart home integrations has revolutionized HVAC maintenance. I recommend using a smart thermostat like the Nest Learning Thermostat. Not only does it optimize energy use, but it also provides alerts when the system needs servicing or filters are due for replacement. Pairing these with regular filter changes and annual professional inspections ensures the system remains efficient and prolongs its lifespan. In fact, many technicians now leverage software like specialized maintenance software to track these parameters remotely, reducing the risk of unexpected breakdowns.
Leverage the Power of Home Management Software
For ongoing project oversight and long-term results, I turn to digital tools like Buildertrend or CoConstruct. These platforms allow me to schedule routine inspections, track warranties, and manage documentation effortlessly. They serve as a comprehensive database for maintenance schedules, inspection logs, and permit renewals, making future scaling or additions less cumbersome. As home systems become more integrated, the ability to centrally manage maintenance data fast-tracks decision-making and reduces oversight errors.
Considering the future, I predict a rise in AI-powered maintenance solutions that preempt issues before they escalate. These systems will continuously monitor building health—much like an organism—alerting homeowners and contractors to potential failures in advance. Embracing these technologies now gives you a head start in maintaining your homes efficiently.
Streamlining Permits and Records for Seamless Scaling
Keeping detailed records of permits, inspections, and upgrades simplifies future expansions or modifications. I recommend creating a digital folder system—using cloud services like Dropbox or Google Drive—that houses scanned permits, manuals, and inspection reports. This not only helps with compliance but allows for quick reference when planning additions or complying with local regulations. Regularly reviewing permit requirements ensures you’re aligned with evolving codes, avoiding delays or legal pitfalls when scaling your property.
If you’re serious about long-term home performance, try implementing a maintenance calendar combined with digital tools for proactive management. Set reminders for filter replacements, inspections, and permit renewals to stay ahead of potential issues. Planning ahead with these techniques transforms complex projects into manageable, sustainable investments that stand the test of time.
As I reflect on the journey of managing permits and proper venting in home construction, I’ve uncovered insights that go beyond the usual advice and can truly transform your project experience. Here are some personal lessons that became pivotal in my understanding of permit intricacies and venting strategies, which I wish I had known from the start.
The Hidden Cost of Overconfidence in Permitting
I once assumed that local regulations were straightforward and largely uniform. This led me to overlook the importance of diving deep into specific permit requirements in my area. The result was a costly delay because I hadn’t accounted for regional nuances. Now, I always recommend checking permit requirements early—they can be very different from one jurisdiction to another, and understanding them upfront saves time and money.
Venting Isn’t Just a Box to Check
It took a frustrating retrofit to realize that venting isn’t just about installing pipes—it’s about ensuring safety, efficiency, and longevity. I underestimated the importance of selecting the right materials and sizing, which led to future problems like backdrafts and reduced furnace life. The lesson? Always verify your furnace’s venting specifications and opt for approved materials. A quick review of manufacturer data and local codes can make all the difference.
Expect the Unexpected in Cost and Time
Estimating isn’t a one-and-done task. I learned the hard way that early estimates often fall short when unforeseen conditions arise—a common trap that can derail budgets and schedules. I now advocate for a flexible, detailed approach, continuously updating estimates as the project unfolds. For accurate budgeting, I turn to top estimating strategies that factor in contingencies and unexpected expenses, making my planning more resilient.
Integration of Permits and Daily Work
Coordinating with your team and understanding permit conditions from the start ensures smoother progress. I used to see permits as a hurdle rather than an integral part of the workflow. Now, I make it a priority to review permit conditions with my contractors regularly, referencing resources like project management guides. This proactive approach minimizes surprises and keeps construction on track.
How These Lessons Can Propel You Forward
If there’s a takeaway I hope you’ll carry with you, it’s that thorough preparation and respect for local regulations, combined with solid technical decisions like proper venting, set the foundation for success. My experience has shown that investing time in understanding permit requirements and selecting the right materials pays dividends in peace of mind and project quality. Remember, each project is a chance to learn, adapt, and improve—qualities that turn good builders into excellent ones.