The Flashing Detail Required for All Deck-to-Wall Connections
It was late one evening when I realized I’d overlooked a tiny, seemingly insignificant detail—flashing—on our new deck project. A small gap, a seemingly minor misstep in installation, and suddenly I was staring at potential water intrusion, mold, and costly repairs down the line. That lightbulb moment hit hard. I’d been so focused on making everything look perfect that I ignored the critical flashing detail where the deck meets the wall.
Why Overlooking Flashing Can Cost You Big Time
In my early days of construction, I naively assumed that a few layers of paint or sealant would keep water out. Boy, was I mistaken. Proper flashing isn’t just an extra step; it’s the line of defense that prevents water from seeping into your home’s vulnerable junctions. If you’ve ever seen water stains around a deck or noticed mold creeping up near your walls, chances are poor flashing installation played a part.
Not convinced? According to a study by the Building Science Corporation, flawed flashing is among the leading causes of water intrusion errors leading to structural deterioration and mold issues in residential buildings. Properly installed flashing at deck-to-wall connections can significantly extend the life of your home and prevent headaches later.
Is Proper Flashing Really Worth the Extra Effort?
Early in my career, I made the mistake of thinking I could ‘cut corners’ with flashing—saving time and money. The result? Leaks that festered, rot that spread unnoticed, and a whole lot of frustration. That experience taught me that ignoring this small yet vital detail isn’t worth it. Good flashing is an investment in peace of mind, durability, and safety.
If this sounds familiar, you’re not alone. Many homeowners and even some builders overlook the importance of the flashing detail, assuming it’s just an optional step. But as I’ve learned firsthand, it’s the little details that separate a sturdy, weather-resistant home from one plagued by issues years down the road.
Now that I’ve shared my story, let’s dive into specific strategies to get deck-to-wall flashing right the first time. Whether you’re building new or updating an existing deck, understanding these principles will save you money, time, and stress in the long run. And if you’re unsure where to start, I recommend checking out [permitting tips](https://constructionedgez.com/permit-approval-tips-for-seamless-home-additions) to ensure your project aligns with local regulations and best practices.
Start with Precise Planning and Material Selection
Before actual construction begins, draw up a detailed plan highlighting the deck’s connection points, especially where it meets the wall. Use this plan to identify the correct flashing types—such as metal or flexible membrane—that suit your home’s materials. I once mistakenly purchased vinyl flashing for a stucco wall, which led to frequent water leaks that took extra time to correct.
Prepare Your Work Zone Like a Veteran
Clear the area and set up scaffolding or ladders to access all joints comfortably. Ensure your workspace is safe and organized to prevent mishaps during installation. I recall rushing through my first flashing job and missing critical overlaps simply because I was unorganized, which resulted in seepage months later.
Install Flashing at the Correct Angle and Overlaps
Position the Flashing Properly
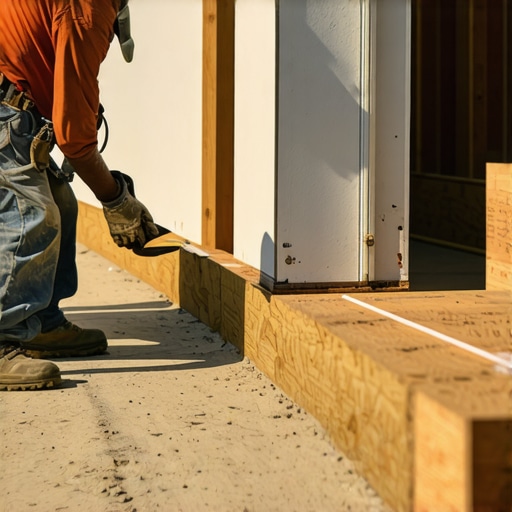
Lay the flashing so that water flows away from the wall, with the top edge under the siding or wall cladding and the bottom overlapping the deck ledger board. Always tuck the top edge of the flashing under the wall covering—this creates a water-shedding barrier. During my project, I initially placed flashing flat against the wall, which compromised its effectiveness, leading to unwelcome water intrusion.
Ensure Adequate Overlap
Overlap each piece by at least 2 inches to guarantee a continuous shield. Stagger overlaps to prevent water from finding a seam. For my own deck, I used a continuous strip of metal flashing, carefully overlapping joints, and the difference was instantly noticeable during a heavy rain.
Seal and Fasten Securely
Fasten the flashing with corrosion-resistant nails or screws, avoiding any punctures that could create leaks. Seal edges with high-quality waterproof sealant, especially around fasteners and seams. I once omitted sealing a joint with skylight sealant, which led to a slow leak that soaked my insulation—an expensive mistake I won’t repeat.
Test Your Installation Before Heavy Rain
After installation, pour water along the deck to verify proper drainage and seal integrity. Use a hose to simulate rain and observe any leaks. This step, which I initially skipped, caught a flawed overlap that was corrected promptly, saving me from future water damage.
Regular Maintenance Extends Your Flashing’s Life
Inspect your flashing periodically for rust, damage, or loose seals—especially after storms or extreme weather. Re-seal or replace sections as needed. A quick visual check last year revealed rust spots on my deck flashing, prompting immediate repair before leaks developed.
By applying these targeted steps, you ensure your deck remains dry, safe, and durable for years to come. Proper flashing isn’t just an extra detail—it’s your home’s first line of defense against water intrusion and structural decay. For comprehensive permit and planning guidance, refer to this resource.
Even seasoned homeowners and contractors often fall prey to common misconceptions that can derail construction projects. One such myth is that estimating costs is straightforward—simply add up the prices of materials and labor. In reality, accurate estimation demands a deep understanding of site-specific factors, permit complexities, and potential hidden costs. For example, overlooking soil conditions can lead to significant foundation adjustments, which are costly and time-consuming. According to a study by the Construction Industry Institute, up to 30% of project overruns are due to underestimated scope or unforeseen site issues. This emphasizes the importance of meticulous initial assessments.
Many assume that securing permits is a mere formality, but in truth, permit processes can become intricate, especially with additions that alter existing structures or affect zoning compliance. Missteps here can result in costly delays or legal issues. I’ve seen projects halted because of overlooked setback requirements or incorrect load calculations—errors that could be avoided by consulting resources like this guide.
The tricky part is understanding the nuances behind permit and estimation pitfalls—these are often overlooked even by experienced builders. For instance, not accounting for impact fees or community assessments can skew initial budgets. Also, on the estimation front, many rely on low-ball bids from contractors trying to win the job, which might seem advantageous initially, but often hide hidden charges. Be sure to compare bids carefully, and consider third-party reviews or detailed itemized estimates, like the ones discussed in this resource.
What are the pitfalls that even experts often overlook? One major trap is ignoring the importance of site prep and utility assessments. Ignoring underground utility lines or poor drainage can shoot up costs unexpectedly. For example, unforeseen drainage issues can require extensive grading or waterproofing—expenses that many contractors omit at the bidding stage. As highlighted in this article, verifying all bids’ assumptions helps avoid the ‘gotcha’ costs.
Furthermore, a sophisticated mistake many novice estimators make is assuming their initial plan won’t evolve. But local regulations, soil conditions, or neighboring properties might necessitate design modifications. Having a flexible plan and understanding the permit process early on—including permits for structural changes—is crucial. Consult authoritative [permit guidance](https://constructionedgez.com/permits-for-new-builds-essential-tips-for-your-project) upfront to mitigate risks.
In conclusion, the real secret to successful home additions and new builds lies in recognizing and mastering these nuances. Accurate estimates, thorough permit preparations, and contingency planning can save you thousands in delays or rework. Have you ever fallen into this trap? Let me know in the comments, and for a deeper dive into estimating or permits, check out this comprehensive guide.Maintaining your new construction project requires precision, reliable tools, and a clear plan to ensure everything continues to function efficiently over time. One essential piece of equipment I swear by is the **digital laser level**. Unlike traditional bubble levels, laser levels project a consistent, visible line across large surfaces, making it easier to check for levelness in foundations and framing, saving time and reducing errors. I use the **Bosch GSL 2 Professional**—its durability and accuracy have minimized my rework on site. For managing schedules and documents, I recommend **Procore**, a cloud-based construction management software. It allows real-time updates and centralized communication, which is vital when coordinating inspections, permits, and long-term maintenance schedules. I personally track all inspections and approvals within Procore, which prevents crucial deadlines from slipping through the cracks. As the industry moves forward, I believe the integration of **AI-powered project forecasting tools** will become more prevalent, helping identify potential delays or budget overruns before they happen. Looking ahead, embracing these technological advancements will be key to maintaining smooth operations. To ensure your build remains on track, I advise developing a **preventative maintenance schedule**, especially for elements like flashing, drainage systems, and structural components. Regular inspections, ideally quarterly, can identify early issues before they escalate. For instance, checking for rust or leaks around flashing can prolong its effectiveness and prevent costly water damage. How do I maintain structure and system integrity over time? Start with **detailed records** of every inspection, repair, and replacement—digital logs can be invaluable. Also, consider installing **remote monitoring sensors** on critical elements such as sump pumps or HVAC systems; these can alert you immediately if a component is failing, enabling prompt action. For tips on estimating the costs of ongoing maintenance or upgrades, you can explore [this step-by-step guide](https://constructionedgez.com/estimating-home-additions-a-step-by-step-guide-for-2025). Remember, investing in quality tools and keeping meticulous records will pay off by reducing downtime and avoiding unexpected expenses. Don’t shy away from trying an advanced tip like adopting AI forecasting—it’s a game-changer for long-term project sustainability. Whether you’re managing a small addition or a large-scale build, these strategies will help ensure your project stays on course.
Uncover Hidden Pitfalls That Joked Me Into Action
One of the most profound lessons I learned was the impact of overlooked site moisture levels. Assuming my soil tests were enough, I later faced unexpected drainage issues. It taught me that no matter how confident you are, always double-check with comprehensive assessments. I also discovered that neglecting permit nuances, like specific setback rules for accessory structures, can cause costly delays. These hidden complexities emphasize that meticulous planning isn’t just recommended—it’s essential. Finally, I realized that relying solely on initial estimates without factoring in potential site-specific challenges can turn a profitable project into a budget nightmare. These lessons have shaped my approach to every new build, making me more vigilant and prepared for unforeseen hurdles.
My Go-To Arsenal for Smooth Construction Journeys
Tools like the step-by-step estimating guides have revolutionized how I budget projects, ensuring I consider every hidden cost. The permit tips resource has saved me from pitfalls that delay projects, especially understanding local nuances. Investing in a laser level such as the digital laser gear ensures precision in foundation work, preventing costly rework. Lastly, staying connected through project management platforms like Procore helps me keep every detail transparent and on schedule, fostering smoother workflows from start to finish.
Forge Ahead with Confidence and Precision
Building your dream home or addition isn’t just about bricks and mortar; it’s about embracing a mindset of continuous learning and meticulous execution. Every project holds its unique challenges, but by integrating the right tools, resources, and lessons learned from real-world experience, you set yourself up for success. Keep questioning, keep improving—your future self will thank you. Are you ready to take your next project to the next level by paying attention to those tiny yet critical details? Share your thoughts below, or tell us about your recent challenges and victories in home construction.