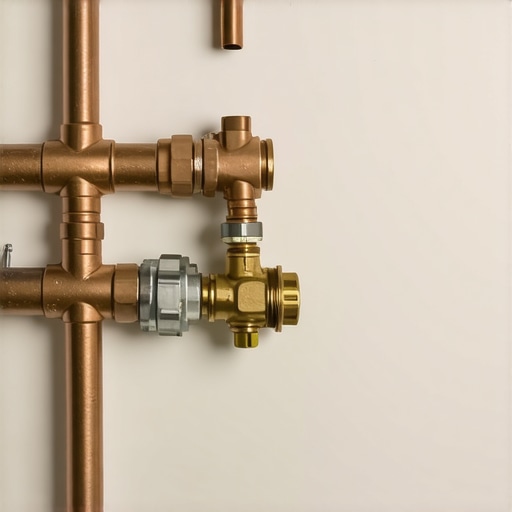
The Sewer Backflow Valve Rule for New Basement Baths
Last year, I watched my carefully planned basement renovation turn into a nightmare overnight—literally. A small leak in the sewer line led to backed-up waste flooding into my new bathroom, despite all the permits and inspections. That frustrating experience became my lightbulb moment about the importance of understanding the sewer backflow valve rule when building or adding a bathroom below grade. If you’re like me, you want your new space to be safe, functional, and compliant without the stress of unexpected surprises.
Why the Sewer Backflow Valve Rule Deserves Your Attention
When constructing a new basement bathroom or remodeling an existing one, local building codes play a crucial role in ensuring your home’s safety and health. One key regulation that often trips up homeowners and builders alike is the requirement for a sewer backflow prevention valve. This little device is designed to prevent sewage from backing up into your home during heavy rains or sewer system blockages—a situation that can lead to severe water damage and health hazards.
However, many overlook this rule during the planning process, either assuming it’s optional or not understanding its significance. In my early days of remodeling, I made the mistake of ignoring this requirement entirely, thinking it would add unnecessary cost. That mistake nearly cost me thousands in repairs and cleanup. It’s all about protecting your investment and, more importantly, your family’s health.
According to the permitting guidelines, failure to install an approved sewer backflow device can lead to permit violations, fines, and even mandatory removal of completed work. Plus, it could invalidate your homeowner’s insurance in the event of sewer backup damage. That’s a risk no one wants to take, especially when reliable solutions are available and straightforward to implement.
Skeptical About the Need for a Backflow Valve? You’re Not Alone
Admittedly, when I first learned about this rule, my initial reaction was skepticism—”Does this small valve really make that much of a difference?” I quickly discovered that underestimating the importance of sewer backflow prevention is a common mistake. The truth is, heavy rainfall and sewer overloads are more frequent than most realize. The Environmental Protection Agency reports that sewer backups cause billions of dollars in damages each year, and many could have been prevented with proper backflow prevention measures.
So, if you’re questioning whether this rule applies to you or if it’s worth the effort and expense, consider this: Have you ever experienced a foul smell or minor backup in your basement during a heavy storm? If yes, then you already know why these regulations exist—to safeguard your home from exactly that scenario. Ignoring this simple requirement could leave you vulnerable to costly repairs and health risks.
Building or renovating your basement bath is an exciting project, but it also involves navigating a maze of codes and permits. Next, I’ll walk you through the essential steps to ensure compliance and get your project off the ground smoothly. Want to avoid the pitfalls I faced? Let’s dive into what you need to know about complying with the sewer backflow valve rule and how to make sure your new bathroom is both safe and code-compliant.
Select the Right Backflow Prevention Device
Begin by choosing an approved and rated sewer backflow valve compatible with your plumbing system. I recommend consulting local plumbing codes or a licensed plumber to ensure you pick a device that meets the requirements outlined in the permitting guidelines. When I installed mine, I visited a plumbing supply store with the exact specifications provided by my city’s building department, which prevented future compliance issues.
Create a Clear Installation Plan
Once you have the device, sketch a detailed plan showing where the valve connects within your sewer line. Use a garden hose to trace the line from your basement’s sewer outlet to the main drain, identifying potential access points. I discovered that incorporating a cleanout near the floor drain made maintenance easier. Planning this step carefully saves time and avoids costly reroutes later.
Prepare Your Workspace and Tools
Gather necessary tools such as a hacksaw, pipe wrenches, pipe cleaner, sealant, and potentially a concrete saw if trenching is needed. Protect your workspace by laying down tarps and wearing safety gear. During my project, unexpected calcified buildup in the pipe required me to cut a section cleanly, which was doable thanks to proper preparation.
Cut into the Sewer Line Carefully
Identify the section of pipe where the valve will be installed. Turn off the main water supply and drain remaining water. Use a pipe cutter or hacksaw to make a clean cut. Ensure the cut edges are smooth; use pipe cleaner and primer if working with PVC pipes to ensure a tight seal. I once rushed this step, which resulted in a leak that delayed the project; taking my time prevented that.
Install the Backflow Valve with Precision
Position the valve in the chosen location, following the manufacturer’s instructions. Use appropriate fittings and secure connections with pipe wrenches. Applying pipe sealant around joints guarantees a leak-proof installation. I found that tightening connections just enough prevented overtightening, which can crack fittings and cause delays.
Test Before Covering the Line
Turn the water supply back on and simulate wastewater flow by pouring water into the drain. Check for leaks around the connections. If all is dry, proceed to backfill the trench or cover the pipe. During my own installation, testing revealed a loose fitting; re-tightening fixed the issue immediately.
Finalize and Document Your Work
Secure the area, restore any disturbed surfaces, and record the installation for future reference or inspections. Keep receipts and manufacturer datasheets in your home improvement files. This documentation proved invaluable when I recently sold my home, demonstrating compliance with local code requirements.
Optional: Arrange for Inspection
If local regulations require, schedule an inspection with your building department to verify the device’s proper installation. I learned that scheduling this early prevents scheduling delays during final permit approval, streamlining the process. Check the permit process details to understand your specific requirements.
Many homeowners and even seasoned builders often fall prey to misconceptions when navigating the complexities of new construction permits and estimating. One widespread myth is that permits are merely bureaucratic hurdles rather than essential safeguards. In reality, these regulations ensure structural safety, environmental compliance, and long-term durability. Overlooking or underestimating permit requirements can lead to costly delays and fines, which some assume only affect the permit process temporarily. However, a study by the National Association of Home Builders highlights that non-compliance can jeopardize insurance claims and resale value—so it’s crucial to understand the nuances involved.
Why Do Many Underestimate the Costs and Time of Permitting?
“Building code compliance isn’t just checking boxes; it’s an intricate system that influences every stage of construction. Many project managers and homeowners simplify the process, assuming that submitting plans and waiting code approval are straightforward steps. This misconception leads to underestimating the required time and costs, especially when permit reviews reveal necessary design modifications or additional inspections. For instance, failing to account for the time needed for plan revisions or the possibility of multiple permit applications can result in project delays. To avoid this trap, I recommend referencing detailed permit process guides, like those available on [Construction Edge](https://constructionedgez.com/understanding-permit-processes-for-successful-home-additions). Accurate estimates here can prevent budget overruns and project stagnation.
Another hidden nuance relates to estimating actual construction costs. Many assume material prices and labor rates remain static during the project timeline. However, market fluctuations, supply chain disruptions, and seasonal labor availability can significantly impact totals. According to industry insights at [Mastering New Build Estimating](https://constructionedgez.com/mastering-new-build-estimating), incorporating contingency allowances and flexible pricing strategies in your estimate is vital. Without accounting for these variables, you risk underfunding your project, which could halt progress midway—a mistake that is both costly and frustrating.
A common trap is neglecting to align estimates with local permitting requirements. Building codes can vary dramatically per jurisdiction, especially with recent updates that may not be reflected in broad estimates or standard templates. Failing to verify local nuances increases the likelihood of rework or permit denial. It’s advisable to consult with local planning departments or specialists—some of whom provide detailed guidance on [navigating permit requirements](https://constructionedgez.com/navigating-permit-requirements-for-additions-in-2025). This proactive approach ensures compliance and streamlines approval processes.
Questions often arise about how to manage these hidden complexities efficiently. For example: “How can I better integrate permit and estimate considerations to avoid surprises?” The key is cross-referencing regulations with your project budgeting from the outset. Using dedicated tools or expert consultation—such as those outlined on [Construction Edge’s guide](https://constructionedgez.com/efficiently-managing-additions-from-planning-to-execution)—can help align your expectations with reality.
Remember, the devil is in the details. Overlooking these nuanced factors often leads to underestimated costs, project delays, and permit issues—all hurdles that can be avoided with thorough planning and expert guidance. Have you ever fallen into this trap? Let me know in the comments or reach out via [contact page](https://constructionedgez.com/contact-us-2). Your awareness can save you time, money, and stress in your next build or addition.
Prioritize Regular Maintenance for Longevity
One of the most effective ways to ensure your built systems and equipment continue functioning properly over time is implementing a planned maintenance schedule. Personally, I rely on establishing monthly checklists that include inspecting sump pumps, sewer backflow valves, and HVAC filters. Regular checks prevent small issues from escalating into costly repairs, saving you time and money down the line. In the future, I predict that smart sensors will become standard for real-time monitoring, enabling proactive maintenance and minimizing downtime.
How do I maintain my plumbing systems over time?
Utilize tools like moisture meters and camera inspections to monitor pipe conditions without invasive procedures. For example, I use a drain camera to routinely check for buildup or blockages in sewer lines, which allows me to address problems early. Keeping an inventory of critical replacement parts—like valves and seals—also ensures you’re prepared for unexpected failures. By integrating these practices, you can extend the lifespan of your systems and avoid emergency repairs that disrupt your schedule.
Leverage Software to Streamline Estimating and Scheduling
Accurate project planning hinges on reliable estimating tools. I personally use Construction Master, a calculator that simplifies complex calculations involving material quantities and costs. Paired with project management software like Buildertrend, I can coordinate schedules, budgets, and permits seamlessly. These digital tools not only increase accuracy but also facilitate collaboration with subcontractors and inspectors. As technology advances, the integration of AI-driven estimating software promises even smarter project forecasts, reducing waste and optimizing resource allocation.
What methods help me keep my estimates accurate over the project’s lifespan?
Regularly updating your cost database with current prices, market trends, and supplier quotes is crucial. I recommend reviewing your estimates weekly and adjusting for any market fluctuations. Incorporating contingency allowances, as discussed in top estimating strategies, helps buffer against unexpected expenses. Using detailed tracking within your software keeps everyone on the same page and prevents surprises that can derail progress.
Maintain Tools for Peak Performance
Proper handling and storage of your equipment extend its usable life. I keep my power tools in a dedicated, weather-protected shed, regularly inspecting and cleaning them after each use. Sharpening blades and replacing worn parts prevent malfunctions that could cause project delays. Additionally, investing in quality PPE ensures safety, which is fundamental for ongoing productivity. In the coming years, I foresee smart tool systems that alert you when maintenance is due, further reducing downtime and enhancing safety protocols.
What’s the best way to keep my tools in top shape?
Implement a routine maintenance checklist tailored to each tool’s requirements, and stick to it diligently. Using manufacturer-recommended lubricants and calibration techniques preserves accuracy and efficiency. Remember, well-maintained tools not only last longer but also perform better, directly impacting your project timelines and quality.
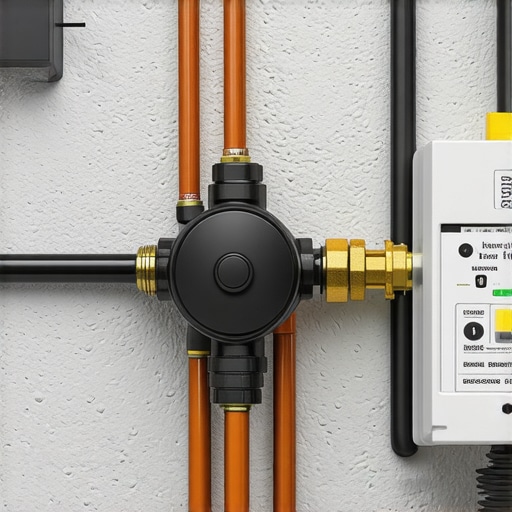
Imagine a high-tech sensor mounted on a sewer line, providing real-time data to your smartphone—this is the future of proactive maintenance. With advancements in IoT technology, integrating such sensors could drastically reduce on-site emergencies and improve long-term system reliability.
Encourage yourself to adopt a sensor-based monitoring system to stay ahead of potential failures and keep your projects ticking smoothly. Start small by installing a moisture sensor in critical areas and expand as you see the benefits unfold.
Lessons That Changed My Construction Approach Forever
- One hard-earned insight was realizing how critical early communication with local building departments is. Waiting until the permits are almost ready can lead to delays and unexpected costs. Having transparent conversations upfront about requirements saves time and money.
- I learned that every detail in your estimate, no matter how small, impacts the overall project success. Overlooking minor expenses like permit application fees or inspection costs can balloon the budget unexpectedly. Diligence in estimating fosters confidence and smoother workflows.
- The biggest surprise was discovering how often misconceptions about permit processes lead to rework. Assuming certain approvals are automatic or that regulations are uniform across jurisdictions resulted in costly corrections. Thorough research and consulting local codes prevent these pitfalls.
My Go-To Resources for Navigating Construction Rules
- Construction Edge’s Guide to Permitting: This comprehensive resource simplifies understanding complex permit requirements, saving me countless hours of confusion. I trust their up-to-date information and step-by-step guidance for smooth approval.
- Mastering New Build Estimating: Accurate budgeting hinges on reliable data. This book has been instrumental in helping me incorporate market fluctuations and contingency planning, ensuring I stay within budget without surprises.
- Online local government portals: While sometimes lacking in clarity, they provide essential jurisdiction-specific details. I make it a habit to check these before finalizing any plans, avoiding potential permit violations.
Your Next Move Toward Confident Construction
Approaching building projects with the right knowledge and resources transforms stress into success. Embrace the process, trust your research, and don’t hesitate to seek expert advice when needed. Your future self will thank you for laying a solid foundation today. Ready to take the next step in your construction journey? Share your biggest challenge below—let’s tackle it together!