The Minimum Depth for Water Lines in Cold Climates
I remember the chilly morning I discovered my outdoor water line had frozen solid—on what was supposed to be a relatively mild winter. The frustration hit me hard. All my plans for a warm cup of coffee outside or a quick garden rinse were suddenly halted by a burst pipe and a flooded yard. That lightbulb moment made me realize just how crucial understanding the minimum depth for water lines in cold climates truly is. It’s not just about digging a trench and hoping for the best; it’s about protecting your home and peace of mind during those frosty months.
Why Going Deep Matters More Than You Think
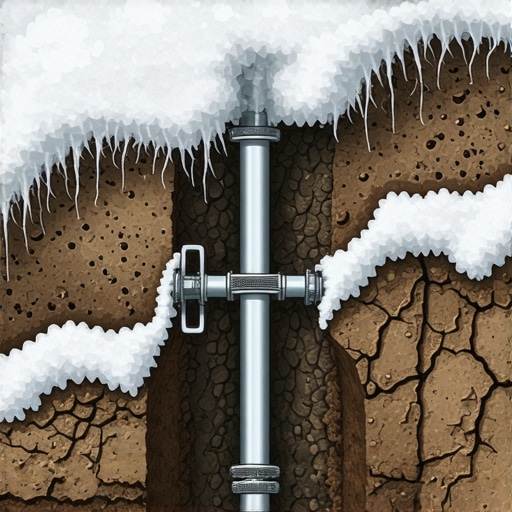
When I first built my new outdoor kitchen, I thought a simple underground water line would suffice. Little did I know that in my region’s harsh winters, shallow pipes are prone to freezing and bursting. The rule of thumb I learned later is that water lines in areas with freezing temperatures should be buried below the frost line, which varies widely depending on your location. According to construction experts, installing water lines at or below the frost line can save you from costly repairs and headaches down the road.
Is Fret Over Depth Overhyped?
Honestly, I was once guilty of thinking I could get away with a shallow trench because I was eager to finish my project quickly. Early on, I made the mistake of not verifying the frost line for my area, which resulted in a frozen pipe the very first winter. That costly lesson taught me that proper planning isn’t just recommended; it’s essential. It’s one of those mistakes I don’t want you to repeat—so, let’s dive into how to get it right from the start, and avoid the frustration I had. If you want to master this crucial step, check out our comprehensive guide on proper trenching and installation techniques.
Pinpoint the Frost Line and Prepare Your Site
Start by determining the frost line height specific to your region. Use local building codes or consult authoritative sources. Mark this depth clearly in your yard. During my last install, I marked the spot with spray paint and a stake, double-checking with local utilities to avoid underground hazards. This baseline ensures you won’t dig shallow, risking freeze damage.
Use Proper Equipment and Dig Deep
Choose a trencher or a manual auger as suits your yard size. Remember, shallow digging is tempting but false economy—shallow pipes are prone to freezing. Aim to excavate at least 12 inches beyond your marked frost line. When I did mine, I used a rented trencher and encountered compacted soil. For tough spots, I broke the job into segments, ensuring consistent depth and avoiding accidental shallow trenches. Accuracy here sets the foundation for success and prevents costly redo.
Install Insulation and Protective Layers
Before laying the pipe, add a layer of foam insulation around it—think of it as a thermal blanket. Use insulation sleeves rated for underground use, and ensure no gaps remain. I wrapped my pipe with foam tubes and secured them with Teflon tape for tight fit. Cover this with a layer of gravel or soil, then backfill carefully, avoiding sharp rocks that can puncture the pipe. Proper insulation significantly reduces freeze risk, especially in areas with deep frost.
Use the Right Pipe Material and Fittings
Polyethylene pipes are preferred for their flexibility and freeze-thaw resilience. When I installed mine, I opted for PE80 grade pipes, which tolerate low temperatures better. Connect fittings securely, employing solvent cement or compression fittings designed for frost-prone zones. Join sections with care—any weak link can cause leaks or breaches once winter hits.

Test and Seal the System
After installation, perform a pressure test to check for leaks, especially at joints. Fill the line with water, pressurize, and monitor for drops over 24 hours. During mine, I used an air compressor to pressurize and found a minor joint leak; sealing it saved future headaches. Once confirmed, insulate exposed valves and connect to your water source, ensuring all controls are accessible for winter shutdown if necessary. This attention to detail ensures your system withstands cold spells without surprise failures.
Plan For Future Maintenance and Inspection
Document the depth and routes of your water line, and keep a map accessible. Regularly inspect above-ground components, especially after storms or freezing weather. I set reminders to check valves and insulation annually, knowing that proactive care extends pipe life and avoids emergencies. Properly installed and protected water lines become resilient fixtures, safeguarding your property through freezing months.
Many homeowners and even seasoned builders believe that estimating costs and navigating permits are straightforward tasks. However, a closer look reveals multiple hidden nuances that can transform a simple project into an expensive nightmare. For instance, a frequent myth is that permits are just bureaucratic hoops; in reality, they are crucial for avoiding penalties, delays, and even structural issues down the line. Skipping or underestimating permit requirements often leads to costly fines or even demolition orders, as outlined in our guide on permit processes.
Another misconception involves estimations—many assume that rough figures suffice, but precision matters profoundly. Advanced mistakes, like miscalculating material wastage or ignoring site-specific factors such as soil stability, often result in budget overruns. For a detailed approach, reviewing our estimation strategies for new builds will help you refine your estimates.
What’s the most overlooked detail that can derail your project from the start?
One critical yet frequently missed point is understanding local regulations and environmental restrictions specific to your area. For example, certain zones may have strict setback requirements or unique materials mandated by codes, which can significantly impact your design and costs. To avoid the trap of underestimated complexity, I recommend consulting with local authorities early and reviewing up-to-date permit guidelines. This proactive step ensures your project aligns with legal requirements and helps avoid delays.
In addition, many underestimate the importance of accurate site assessment—soil composition, drainage paths, and existing utilities all play vital roles in the success of your build. Ignoring these nuances can cause foundation failures or costly rework. Engaging with professionals for a thorough site analysis, and referencing expert estimation techniques, provides a buffer against unforeseen issues.
Remember, the devil is in the details. Properly understanding and meticulously planning for these complexities can save you thousands of dollars and months of frustration. Don’t cut corners—invest time in the early stages to identify potential pitfalls and prepare accordingly. Have you ever fallen into this trap? Let me know in the comments, and share your experiences or questions. For a comprehensive approach to managing your project from start to finish, explore our resource on project management.
Keep It Running Smoothly with the Right Tools
Having the proper equipment is the backbone of any successful build or renovation. For instance, I swear by my DEWALT DCH493 XR Brushless SDS-Plus Hammer Drill; its power and durability make boring holes and driving anchors effortless, even in tough masonry. Choosing tools designed for professional use ensures longevity and precision, which ultimately saves money and time. As technology advances, I predict a surge in cordless, battery-powered tools with AI-assisted features that optimize performance and safety, making site management even more efficient.
Streamlining Maintenance and Long-Term Results
To keep your systems operating reliably, regular inspections are crucial. I schedule quarterly checks for plumbing, electrical, and HVAC systems. Using digital inspection apps like SpectaPlus allows me to log issues over time, identify patterns, and plan preventive repairs. This proactive approach extends the lifespan of installed components and reduces costly emergencies. For example, routinely inspecting insulation around water lines during winter prevents freeze-ups, saving you from emergency repairs and water damage.
Tools That Boost Productivity and Accuracy
One tool I find indispensable is the Laserliner Bluebeam 3D Laser Distance Meter. It enables me to quickly measure distances and areas with centimeter accuracy, streamlining estimating and layout work. Accurate measurements are vital when preparing permits or planning additions, as errors can lead to delays or code violations. In the future, I see these devices integrating with BIM (Building Information Modeling) software, providing real-time updates and reducing human error even further.
How do I maintain my tools and systems over time?
Implementing a disciplined maintenance routine is key. This includes cleaning equipment after each use, inspecting for wear and tear, calibrating measurement devices annually, and storing everything in protective cases. For complex systems, I recommend employing specialized contractors for detailed inspections, much like how expert estimators ensure accuracy from the outset. Regular upkeep not only prolongs tool life but also prevents unexpected failures during critical project phases.
Don’t overlook the value of software in project management. Tools like Procore automate documentation, scheduling, and communication, reducing missteps and keeping everyone aligned. As the industry moves forward, integrating hardware with cloud-based solutions will likely become the norm, enabling remote diagnostics and maintenance scheduling—saving you time and money in the long run.
Ready to Upgrade Your Toolbox?
Start by evaluating your current equipment with an eye toward automation and durability. Invest in versatile, high-quality tools that can handle various tasks, and develop a routine maintenance schedule. For detailed guidance, consider reviewing our comprehensive construction guides to better understand how the right tools and upkeep can elevate your projects. Remember, staying ahead with the best equipment not only improves outcomes but also builds your reputation for quality craftsmanship.
Lessons That Could Save Your Whole Project
- One of the most underestimated aspects I learned was the importance of verifying local frost line maps directly from the authorities instead of relying on vague regional assumptions. A detail like this can be the difference between a reliable water supply and a flooded disaster that costs thousands to repair.
- My quick fix approach to shallow installations seemed efficient at first, but it consistently led to freeze-ups each winter. It taught me that investing extra time and resources upfront, like extra depth and insulation, pays off by avoiding a cycle of repairs and downtime.
- Initially, I oversimplified the insulation process around pipes, thinking a basic foam sleeve was enough. The reality hit me hard when I encountered deep-penetrating frost in severe cold snaps. The lesson? Always plan for the coldest weather, not just average winter temperatures.
- Proper material choice transformed my outdoor water line experience. Polyethylene pipes proved more resilient, minimizing damage from freeze-thaw cycles. Selections like these are often overlooked but are critical for long-term durability.
Tools and Resources I Depend On
- ConstructionEdgez permit guides help me navigate local regulations smoothly, avoiding costly delays.
- Careful estimation of trenching depth and insulation needs is supported by expert guides, ensuring I don’t under or over-specify materials.
- For accurate measurements and layout, I rely on tools like the advanced laser distance meters. They save time and prevent costly errors.
- Connecting with online communities or consulting local experts through ConstructionEdgez contact pages keeps me grounded in real-world practices and updates.
Your Next Move: Build With Confidence
If you’re planning to install outdoor water lines in a cold climate, remember that meticulous planning, choosing the right materials, and respecting local frost lines are the keys to success. Don’t fall into the trap of taking shortcuts—your future self will thank you for laying a reliable foundation now. The more you learn and prepare, the less you’ll worry about winter surprises. Take action today to ensure your outdoor water systems stand resilient against the cold — your home and wallet will thank you. What’s been your biggest challenge in outdoor plumbing installations? Share your experiences below and join the conversation on making winter-proof water lines!