How to Estimate the Volume of Fill Dirt Needed for a Lot
It was a moment of pure frustration that finally made me sit down and really grapple with estimating how much fill dirt I needed for my lot. I remember standing there, a wheelbarrow in hand, staring at an uneven patch of land that I thought was ‘almost ready.’ But as I started digging, I realized I’d vastly underestimated the amount of dirt necessary—leaving my project stalled and me scrambling for solutions. That lightbulb moment hit hard: estimating volume isn’t just guesswork—it’s a crucial step that can make or break your project.
Why Precise Dirt Estimation Can Save Your Project
Getting a reliable estimate of fill dirt isn’t just about counting loads or eyeballing the space. It’s about understanding the exact volume your project demands and avoiding costly mistakes. When I started learning the ins and outs of volume calculation, I discovered that many homeowners and builders overlook a simple truth: even a small miscalculation can lead to delays, increased costs, and complications with permits and inspections. According to construction experts, inaccurate estimations can contribute to anywhere from 10% to 30% additional costs on excavation and fill, which could be avoided with proper planning and calculation techniques. For more insights on cost-effective estimating, check out [this guide](https://constructionedgez.com/cost-effective-estimating-techniques-for-new-builds-and-additions).
Are You Worrying About Overpaying or Underestimating? Here’s Why That Matters
My early mistake was relying on rough guesses and neglecting to measure properly. I thought a couple of quick calculations would suffice, but I learned painfully that without precise measurements, you’re just throwing money into the dirt—literally. That’s why knowing exactly how to estimate volume and material needs can help you avoid the trap of overpaying or ending up with too little fill, forcing costly repeat trips. Whether you’re planning a new build, an addition, or landscaping, accurate estimation ensures a smoother process.
If you’re unsure how to approach this—or have faced the headache of miscalculated fill—you’re not alone. Many people make the mistake of skipping detailed planning, which slows everything down.
So, how do you get it right? Well, stick around—I’ll guide you through straightforward, reliable methods to nail your fill dirt calculations, ensuring your project stays on track from start to finish.
Measure the Area Precisely
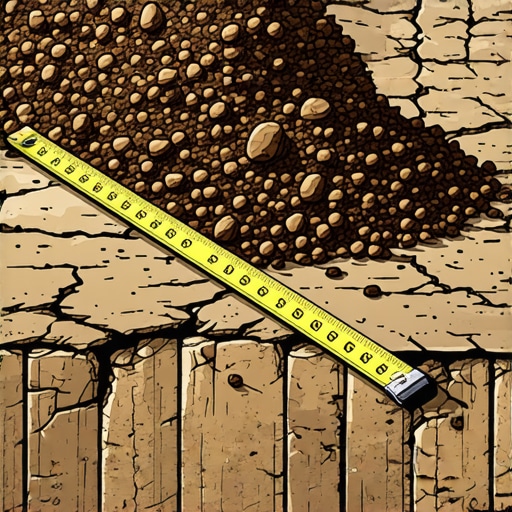
Start by defining the exact footprint of the area you need to fill. Use a reliable measuring tape or laser distance measurer to record length and width, especially on uneven terrain. For example, during my recent backyard project, I laid out string lines and double-checked measurements with a laser tool, which minimized errors and saved me from costly overestimation.
Calculate the Volume Methodically
Convert your measurements into a volume estimate using the formula: length x width x depth. Always convert dimensions into consistent units, like feet, to avoid mistakes. In my case, I needed a 100-foot by 50-foot area, with an average fill depth of 0.5 feet. Multiplying these gave me a raw volume of 2,500 cubic feet of soil needed.
Account for Shape and Elevation Changes
If your project involves slopes or uneven terrain, break it into smaller sections with different depths. Use topographic maps or a level to measure elevation differences. During one project, I used a transit level to identify depressions; then I separately calculated each section’s volume, ensuring accuracy rather than relying on a single average depth.
Convert Cubic Feet to Cubic Yards
Most suppliers sell dirt by the cubic yard. To convert, divide your total cubic feet by 27 (since 1 cubic yard = 27 cubic feet). For my project, 2,500 cubic feet divided by 27 resulted in approximately 93 cubic yards. Always add 5-10% extra to accommodate waste and settling—so order around 100 cubic yards to be safe.
Factor in Waste and Compaction
Soil compacting reduces volume; typically, expect a 10-15% decrease after settling. To compensate, increase your order accordingly. If you estimate 100 yards, ordering about 115 yards ensures you won’t run short. I learned this the hard way when I underestimated compaction, leading to delays and additional orders, which increased my overall costs.
Use Visual Aids and Tools
Apply tools like site maps, measurement apps, or even physical templates to visualize the area. During my last project, I drew scaled diagrams and used online calculators to cross-verify my estimates, preventing overbuying and saving money.
Consider Permitting and Regulations
Understand local regulations regarding soil excavation and fill. Check if you need permits before commencing work to avoid fines or project delays. I used resources like this guide to navigate permit requirements efficiently, which helped streamline my process.
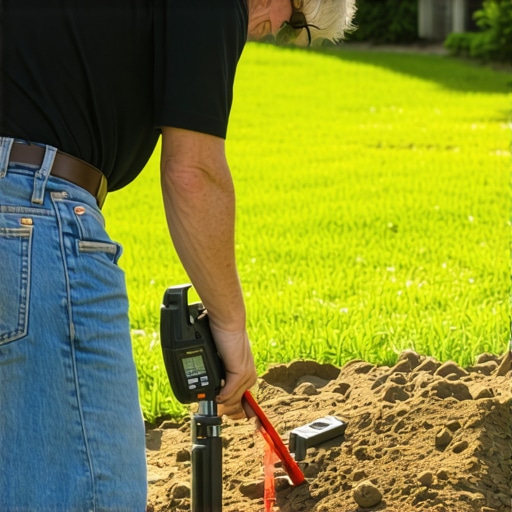
Illustration of measuring site dimensions with laser tools and calculating volume for fill dirt estimate.
Many misconceptions surround permits and estimating in the construction world, leading homeowners and builders astray despite their good intentions. Everyone talks about the importance of permits and accurate estimates, but a critical nuance is often overlooked: the complexity of local regulations and the advanced pitfalls that come with neglecting them. One common myth is that securing a permit is a mere formality—when in reality, it involves a detailed process that can make or break your project if misunderstood. For instance, missing a small detail in the permit requirements can result in costly delays or fines, as outlined in this guide. Similarly, beginners often underestimate the importance of precise estimating, assuming rough calculations will suffice. But, as I’ve learned through my experience, especially when dealing with additions and new builds, inaccurate estimates lead to budget blowouts and schedule overruns. An advanced mistake is neglecting the nuances of waste factors, soil settlement, or permitting nuances that change based on local codes. This is where expertise counts; simply copying a generic formula from the internet isn’t enough. Instead, understanding the specificities—such as how soil moisture content affects compaction or how permit approval times vary—can save you headaches. For example, a study published in the *Journal of Construction Engineering and Management* emphasizes that project delays are often caused by underestimated permit complexities and overlooked regulatory details. So, how can you avoid these traps? Engage deeply with your permits by visiting local authority websites and consulting experts experienced in your jurisdiction. And for estimating, leverage advanced strategies tailored for your project scale, like those outlined here. Recognize that permits are not just a box to check—they’re a vital part of your project’s integrity. Think of it like this: you wouldn’t build a house without solid foundations, nor should you underestimate the intricacies of permits and estimates. By mastering these hidden nuances, you set your project up for success, avoiding unnecessary costs and delays. Have you ever fallen into this trap? Let me know in the comments.
Invest in Reliable Measuring Instruments
One of the most overlooked aspects of maintaining successful construction projects is the use of precise measuring tools. I personally rely on a laser distance measurer, such as the Bosch GLM 50 C, because it offers quick, accurate measurements over long distances without the need for physical tapes, which can be cumbersome and prone to errors. Keeping this tool calibrated and replacing batteries regularly ensures sustained accuracy, helping prevent costly miscalculations in fill depth, permit boundaries, or framing dimensions.
Use Construction Software for Planning and Tracking
Digital tools likeBuildertrend or Procore are game-changers for project management. I utilize Buildertrend because it centralizes communication, schedules, and document sharing, reducing the chaos often seen on job sites. These platforms help keep your team aligned, track progress, and set reminders for inspections or permit renewals, essential for maintaining momentum. As technology evolves, I predict more integrated systems combining real-time drone surveys with project management platforms will become standard, providing instant updates on site conditions and compliance status.
Regularly Service and Inspect Equipment
Maintaining your tools and machinery prevents unexpected breakdowns. I schedule monthly inspections for the core equipment I use, like skid-steers and compactors, following manufacturer guidelines. Keeping spare parts and lubricants on hand minimizes downtime—crucial during tight schedules. This proactive maintenance extends equipment lifespan and saves money in the long run, ensuring your work continues smoothly without delays.
Keep Documents Organized and Up-to-Date
It might seem simple, but maintaining a well-organized archive of permits, inspection reports, blueprints, and communication logs pays dividends when unforeseen issues arise. I recommend a dedicated cloud storage solution, such as Dropbox Business, where documents are accessible but secure. Regularly updating and backing up these files ensures you have everything at your fingertips in case of audits, permit disputes, or revision needs. Staying organized also promotes compliance, reducing risk of penalties or project halts.
Implement a Routine Maintenance Schedule
Scheduling periodic review sessions—monthly or quarterly—helps identify potential issues before they escalate. During these reviews, I check permit expirations, verify that the project adheres to local codes, and assess whether my tools are functioning optimally. This habit keeps projects aligned with regulatory standards and contractual commitments, preventing costly rework. As regulations become increasingly complex, consistent audits become even more vital for long-term success.
How can I ensure my equipment stays in top shape over time?
Establishing a preventative maintenance protocol is key. This includes scheduled inspections, cleaning, calibration, and prompt repairs. Not only does this extend the usability of your tools, but it also enhances accuracy and safety. Remember, well-maintained tools and organized documentation are your best allies in avoiding delays and cost overruns. Try integrating a maintenance checklist into your project workflow and see the difference it can make. For more detailed strategies, visit this resource for comprehensive planning tips.
3 Unexpected Truths Behind Permit and Estimating My Projects
– I learned that permits are more than just paperwork; they’re a window into the complex regulations that can make or break your timeline if overlooked. Engaging early and thoroughly with local authorities saved me from costly delays. For detailed insights, see this guide.
– Relying on rough estimates might seem tempting, but I found that precise measurements and calculations are the backbone of a budget that holds. Investing in proper tools and double-checking my math prevented surprises later. For tools I trust, check out this resource.
– The myth that permit acquisition is a quick step can be dangerous. In reality, understanding the detailed process and possible delays gave me the edge to plan accordingly. Don’t underestimate the complexity—see this article for more.