The Specific Gravel Grade Required for Stable Driveway Sub-bases
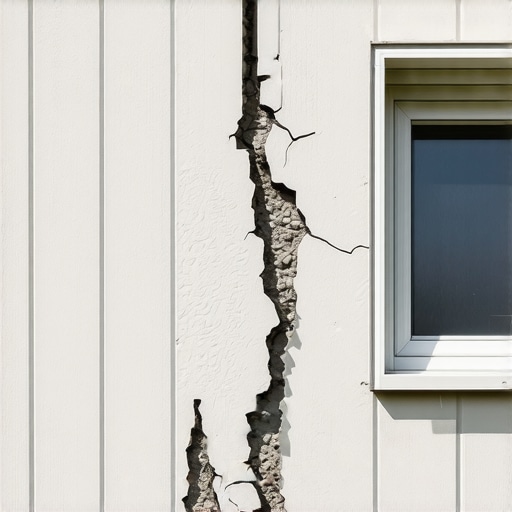
Ever pulled into your driveway and immediately felt that unsettling wobble beneath your tires? Or maybe you’ve watched your gravel shift and wrinkle over just a few months, wondering if all that effort and expense was worth it. I went through the same nightmare early on—thinking I could just pick any gravel, sprinkle it down, and call it a day. Big mistake. That lightbulb moment hit me hard when my driveway started to sink and crack, leaving me frustrated and out hundreds of dollars.
Why Gravel Grade Matters More Than You Think
Choosing the correct gravel grade isn’t just about aesthetics or cost; it directly impacts the stability and longevity of your driveway. If you pick gravel that’s too small, it compacts poorly and requires frequent replenishing. Too coarse, and it can create drainage problems or become uneven. It’s a delicate balance—one I wish I understood better from the start. The good news? You don’t need to become a gravel expert overnight. Today, I’ll help you sort out the gravel grades that will guarantee a solid, durable base for your driveway.
Is All Gravel Created Equal? The Truth About Gravel Types
If you’re skeptical about whether this really makes a difference, I get it. I nearly overlooked it myself. Early in my project, I thought any gravel would do—regardless of size or composition. That was a costly mistake. According to home improvement experts, selecting the right gravel grade can extend your driveway’s lifespan significantly. For instance, using the proper crushed stone not only enhances stability but also improves drainage, which prevents water damage and cracking.
Understanding the various gravel grades and their appropriate applications is essential. I’ll walk you through common gravel types, what to look for at the hardware store, and how to avoid the trap of cheap, poorly graded materials.
Are you facing the challenge of choosing gravel that sticks around for years? Have you experienced issues with your current gravel base? Let’s dive into the specifics that will help ensure your driveway remains firm and functional for decades. And for a deeper dive into related planning and permitting essentials, you might find this [guide on understanding permit processes](https://constructionedgez.com/understanding-permit-requirements-for-new-builds-and-additions) quite helpful. Ready to get your hands dirty? Let’s explore the gravel grades that will give your driveway the backbone it needs.
Determine Your Driveway’s Traffic and Load Capacity
Start by assessing the expected traffic on your driveway. Will it support heavy vehicles or just personal cars? This step is analogous to choosing the right foundation for a building—too weak, and it won’t hold; too strong, and you overspend. For light-use driveways, a ½-inch crushed stone often suffices, while heavier loads demand a ¾-inch or even two-inch crushed stone. I learned this firsthand when I initially used fine gravel for my garage entrance, which quickly shifted and led to cracking—shifting taught me the importance of matching gravel size to load.
Source Quality Materials from Reputable Suppliers
Visit local quarry yards or trusted hardware stores. Don’t settle for the cheapest option—think of it as buying quality ingredients for a recipe. Once I switched to high-quality crushed stone from a reputable supplier, the stability improved dramatically, and I avoided repeated repairs. Ask for gradation charts to verify the gravel’s size distribution, ensuring it meets your needs. Remember, a well-graded gravel compacts better, reducing future maintenance.
Layer and Compact Gravel Properly
Lay your gravel in 4-inch layers, compact each layer thoroughly with a plate compactor. Skipping this step is like stuffing pillows underwater—you end up with uneven settling. I once neglected to compact in layers, and over time, my driveway settled unevenly, causing cracks. Use a calibrated compactor and move in a grid pattern for uniform density. Proper compaction creates a solid base that withstands weather and use, extending your driveway’s lifespan.
Choose the Correct Subgrade Preparation
Excavate and grade the soil to achieve a level surface. Ensure good drainage by sloping the driveway away from structures—think of it as directing water flow, not letting it pool. In my case, I mistakenly built my driveway on poorly drained soil, which resulted in early erosion. Applying a geotextile fabric beneath the gravel can prevent mixing with underlying soil and improve stability.
Incorporate a Geotextile Barrier for Extra Support
This fabric acts as a filter and separator, much like a sturdy fence holding everything in place. Installing it over the prepared subgrade before spreading gravel prevents weeds and soil mixing, maintaining gravel integrity. I added this step after noticing future weed growth disrupting my gravel surface, and it made a noticeable difference in longevity and cleanliness.
Verify Your Work and Make Adjustments
Use a level and string line to confirm the surface is even. Small imperfections now can lead to bigger problems later. Regular checks save time and money by catching issues early. During my project, I used a laser level to ensure consistent slope, which prevented flooding and pooling after rain. Never skip quality checks—your driveway depends on it.
Repeat and Maintain
Replenish gravel as needed—about every 3-5 years depending on usage. Regular maintenance, like raking and compacting, keeps the surface solid. Think of your driveway as a living entity—needs attention to stay healthy and durable. I schedule annual inspections to top up gravel and recompact high-traffic areas, extending its lifespan significantly.
Applying these concrete techniques ensures your driveway remains reliable for years. Proper assessment, sourcing, layering, and maintenance are your best tools for durable results, avoiding costly repairs down the line. For guidance on the permitting side of larger driveway projects, see this permit process guide.
Many homeowners and even seasoned builders operate under common myths when it comes to additions, estimating costs, or navigating permits. One widespread misconception is that permits are merely bureaucratic hurdles to be bypassed. In reality, proper permit acquisition ensures your project adheres to local codes, minimizes legal risks, and prevents costly delays. Skipping or rushing this step can lead to violations, fines, or even halting your project halfway through. According to a study published by the National Association of Home Builders, nearly 30% of project delays stem from permit-related issues, underscoring the importance of understanding this often-overlooked process.
Why Do Some Projects Suddenly Get Halted? The Permitting Trap
A common mistake is underestimating the time and complexity involved in obtaining permits. Many assume that submitting paperwork is a quick formality, but in truth, permits often require detailed plans, inspections, and sometimes revisions. For example, improper or incomplete applications can cause repeated review cycles. This oversight can extend timelines by weeks or even months, drastically increasing costs. To avoid this, familiarize yourself with local requirements through resources like this comprehensive guide on permit processes. Moreover, engaging with experienced professionals early on ensures your project aligns with all regulations, reducing the likelihood of expensive setbacks. Have you ever fallen into this trap? Let me know in the comments. From accurate estimating to project management, understanding the nuances helps you control costs and timelines effectively. Misjudging these factors often leads to the overspending or underfunding your project, risking project quality or completion. For instance, many underestimate permit fees or the time needed for approvals, leading to budget overruns. Using reliable estimating techniques like those discussed in this detailed article can help you set realistic budgets and avoid surprises. Remember, transparency and thorough planning are your best tools in mastering home improvements. Want to learn more about streamlining your project? You can explore strategies to expedite permit approval to keep your project on track.
Maintaining your gravel driveway and its underlying foundation requires the right set of tools and a consistent approach. Over time, even the most well-constructed driveways need periodic attention to remain durable and functional. Personally, I rely on a handful of specific equipment and techniques that have proven effective in keeping my driveway in top shape. In this section, I’ll share these tools and methods, explaining why they are essential for long-term success.
My Go-To Equipment for Driveway Maintenance
First and foremost, a high-quality plate compactor is irreplaceable. I use the Wacker Neuson BP 1550 because of its dependable engine and consistent vibration frequency, which I’ve found crucial for properly compacting gravel layers. Proper compaction prevents settling and erosion, keeping the base stable for years to come. Additionally, a durable rake—preferably with an adjustable handle—helps in spreading gravel evenly after grading or replenishing material. I also keep a sturdy tamper for spot fixes, especially around problematic areas where the gravel tends to shift.
For routine inspections, I utilize a digital level combined with a laser line generator. These tools help me identify irregularities in surface evenness over large sections quickly, ensuring any issues are addressed promptly before they escalate. This approach is inspired by the detailed guides found on constructionedgez.com, which emphasize the importance of regular quality checks.
Why Software Has Become a Game-Changer
Beyond physical tools, I highly recommend leveraging software for planning and long-term management. Programs like AutoCAD Civil 3D help visualize the grading plan and drainage slopes, preventing costly mistakes down the line. For ongoing maintenance scheduling, I use Smartsheet to track inspection dates and upcoming replenishment needs. These digital aids allow for proactive maintenance, reducing unexpected costs and boosting driveway lifespan.
Looking ahead, I predict that drone technology will become increasingly prevalent in driveway inspections. Equipped with high-resolution cameras, drones can survey large areas quickly, capturing detailed images to identify subsidence or erosion early. Integrating such tech into routine maintenance plans will undoubtedly improve efficiency and accuracy.
How do I keep my driveway working seamlessly over time?
Regular inspection is key. Schedule seasonal check-ups to identify issues like weed intrusion, gravel displacement, or erosion spots. Keep the gravel topped up and compacted annually, especially in high-traffic zones. Additionally, installing surface drains or simple gutter extensions can divert water away from vulnerable edges. My personal experience confirms that promptly addressing small problems prevents major repairs later, saving both time and money. For more comprehensive guidance on planning your upgrades, visit this resource that explains how to systematize maintenance routines effectively.
Try incorporating a laser level for surface verification into your routine — it’s a game-changer for early problem detection. Implementing these tools and methods will ensure your driveway remains resilient, safe, and aesthetically appealing for decades to come. To learn more about permits and long-term planning, don’t hesitate to contact us for personalized advice.
What I Wish I Knew About Gravel and Groundwork
One of the biggest surprises for me was realizing that not all gravel is created equal—choosing the wrong grade can lead to instability and costly repairs. I learned this the hard way when my driveway started sinking within a year of installation. It taught me that sourcing quality materials and understanding their gradation is essential for a durable foundation.
Another lesson was the importance of proper layering and compaction. Initially, I skipped layered compaction, which resulted in uneven settling and cracks. Now, I always ensure each layer is thoroughly compacted, creating a solid base that withstands weather and everyday use.
Lastly, I underestimated the value of proper drainage and subgrade preparation. Sloping the driveway correctly and adding geotextile fabric made a significant difference in preventing water damage and erosion. It’s these details that truly extend your driveway’s lifespan and save money in the long run.
Tools, Resources, and Hacks That Changed My Game
My go-to equipment includes a high-quality plate compactor like the Wacker Neuson BP 1550. Its reliable vibration ensures proper compaction, preventing future settling. I also swear by a sturdy rake with an adjustable handle and a laser level for surface checks—small tools that make a huge difference.
On the digital side, I rely on AutoCAD Civil 3D for grading visualization and drainage planning, which helps me avoid costly mistakes. I also use Smartsheet for maintenance scheduling, making sure I stay proactive with gravel replenishing and inspection routines. Looking ahead, drone technology promises even more efficient driveway monitoring, capturing detailed images that catch issues early before they become expensive.
For detailed planning and permits, the permit process guide has been invaluable—helping me navigate the often confusing regulations smoothly and avoid delays.
Your Next Step Toward a Long-Lasting Driveway
Building a driveway that stands the test of time is about more than just laying gravel; it’s about mastering planning, execution, and maintenance. Embrace the process with patience and attention to detail, and you’ll enjoy a durable, low-maintenance driveway for years to come. Remember, small investments in quality materials, proper technique, and regular upkeep pay off many times over.
If you’ve faced challenges or have tips to share, I’d love to hear about your experience. Have you ever struggled with selecting the right gravel grade or maintaining your driveway? Let me know below and join the conversation!