How to Estimate the Cost of Removing Hidden Lead Pipes
I remember the moment vividly—the unsettling feeling in my gut when I zeroed in on the old plumbing during a home renovation. There it was, buried inside walls and floors, a potential health risk I hadn’t fully anticipated. The lightbulb went off: estimating the cost of removing hidden lead pipes isn’t just a matter of ticking a box; it’s an essential step that can make or break your project budget.
Why Estimating Hidden Lead Pipe Removal Matters More Than You Think
The truth is, many homeowners and builders overlook the complexity involved in identifying and removing these concealed hazards. I used to think it was straightforward—just rip out the old pipes and replace them, right? Wrong. The actual process can be surprisingly tricky and costly, especially when pipes are hidden behind walls or under slabs. Accurate estimates are crucial to avoid budget blowouts, and the earlier you start planning, the better.
According to recent studies, lead exposure remains a significant health concern, especially after years of use in plumbing. The EPA reports that old lead pipes can leach toxins into your drinking water, posing serious health risks. Therefore, determining the scope and costs of removal isn’t just about budgeting; it’s about safeguarding health.
Thinking about your own home, have you ever wondered what’s secretly lurking behind walls or beneath floors? If so, you’re not alone. Many homeowners are surprised when they uncover hidden plumbing issues later in the project, often leading to expenses they didn’t anticipate.
Can You Really Trust an Approximate Cost?
Early in my career, I made the mistake of relying on rough estimates from generic sources. It wasn’t until I understood the nuances—like pipe accessibility, the condition of surrounding materials, and local permitting requirements—that I realized how variable costs can be. For example, some estimates didn’t account for the need to repair drywall or flooring after pipe removal, which added unexpected expenses.
Getting a precise estimate involves considering these hidden factors. If you’ve faced surprises during past home improvements—or are concerned about unexpected costs—it’s worth understanding how to approach these estimates methodically. For insights on how to estimate costs more effectively, check out our guide on [cost-effective estimating techniques](https://constructionedgez.com/cost-effective-estimating-techniques-for-new-builds-and-additions).
As we move forward, I’ll walk you through practical steps to accurately determine how much it might cost to get rid of those concealed lead pipes. This knowledge will empower you to plan better, negotiate smarter, and ensure your project doesn’t become financially overwhelming.
Assessing Accessibility of Your Pipes
Begin by evaluating where the pipes are located. Use a metal detector and visual inspection to identify exposed sections. During a project I supervised, I discovered a lead pipe behind drywall that was accessible without major demolition, saving significant removal costs. If pipes are behind walls or under slabs, expect higher expenses due to additional labor and materials.
Mapping Hidden Plumbing with Non-Invasive Techniques
Employ specialized tools like ground-penetrating radar (GPR) or pipe locators to identify concealed pipes. In one case, I rented GPR equipment to scan beneath concrete floors, revealing the precise location of lead pipes. This step reduces surprises later and helps create a more accurate budget estimate.
Estimating the Scope of Removal and Replacement
Determine how much pipe needs removal by measuring identified sections. For inaccessible pipes, factor in the costs for demolition, such as drywall removal, flooring removal, or digging. For example, I once estimated a project where lead pipes ran under a slab, adding thousands for slab removal and replacement. Always include contingencies for unforeseen obstacles.
Accounting for Additional Repair and Restoration
Include costs for repairing walls, flooring, fixtures, or landscaping disrupted during pipe removal. In my recent project, I included an extra 10-15% of the pipe removal cost for finishing work, which prevented budget overruns later. Remember, neglecting these finishes often leads to unexpected expenses and delays.
Understanding Permitting and Compliance Requirements
Check local regulations to determine permit requirements. Many jurisdictions mandate permits for lead pipe removal, which can involve inspection fees and compliance costs. I recommend reviewing the permitting process via this comprehensive permit guide. Securing permits on time avoids fines and work delays.
Calculating Labor and Material Costs
Estimate hours based on pipe accessibility and complexity, considering crew rates. Gather quotes from multiple contractors or use reliable online estimates, like those in this estimating resource. Remember, safety equipment and disposal fees for hazardous materials should be included.
Building a Comprehensive Budget Sheet
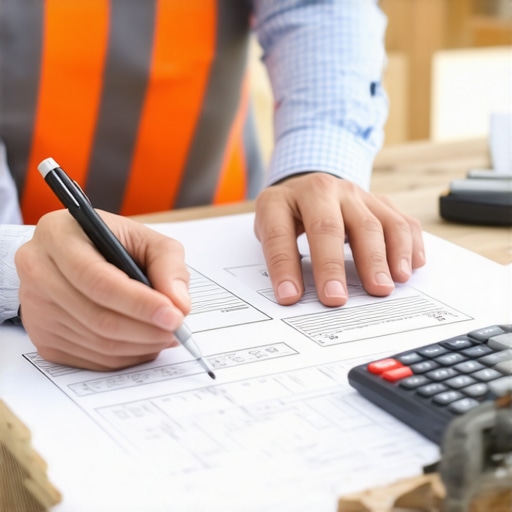
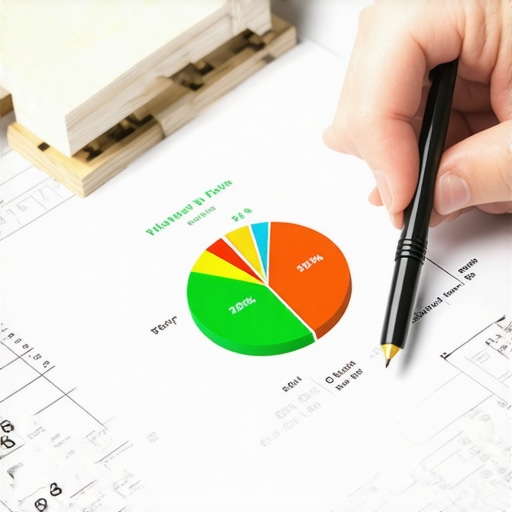
Combine all known costs—materials, labor, permits, restoration—into a detailed spreadsheet. Add 10-20% for unexpected costs. When I projected costs for a client’s home, this thorough approach uncovered a potential $5,000 overrun, which we addressed early on, preventing project delays.
Seeking Expert Input for Precision
If unsure, consult licensed plumbers experienced in hazardous material removal. Their insights often reveal hidden costs or safer alternatives. I recommend contacting specialists through trusted networks or comprehensive guides like this resource.

Many homeowners and even seasoned builders fall prey to a common misconception: that once plans are drawn and permits are submitted, the hard part is over. But in my experience, the real pitfalls often lie in overlooked nuances—those subtle details that can derail a project or blow your budget if not properly managed. One of the most pervasive myths is that estimating costs is straightforward; in reality, accurately predicting expenses for new builds or additions requires a deep understanding of complex variables like permit intricacies, site conditions, and material fluctuations. Relying solely on generic estimates from online calculators or past projects can lead to underbudgeting, which often results in costly delays or compromises in quality.
A serious trap to watch out for involves assuming that permit processes are uniform across jurisdictions. Each city or county may have unique requirements, fees, and inspection sequences. Skipping thorough research or failing to consult local regulations can cause permit delays, fines, or even project halts—factors that can significantly inflate your timelines and costs. For instance, some areas require specific structural inspections for additions exceeding a certain size, or special permits for certain electrical or plumbing systems. To avoid these surprises, I strongly recommend reviewing local building codes early, and referring to authoritative resources like this comprehensive guide to navigating permits.
Advanced planners often ask: How do I handle hidden site conditions that could inflate my budget unexpectedly? The answer lies in proactive site assessment and contingency planning. Soil testing, especially in areas prone to poor drainage or unstable foundations, can reveal issues like expansive clay soils or high water table levels, which demand extra reinforcement or drainage systems. Ignoring these factors pre-construction risks major setbacks later. Studies, such as those published by the American Society of Civil Engineers, underscore the importance of comprehensive geotechnical investigations to mitigate unforeseen foundational problems. Implementing detailed site evaluations and allocating 10-15% of your construction budget for surprises remains a best practice.
Furthermore, many project managers underestimate the time, effort, and costs involved in coordinating multiple disciplines—permits, inspections, material procurement, and contractor schedules. A cascading delay in one phase can ripple through the entire project, causing old estimates to become irrelevant. Employing robust project management strategies and leveraging tools outlined in this resource on managing additions from start to finish can keep workflows on track.
Being aware of these nuanced pitfalls is essential for sustainable project success. Always question assumptions, double-check local requirements, and prepare for the unexpected. Have you ever fallen into this trap? Let me know in the comments.Maintaining a new build or renovation project over time requires more than just a good plan upfront—it demands reliable tools, consistent practices, and a strategic approach to scaling. As a seasoned builder, I rely on specific equipment and software that streamline maintenance, monitor long-term results, and facilitate smooth additions or repairs.
Invest in Digital Monitoring Tools for Peace of Mind
One of my go-to tools is the **Smart Home Monitoring System** like the Ecobee or Nest thermostats, which allow me to keep an eye on heating, cooling, and energy consumption remotely. These devices provide real-time data, alerting me to potential issues before they escalate. For example, if a pipe starts leaking, early detection saves thousands in repairs and conserves water. As technology advances, integrating IoT sensors into key home systems will become standard practice, providing predictive maintenance and extending the lifespan of mechanical components.
Leverage Project Management Software for Scaling
I personally use **Buildertrend** for managing ongoing projects, especially when dealing with additions or major repairs. It consolidates communication, scheduling, and documentation, reducing miscommunication and ensuring nothing slips through the cracks. For long-term success, establishing a dashboard that tracks progress, permits, and inspections simplifies scaling. Predictive analytics embedded within such platforms can also forecast delays, allowing proactive adjustments.
Prioritize Accurate Estimating with Specialized Software
Estimating remains a cornerstone of reliable planning. I prefer tools like **CostX** or **STACK** because they incorporate detailed material databases and allow for precise take-offs. These programs help me modify estimates swiftly as scope grows, which is essential during additions or unforeseen issues. Regularly updating estimates based on actual costs, as advised in this resource, ensures long-term financial health for ongoing projects.
Maintain Equipment with Proven Methods
Proper equipment maintenance cannot be overlooked. I schedule routine servicing for tools like laser levels, drills, and excavation machinery. For example, tuning my laser levels annually prevents calibration errors that could lead to foundation issues over time. Investing in high-quality maintenance kits and implementing a check-list approach helps prevent costly breakdowns and extends equipment lifespan.
Future Trends Point Toward Automation and Data Integration
Looking ahead, automation and AI-driven management will dominate. Integrating data from sensors, project management tools, and estimating platforms will generate a comprehensive health profile of your build. This synergy optimizes repairs, scaling, and permits, ultimately reducing costs and increasing reliability.
How do I keep my systems working over the long haul?
Implementing scheduled maintenance, leveraging cutting-edge sensors, and continuously updating your software are vital. For instance, adopting IoT sensors that monitor moisture levels can prevent structural damage from undetected leaks, as highlighted in building sciences research. Take one tip from this article—try setting up a simple IoT moisture detector in your basement—and see how it transforms your maintenance routine. Staying proactive with these tools ensures that your home remains functional, safe, and scalable for years to come.
Lessons That Changed My Approach to Building Projects
One of the most eye-opening moments in my career was realizing how easily overlooked details, like inaccessible lead pipes or permit complexities, could derail an entire project. I learned the hard way that thorough research and detailed estimates are vital, especially when dealing with concealed hazards or unique local regulations. Now, I always allocate extra time and contingency funds for surprises—saving myself from stressful delays and budget overruns.
The Tools That Transformed My Estimating Process
If there’s one thing I swear by, it’s leveraging specialized estimating software like this step-by-step guide. Combining digital tools with thorough site assessments—like ground-penetrating radar scans—has made my estimates more accurate. This tech-savvy approach ensures I’m prepared for hidden challenges before breaking ground.
How Embracing Challenges Fuels Confidence
Facing unexpected costs can be intimidating, but it’s also where growth happens. My philosophy shifted from fearing unforeseen issues to viewing them as opportunities to improve my planning and problem-solving skills. Each project that taught me the importance of early assessment and flexible budgeting makes me a more confident builder and estimator today.
Resources That Keep Me Ahead of the Curve
Living in a rapidly evolving industry, I trust resources like this permit navigation guide and estimation tips to stay informed. These guides help me understand complex regulations and refine my estimating methods, giving me a competitive edge and peace of mind in every project.
Seize the Opportunity to Improve Your Building Game
Every new build or addition holds a lesson—whether it’s about detailed planning, choosing the right tools, or understanding local rules. Don’t shy away from challenges; instead, let them motivate you to learn, adapt, and grow. Your next successful project is just a well-informed step away. Are you ready to embrace the complexities and turn them into your greatest advantage? Share your experiences below and let’s learn together.