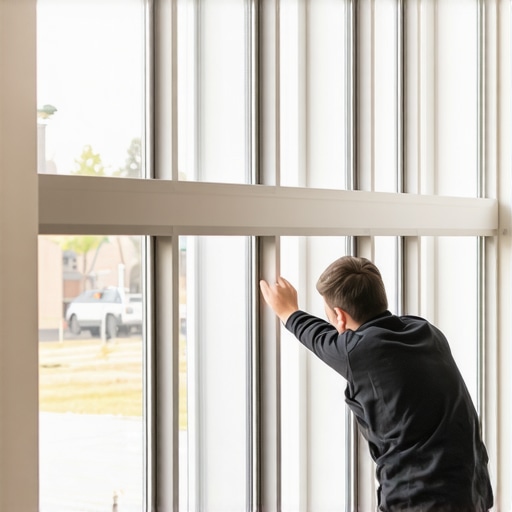
How to Verify That Your New Windows Meet Egress Standards
It was a chilly Saturday morning when I finally got around to installing those new basement windows I had been dreaming about for months. As I eagerly started measuring and fitting, a sinking feeling hit me — what if these windows don’t actually meet the egress standards? Suddenly, the project that I thought was straightforward felt daunting. Turns out, verifying that your new windows comply isn’t just a matter of measuring; it’s a critical safety step that many homeowners overlook until it’s too late. Have you ever faced that panic of wondering, “Did I do this right?” when it comes to building code requirements for egress windows? Well, you’re not alone, and good news — there’s a way to confidently verify compliance before any inspector knocks at your door.
Why Egress Standards Matter More Than Ever
Imagine a fire breaks out in your basement. Would your family have enough time to escape through those small, new windows? Probably not, if they aren’t built to code. Egress standards aren’t just red tape; they’re life-saving guidelines designed to ensure every home is safe during emergencies. Knowing how to verify that your windows meet these standards can save lives, and trust me, it’s worth the effort. Early in my renovation journey, I made the mistake of assuming that any window meets the safety code just because it looks right. That was a costly oversight — one that could’ve been deadly in a real emergency. According to the International Residential Code (IRC), windows serving as an exit must meet specific size, opening, and accessibility criteria, and overlooking this can lead to hefty fines or failed inspections. Fortunately, with some simple steps, you can avoid my mistake and ensure your windows are safe, compliant, and ready for any situation. If you’ve ever been unsure about whether your new windows actually meet egress standards, stick around. I’ll share the practical ways I learned to verify compliance, backed by industry advice, so you can breathe easier during your next inspection.
Measure Precisely to Meet Code Requirements
Start by measuring the window’s opening dimensions using a tape measure, ensuring the minimum width is 20 inches and height is 24 inches, as specified by the IRC. I remember struggling with this during my first attempt, repeatedly rechecking measurements to avoid costly mistakes. Using a level helped me verify the window’s frame was plumb, preventing miscalculations.
Calculate the Opening Area and Compare to Standards
Calculate the actual opening area by multiplying width and height. It should be at least 5.7 square feet for bedrooms. During my project, I drew the opening on paper and used a ruler to confirm dimensions before cutting. Once I verified the area, I cross-checked with local code variations listed in permit guides.
Check Sill Height and Accessibility
Ensure the sill height is no more than 44 inches from the floor. I used a level and tape measure to confirm this on-site. Remember, accessible egress windows must be easy for all occupants to reach in an emergency, so test opening operation to verify easy one-hand egress. This hands-on step is critical; I overcame my hesitation by practicing opening and closing multiple times, confirming compliance.
Test the Window’s Operation and Egress Ease
Open and close the window to confirm it functions smoothly and fully. During my installation, I discovered some locking mechanisms stuck, preventing proper operation. Applying a light lubricant fixed the issue, ensuring the window could be opened quickly during an emergency. Regularly test the window’s latch and hinge to maintain compliance.
Review Local Code Specifics and Document Evidence
Variations may exist: some jurisdictions require egress windows to be operable without tools or special knowledge. I reviewed local restrictions on window wells and required safety bars, referencing the local permit guidelines. Take photos of measurements, operation, and installation details to keep record for inspections and future reference.
Consult a Professional if Uncertain
If doubts linger, reach out to experts or building officials. I contacted a local building inspector through the contact page, who reviewed my work and provided last-minute tips. Remember, ensuring compliance isn’t just about passing inspections; it’s about protecting your loved ones during emergencies.
When it comes to new builds and home additions, many professionals and homeowners alike fall prey to misconceptions that can significantly inflate budgets and complicate permitting processes. A common myth is assuming that standard square footage calculations suffice for accurate estimates—yet, this overlooks nuanced factors like seasonal timing, material lead times, and site-specific challenges, which are often underestimated. In my experience, not accounting for these variables early can lead to costly overruns; for instance, unexpected weather delays during winter can extend construction timelines by weeks, impacting labor and material costs. A crucial nuance often missed is the interplay between permit complexity and local regulations. Many assume that permits are a straightforward formality, but the reality involves navigating a labyrinth of codes, variances, and inspections that vary city by city. Ignoring these intricacies can cause significant delays, penalties, or even project shutdowns. For example, a misclassified addition might require an entire redesign or additional inspections—costs that could have been avoided with thorough pre-application research. One advanced question I often get from seasoned builders concerns estimating costs for specific, often overlooked aspects like underground utility connections or environmental mitigation. Experts like those at Construction Edgez suggest performing detailed site assessments and consulting local permitting authorities for such nuances, which can otherwise be hidden traps. Be cautious of the “oops” factor: rushing estimations without detailed scope breakdowns can leave you vulnerable to hidden fees and unexpected hurdles. This is particularly true for additions where existing structures and property-specific conditions dramatically influence costs and timelines. To avoid these pitfalls, integrating comprehensive research—like reviewing the permitting guides—and maintaining proactive communication with local authorities proves invaluable. Remember, the devil is in the details; a thorough understanding here not only saves money but also smooths the approval process. Have you ever fallen into this trap? Let me know in the comments. Mastering these nuances transforms a daunting project into a manageable, even enjoyable, journey—so equip yourself with knowledge and avoid the common pitfalls that catch even industry veterans off guard.
Embracing Smart Maintenance Practices for Longevity
Maintaining your new build or addition requires more than just routine inspections; it demands strategic planning and the right tools to catch issues early. Regular upkeep ensures that your investment remains sound and safe over the years. I recommend scheduling seasonal checks on critical systems such as HVAC, drainage, and structural elements. Utilizing digital monitoring tools like moisture sensors and smart thermostats can preempt costly repairs. These devices alert you to anomalies before they become serious problems, saving time and money. Looking ahead, advancements in IoT (Internet of Things) technology are poised to revolutionize maintenance in construction—imagine a home that self-diagnoses issues and alerts you through your smartphone, streamlining long-term care.
How do I maintain my build over time?
My go-to maintenance arsenal includes a digital moisture meter for evaluating foundation and basement conditions, ensuring you catch leaks or water intrusion early. For roofing, I use infrared thermography cameras—these detect heat leaks or insulation issues invisible to the naked eye, as detailed in the Official Infrared Roof Inspection Guide. Additionally, a robust task management app helps schedule regular inspections and repairs, keeping everything on track without missing critical deadlines. When it comes to tools, I highly recommend investing in a good-quality multi-meter and a digital level. These allow quick diagnostics and ensure ongoing structural integrity, especially when verifying that additions or modifications maintain precise measurements. For more advanced maintenance strategies, exploring industry-specific software like project management platforms can improve your planning process. As technology evolves, expect to see integration of predictive analytics that forecast potential failures based on data trends, further simplifying long-term maintenance. Try incorporating a moisture sensor or infrared inspection into your routine, and watch how early problem detection becomes effortless—these small steps can save thousands down the line and ensure your build stays in peak condition for years to come.As I reflect on my journey through home additions and renovations, one lesson stands out as truly transformative: the importance of detailed knowledge over assumptions. Turning a blind eye to even the smallest code detail can jeopardize safety, cost time, and drain resources. I used to believe that a professionally installed window was automatically compliant, but I learned the hard way that verifying size, operation, and accessibility is an ongoing commitment. This insight has reshaped my approach: proactive checks and continuous learning are your best tools for safety and efficiency. Remember, building a safe home isn’t just about meeting standards—it’s about embracing a mindset of vigilance and education that keeps your loved ones protected in every scenario.