How to Map Underground Utilities Before Your Dig
I remember the first time I started a project without checking the underground utilities. It was a sunny Saturday morning, and I was eager to get my new backyard shed built. But as I dug the first trench, suddenly my shovel hit something hard—and not the kind I hoped for. It was a surprise wire, and luckily, I caught it early before anyone got hurt or I caused a major outage. That mistake taught me a simple but vital lesson: never underestimate the importance of mapping underground utilities before digging.
Why Knowing What’s Beneath Your Feet Changes Everything
Getting familiar with what lies underground isn’t just about avoiding a few damaged cables. It’s about protecting your property, your safety, and your peace of mind. Did you know that striking an underground utility line can cause serious injuries or even fatalities? According to the American Gas Association, accidental utility strikes happen roughly every three minutes in the U.S., leading to property damage, injuries, and costly repairs. That’s why it’s crucial to know what’s buried beneath before you start digging.
Is Investing Time and Money Worth It?
Many homeowners or contractors skimp on utility mapping, thinking it’s an unnecessary expense or delay. But in my early days, I learned the hard way that rushing without proper mapping can turn into a nightmare. I once skipped this step on a small garden fence project—only to find out the hard way that a water line ran just inches below my planned post holes. It added days of delays and hundreds of dollars in repairs. Now, instead of guessing or relying solely on old marks, I always use professional utility detection tools or consult utility companies. It’s a small investment that can save you a huge headache.
Do you have a similar story? Or perhaps you’re about to start a new build and wonder whether you’re overlooking this critical step? If so, stay tuned, because next I’ll guide you through how to effectively locate underground utilities—before you lift a shovel.
Start with Professional Utility Maps
Begin by obtaining existing utility maps from local agencies or utility companies. These records often include information on water, gas, electric, and telecommunication lines. However, keep in mind that these maps can be outdated or inaccurate, so don’t rely solely on them.
Use Ground Penetrating Radar (GPR) for Accurate Detection
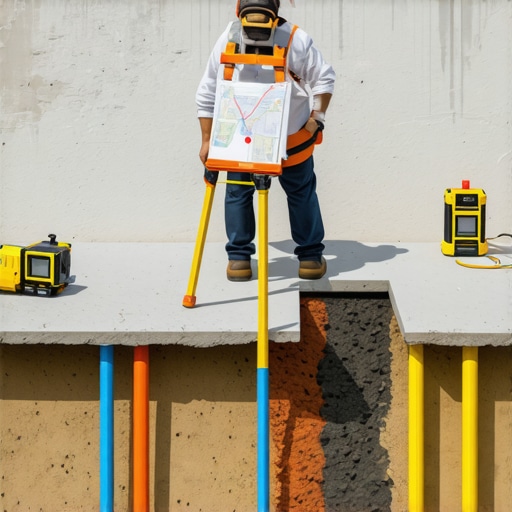
Next, employ ground-penetrating radar (GPR) technology, which uses electromagnetic signals to detect underground objects. Renting or hiring a professional with GPR expertise can significantly improve accuracy. I recently rented a GPR device and, for a small backyard shed project, successfully identified hidden utility lines that survey maps missed, preventing costly damages and delays.
Identify and Mark Utility Lines Clearly
Once you detect underground utilities, mark their locations clearly using spray paint or flags. Make sure to note the depth and type of lines, especially if you plan to excavate deeply—this info is crucial for avoiding accidental cuts. In my experience, marking out the lines early saved me from having to redo parts of my project when I inadvertently approached a water line deeper than the surface indication suggested.
Consult Utility Companies Before Proceeding
If you’re unsure about the detection results or need confirmation, contact utility companies directly. They often offer free or low-cost services, such as live line detection or marking. Engaging with them not only verifies info but also ensures compliance with local regulations.
Utilize Technology and Local Regulations
Some regions require permits or special procedures for digging near utilities. Familiarize yourself with local laws by visiting official websites or consulting with permit authorities. For instance, I checked the local regulations and found that certain depths require licensed utility locators, which I arranged for a small fee.
Integrate Your Findings into Project Planning
Finally, incorporate your utility maps and detection marks into your project plans. Adjust your excavation boundaries accordingly, and communicate clearly with your team. I once nearly caused a water line rupture because I didn’t revise my plans after detection; updating these plans saved me from costly repairs and downtime.
Remember, proper underground utility detection isn’t just about safety—it’s about protecting your investment and ensuring smooth project progress. For a comprehensive approach, consider checking out expert home additions guides that emphasize planning and risk management.
Many property owners and even seasoned builders believe that estimating costs, obtaining permits, and planning for additions are straightforward processes. However, beneath the surface lie subtle nuances that can make or break your project. One widespread misconception is relying solely on initial quotes without considering the complexity of permit processes and hidden costs. For example, many overlook how zoning regulations and specific local ordinances affect project scope and timelines, leading to costly delays or modifications. To navigate this effectively, it’s essential to familiarize yourself with regional requirements by consulting authoritative resources like permits for new builds and additions. Furthermore, estimators often focus on material and labor costs but ignore secondary expenses such as site preparation, utility upgrades, and unforeseen structural issues—these can inflate the budget significantly. Advanced project managers incorporate contingency percentages into their estimates, often 10-20%, as recommended by industry experts. Additionally, have you ever heard the myth that permits are simply a formality? In reality, improper permit handling can result in legal issues, fines, or even demolition orders, as detailed in understanding permit processes for successful home additions. The trap here is assuming your plan aligns with all local codes without thorough review, which is rarely the case. There’s also a ‘hidden’ nuance in estimating: the importance of accurate site assessment. Many underestimate the impact of soil conditions, drainage, and existing structures, which can alter foundation requirements and project scope. Skipping detailed site analysis often leads to surprises during construction, increasing costs and delays. Finally, consider the advanced question: How can digital estimation tools and Building Information Modeling (BIM) reduce these errors? Industry studies suggest BIM can decrease project overruns by up to 20%, as per top estimating strategies. Embracing these technologies, combined with thorough planning and regulatory knowledge, can significantly elevate your project’s success rate. Have you ever fallen into this trap? Let me know in the comments and share your experiences. Remember, mastering these nuances ensures your build is smooth, compliant, and within budget.
Maintaining Momentum with Reliable Equipment and Software
In the world of construction, consistency is key—yet long-term success hinges on the right tools and maintenance routines. I rely heavily on precision tools like laser distance meters, such as the Leica DISTO D410, which provides quick, highly accurate measurements. These gadgets reduce human error, saving time and preventing costly mistakes during project execution. Additionally, I use project management software like Procore, which streamlines communication, document sharing, and task tracking, ensuring that every team member stays on the same page. Regular updates and data backups from such platforms are vital for seamless workflows.
Beyond digital tools, maintenance routines play a pivotal role. I schedule weekly inspections of equipment, including excavators and compressors, to check for wear and tear. Implementing a preventive maintenance plan, often grounded in manufacturers’ recommendations—like those from Caterpillar’s service guidelines—can significantly extend machinery lifespan and prevent breakdowns that cause delays. These proactive steps form a foundation for reliable progress, especially on complex builds where unexpected equipment failures can derail timelines.
Looking ahead, the trend is moving toward integrated, IoT-enabled equipment that communicates diagnostics in real-time. This development promises even greater efficiency by predicting failures before they happen, thus minimizing downtime. Embracing smart maintenance is not just an upgrade, but a necessity for scalable growth and sustained success.
How do I keep my tools functioning effectively over time?
Maintaining your tools is essential for ongoing project success. Regular cleaning, especially after exposure to dust and moisture, prevents corrosion and lubricates moving parts. Calibration of measurement devices like laser meters should be performed annually, or according to the manufacturer’s schedule, to maintain accuracy. I personally keep detailed maintenance logs—this habit ensures that I don’t overlook upcoming service dates and can trace performance issues back to specific maintenance actions. According to industry standards outlined by top estimating strategies, well-maintained tools and equipment reduce error margins and improve project estimations, which is crucial when scaling up efforts or managing multiple projects simultaneously. Investing in quality maintenance will pay dividends in shorter project timelines and lower repair costs, ultimately contributing to dependable long-term results.
Don’t forget, leveraging modern software solutions like digital project dashboards enables us to monitor ongoing equipment status instantly. These platforms help identify potential issues early, so you can schedule repairs during planned downtime instead of reacting to failures. Trying out such integrated maintenance strategies will give your projects resilience and ensure they stay on track from start to finish.
Lessons That Changed My Perspective on New Builds and Additions
One of the most profound lessons I learned was the value of meticulous planning, especially when it comes to permits and estimating. Rushing into a project without thorough research often leads to costly corrections later. I once underestimated the time needed to secure the right permits, which delayed my entire timeline and increased expenses. Now, I always allocate extra time for permit acquisition, referencing resources like permit streamline guides, to stay ahead.
Another insight was understanding the importance of detailed site assessments. Ignoring soil quality, drainage issues, or existing constraints can cause foundational problems and budget overruns. A heartfelt lightbulb moment came when I realized that early inspections and accurate utility detection, as discussed in this article, are vital steps that safeguard your project’s success.
Finally, I discovered that leveraging technology—such as digital estimation tools and BIM—can drastically reduce surprises. These tools, recommended in top estimating strategies, enable me to anticipate potential issues and plan accordingly. Embracing these lessons has transformed my approach from reactive to proactive, saving both time and money.
Tools and Resources That Elevated My Building Projects
My go-to utility maps from local agencies provide a valuable starting point but must be supplemented with on-site detection methods. For accurate underground utility detection, ground-penetrating radar (GPR) rented from reputable providers has been a game-changer—it’s helped me avoid costly utility strikes and project delays.
When estimating project costs, accurate estimation software has been essential. Its ability to incorporate contingencies and real-time updates ensures my budgets are realistic and adaptable. Additionally, consulting authoritative guides like expert home additions resources helps me navigate permits smoothly and stay compliant with local regulations.
For managing ongoing tasks, cloud-based project management platforms like Procore help keep teams aligned, and regular equipment maintenance routines prevent unexpected breakdowns that could set projects back. These tools, combined with a proactive mindset, empower me to handle complex builds with confidence.
Seize the Moment: Building Smarter Starts Now
Taking the lessons learned and trusted tools into your own projects can dramatically improve outcomes. Whether you’re planning a simple addition or a whole new build, remember that thorough preparation, the right technology, and continuous learning are your best allies. The journey might seem daunting at first, but with strategic steps and a growth mindset, you can turn your vision into reality with less stress and more success.
What’s one lesson from your own building experience that changed how you approach projects? Share your story below and let’s grow together in this construction journey!