The Railing Gap Rule for Child Safety Inspections
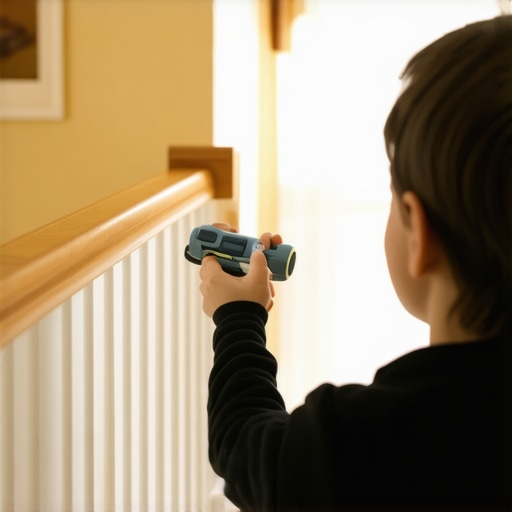
I once nervously watched as my toddler tiptoed dangerously close to an open railing gap during a playdate at my friend’s house. That lightbulb moment hit hard—how could I have overlooked something so simple yet crucial? The realization that even tiny gaps could pose a safety risk kept me awake that night. Since then, I’ve become obsessed with mastering the Railing Gap Rule, a vital aspect of child safety inspections that often gets neglected.
Why Overlooking Railing Gaps Can Be a Real Danger
Many homeowners and builders underestimate the importance of analyzing the spacing between railings. What seems like a minor detail can become a major hazard for curious little ones. The Railing Gap Rule essentially states that gaps exceeding a certain size can allow children to slip through or get stuck. This isn’t just a safety guideline—it’s backed by safety standards, such as those outlined by the Consumer Product Safety Commission, which emphasizes the importance of safe spacing.
I remember making a mistake early on—failing to check the actual measurements during a home inspection—and trusting the previous contractor’s work. That’s a common slip, but one I learned to avoid by paying close attention to these details. Ignoring such small but significant factors can delay inspections, cause costly rework, or worse, lead to accidents.
Are you worried about the safety of the railings in your home or upcoming project? Or maybe you’re not even sure where to begin with the inspection process? Don’t worry—I’ll guide you through practical steps and help you avoid common pitfalls.
Is the Railing Gap Rule Actually Worth the Hype?
It might seem like a minor detail, but trust me, paying attention to railing gaps saved me from potential heartbreak and legal issues. Early in my journey, I overlooked this rule in a rush to meet deadlines, only to realize that I had installed railings violating safety standards. That experience taught me the importance of precision. If you’re curious about how to master these inspections, or want to ensure you’re not overlooking critical compliance points, I’ve got you covered. For deeper insights on proper estimating and inspection techniques, check out [this guide on estimating home improvements](https://constructionedgez.com/how-to-accurately-estimate-costs-for-home-improvements).
Now that I’ve shared my experience, let’s dive into the practical aspects of ensuring your railings meet safety standards and protect your loved ones from avoidable hazards.
Measure the Gaps Precisely
Start by obtaining an accurate measuring tool, like a tape measure or a gauge stick. When I inspected my first home for compliance, I mistakenly relied on visual estimates, which led to overlooking a critical gap. To avoid this, always double-check your measurements at multiple points along the railing. Measure both the width and the height of each gap, especially near corners and joints, where gaps tend to be inconsistent.
Refer to Safety Standards and Regulations
Before inspecting, familiarize yourself with local building codes or safety standards, such as those from the Construction Edgez resources. These typically specify maximum allowable gap sizes, often around 4 inches for residential railings. Have these standards handy to compare your measurements against, ensuring compliance and safety.
Document Your Findings Thoroughly
Use a digital camera or smartphone to take clear photos of each measured section, especially if you find gaps exceeding the standard. This documentation will be invaluable if you need to discuss corrections with clients or contractors later. When I found a non-compliant railing, detailed photos helped me communicate precise issues, leading to a quick fix before any final inspection.
Identify and Address Non-Compliance
If you detect gaps larger than the allowable limit, plan corrective actions immediately. This might involve installing new pickets, adding filler panels, or adjusting railing posts. Remember, simple solutions like adding filler strips can often restore compliance without complete reconstruction. During my latest inspection, a quick addition of filler material transformed a hazardous gap into a compliant section in under an hour.
Perform a Final Re-Inspection
After any modifications, always re-measure the gaps to confirm compliance. Don’t skip this step; it’s common to overlook residual issues. When I re-checked after adjustments, I noticed a slight misalignment, which I corrected right away. This diligence ensures the safety standards are truly met and avoids potential re-inspections or legal liabilities.
Leverage External Expertise When Needed
If you encounter complex railing designs or persistent compliance issues, consulting with a certified inspector or structural engineer can save time and ensure accuracy. For instance, I once brought in a professional after my initial DIY efforts failed to meet code, and their insights clarified how to properly modify the railing for full compliance. You can find qualified experts through Construction Edgez.
When planning a home addition or embarking on a new build, many tend to focus on the visible aspects—layout, design, and materials—missing subtler yet critical details. One of the most misunderstood nuances is the significance of comprehensive estimating and the pitfalls of underestimating permit complexities. Everyone seems to think that adding a room or building anew is straightforward, but in practice, the devil is in the details. A common myth is that permits are just a bureaucratic hurdle—usually, it’s an essential safeguard that can significantly impact your project’s timeline and budget if not properly navigated. In fact, failing to understand local permit requirements can lead to costly delays or even legal issues. According to industry experts, failing to factor in permit acquisition duration and costs during early planning stages is a recipe for disaster, often resulting in inflated budgets or halted projects.
The real trap many fall into is assuming permit processes are standard across jurisdictions. Actually, each city or county has unique rules, and a permit required for a garage conversion may differ substantially from approvals needed for a custom-built addition. Not consulting these local regulations early can cause unnecessary rework or, worse, illegal construction that compromises safety and compliance.
Additionally, some underestimate the complexity of estimating actual construction costs. It’s tempting to rely on initial bids that look competitive but fail to account for hidden costs like soil testing, specialized inspections, or unforeseen site conditions. For example, soil stability issues might require additional foundation reinforcement, drastically increasing costs. A 2024 study by the Home Builders Institute highlights that over 60% of renovation overspending derives from poor initial cost estimation, mainly neglecting these ‘hidden’ factors.
< h3 >What complicates permit and estimate accuracy even further for advanced projects? < /h3 >
For seasoned professionals, the challenge lies in understanding the interplay between design intricacies, local regulations, and unforeseen site issues. Advanced projects often involve complex structural calculations, environmental assessments, and specialized systems installation, all of which demand precise planning and expert insight. Missing these nuances can lead to project delays, increased costs, or structural non-compliance. To master these, it’s crucial to proactively engage with licensed inspectors and seasoned estimators. Resources such as these expert guides provide invaluable insights into avoiding such pitfalls.
The bottom line? Always incorporate thorough research and expert consultation into your planning process. Don’t rely solely on initial bids or assumptions; instead, plan a buffer for unexpected costs and permit delays. Doing so ensures smoother project execution and peace of mind. Have you ever fallen into this trap? Let me know in the comments.
Keep It Running: Tools I Recommend for Reliable Construction Work
Maintaining precision and efficiency over time requires the right equipment. Personally, I rely heavily on a high-quality laser distance meter like the Bosch GLM 50 C. Its accuracy, ease of use, and connectivity to your smartphone make measuring tedious tasks quick and trustworthy, especially when verifying large or complex layouts. I’ve found that investing in reliable tools like this reduces errors and speeds up inspections, which is crucial when managing multiple projects or scaling operations.
Next, I advocate for a digital level such as the Stabila 37472 Digital Level. Traditional bubble levels only get you so far; technology like this offers digital readouts and data storage, ensuring your elevations and slopes are consistently accurate. Over time, small discrepancies can snowball into major structural issues, but advanced tools like these help catch problems early.
Complementing physical tools, I swear by software solutions such as Buildertrend for project management. It streamlines scheduling, material ordering, and communication, making sure everyone is on the same page from start to finish. Incorporating such platforms into your workflow not only improves accountability but also aids in long-term tracking for inspections and permit renewals.
How do I maintain construction standards as projects expand?
Scaling your operations or embarking on complex additions demands a strategic approach to upkeep. Regularly scheduled calibration of your measuring devices ensures ongoing accuracy; I recommend marking calibration dates in your calendar based on usage frequency. Additionally, safe storage of tools—preferably in a climate-controlled environment—prevents damage and extends their lifespan. Incorporating routine maintenance checks, like inspecting drills and saw blades before each use, minimizes downtime and costly repairs.
For software, ensuring your project management platforms are up-to-date is vital. Many updates include security patches, new features, and efficiency improvements that support long-term use. Training your team on these updates sustains productivity and reduces errors stemming from unfamiliar interfaces.
What about tools that help project scaling and permit handling?
When planning large-scale additions, tools such as permit navigation apps become invaluable. They help you understand jurisdiction-specific requirements and track permit statuses. Additionally, estimating software that integrates with your CAD drawings—like EstimateMaster—can provide quick, reliable cost projections to accommodate new scope and ensure you stay within budget.
Leveraging these tools proactively can simplify complex processes and save you from costly rework or delays. As construction standards evolve, especially with recent updates cited in new build estimating guides, staying current with technological advances is essential for sustainable growth.
Try implementing a digital level and scheduling routine calibration checks this month. Incorporating these small but impactful steps can dramatically improve your project consistency and long-term performance. Ready to take your maintenance to the next level? Dive deeper into advanced estimating techniques and permit strategies at this comprehensive guide.
What Slipped Through My Hands and Cost Me More
The biggest lesson I had to learn was not overlooking the smallest details—like that sneaky railing gap or inconsistent permit requirements. Overconfidence can lead to costly rework; I once skipped re-measuring after a fix, only to find residual gaps that failed inspection. It taught me that meticulous attention to detail and a mindset that expects surprises save time and money in the long run.
Another tough lesson was realizing that local building codes are as varied as the homes they govern. Assuming a standard permit process across jurisdictions was a mistake I paid for. Dive into your local regulations early, and you’ll avoid unexpected delays. I wish I had prioritized upfront research instead of reworking plans last minute.
Finally, I learned that estimating hidden costs—soil issues, structural requirements, special inspections—is vital. Relying on initial bids alone can make your project balloon in price. Instead, I now incorporate a contingency buffer based on thorough assessments. It’s a practice that wards off unpleasant surprises and keeps projects on track.
Tools and Resources That Transformed My Approach
For precise measurements, I swear by the construction estimating guides. They helped me understand how to accurately gauge material and labor costs, avoiding underestimations. Reliable tools like the Bosch GLM 50 C laser distance meter have become my go-to for fast, accurate measurements on-site.
When it comes to permits and inspections, permit navigation apps are essential. They simplify understanding jurisdiction-specific requirements and track permit statuses, saving me weeks of guesswork. Additionally, expert guides on estimating and permitting provide insights that elevate the quality of your project planning.
Lastly, project management platforms like Buildertrend keep all aspects synchronized—from scheduling to documentation. Integrating these tools streamlines workflow and prevents costly oversights, helping your home addition reach completion smoothly.
Your Next Step Lies in Action, Not Fear
Diving into additions, estimating, and permit hurdles might seem daunting, but remember—every project is a learning journey. With the right tools, mindset, and a keen eye for details like railing gaps, you’re already ahead. Start small, apply what you’ve learned, and watch your confidence grow as your projects succeed. The future of your home improvements is in your hands—embrace it with enthusiasm.
What’s one detail you’ve overlooked in a project that you wish you had caught earlier? Share your story below!
,