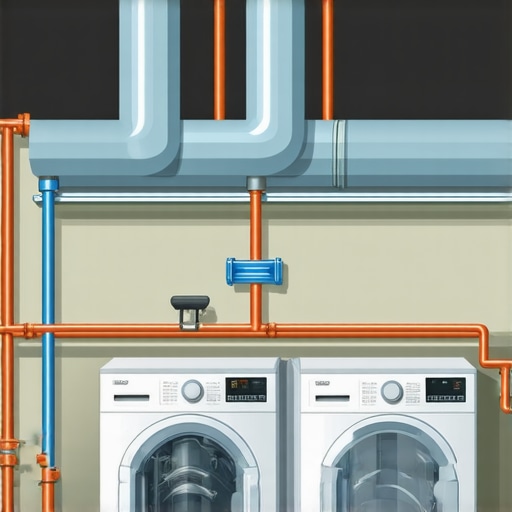
The Plumbing Vent Rule for Second-Story Laundry Rooms
I remember the moment I realized I had overlooked the plumbing vent requirements when remodeling my second-story laundry room. It was late one evening when I received that dreaded call from the city inspector, pointing out the permit issue that could delay my project by weeks. That lightbulb moment hit hard—nothing’s more frustrating than spending months on a renovation only to find out a simple code oversight can derail everything.
Why Understanding the Plumbing Vent Rule Can Save Your Project
As a homeowner who’s been through the twists and turns of home improvements, I can tell you firsthand how confusing some rules can be—especially those related to plumbing vents. These rules aren’t just bureaucratic hurdles; they’re safety standards designed to prevent sewer gases from entering your home and ensure your plumbing system functions properly. Missing or misapplying these can lead to odors, code violations, or even costly redo’s.
But here’s the good news: mastering the plumbing vent rule, particularly for second-story laundry rooms, isn’t as complicated as it seems. Today, I’ll walk you through simple, practical steps that helped me navigate this part of the process successfully—and how you can do the same.
Is the Plumbing Vent Rule Just Overhyped? Here’s Why It Matters
Early on, I made the mistake of thinking that I could just run a basic vent and that would be enough. Turns out, I overlooked the specific requirements for second-story setups, which require additional considerations to prevent system problems. According to the International Plumbing Code, proper venting prevents negative pressure that can siphon water out of traps, leading to bad odors or gas leaks. It’s not just a technicality; it’s about your family’s health and safety.
My advice? Don’t make the mistake I did by assuming all vents are created equal. A small oversight can turn into a big mess. For detailed insights on how to get the permits right the first time, check out this comprehensive guide on understanding permit processes.
Understanding these essentials early can prevent costly delays. Keep reading, and I’ll share the do’s and don’ts I learned the hard way—that way, your laundry room upgrade will go smoothly from planning to permit approval—without those last-minute surprises.
Identify Clear Vent Pathways Early
When I remodeled my second-story laundry, I started by sketching the existing plumbing layout and marking potential vent routes. Think of venting like plumbing’s respiratory system—it needs a direct, unobstructed path to the roof. I used a implement like a flexible pipe to visualize the route, ensuring it didn’t clash with structural elements. By doing this, I avoided rerouting later and streamlined obtaining permits. To refine my approach, I reviewed the permit guidelines, which clarified the minimum distances and configurations required for second-floor vents.
Calculate Proper Vent Sizing and Placement
Measuring the flow requirements of my laundry fixtures, I learned that undersized vents could cause siphoning traps and sewer gases. I adopted the rule of thumb: a vent pipe should be at least 1.5 inches in diameter, with the length from the fixture to the vent stack not exceeding specific limits. To avoid costly mistakes, I used the estimating strategies to forecast material needs precisely, ensuring code compliance and system efficiency. Recalling my project, I remember doubling the vent size at one joint after noticing signs of slow drainage—this proactive step prevented future odors and inspection failures.
Coordinate Vent Placement with Structural Constraints
Aligning my vent pipes with existing framing was a puzzle. I drilled through joists carefully, using a stud finder and blueprints, to avoid weakening the structure. Think of this process as threading a needle through a dense fabric—precision avoids future squeaks and supports. I also planned vent termination points on the roof with proper clearances—generally 10 feet from windows, doors, or HVAC intakes. To ensure I met local requirements, I referenced the permit standards. During installation, I kept the vent pipe as straight as possible to facilitate airflow, which is particularly crucial for second-story setups where gravity and pressure differences are more pronounced.
#IMAGE_PLACEHOLDER_B#
Illustration of correct vent pipe routing for second-story laundry rooms, emphasizing straight runs and proper roof termination height.
Address Local Code Nuances and Get the Right Permits
Before finalizing my plans, I contacted the local building department, examining their specific venting requirements. It’s akin to checking the rules of a game before playing—it saves time and prevents disqualifications. I learned that some jurisdictions demand an anti-siphon device at the vent entry or specific vent pipe insulation. To avoid surprises, I reviewed the full process in the permitting guide. During inspection, I demonstrated that my vent path adhered to these standards, which expedited approval. Remember, each modification adds complexity—consult your local codes early to prevent rework or delays.When homeowners and even some so-called experts focus solely on initial costs and overlook the nuanced complexities of modern construction, costly mistakes often follow. Contrary to popular belief, estimating isn’t just about plugging in some square footage numbers; it requires understanding advanced factors like regional permit intricacies and current material market fluctuations. For example, many assume that permits are straightforward approvals, but as detailed in navigating permit requirements, certain jurisdictions demand specific structural details or environmental mitigations that can dramatically alter your budget and timeline. Overlooking these nuances can lead to ‘hidden’ expenses, unexpected delays, or even retroactive permit approvals, which are much harder and costlier than initial planning.
One prevalent myth is that estimates are static; however, fluctuating material prices mean that your initial quote often becomes obsolete within weeks. A study highlighted by top estimating strategies underscores the importance of including contingency buffers and dynamic updating practices to keep budgets realistic. Additionally, many underestimate the importance of regional code differences—what is permissible in one city might be prohibited in another, especially regarding zoning setbacks and foundation requirements. This can cause major project reworks if not vetted early.
A hidden trap relates to the misjudgment of permitting timelines. Homeowners often believe permit approval is quick, but property-specific factors, such as neighborhood covenants or recent zoning updates, can extend the process significantly. Consulting authoritative sources like the permit process guides helps set realistic expectations.
Let’s confront a common misconception with bold honesty—many assume base estimates cover all scenarios, but when unexpected issues like soil contamination or unanticipated structural reinforcement arise, costs can swell 50% or more. The only way to mitigate this risk is thorough pre-project due diligence and a flexible estimating framework—skills honed through experience and continuous learning.
Mastering these advanced nuances is crucial for smoother projects, avoiding surprises, and maintaining control over your budget and timeline. Remember, proper planning isn’t just about numbers; it’s about understanding the hidden layers that influence every decision. For deep dives into these complexities, check out adding value through expert guidance.
Have you ever fallen into this trap? Let me know in the comments.
Prioritize Long-Term Equipment and Software Maintenance
Ensuring your tools and software stay in top shape is crucial to maintaining efficiency in your home building or remodeling projects. I personally rely on a few key tools that have proven their worth over time. For example, I use a high-quality laser distance measurer like the Leica Disto—it not only provides precise measurements but also has a durable casing that withstands tough job site conditions. Regular calibration of such devices prevents measurement errors that could compromise your project timelines and budgets. Similarly, my preferred project management software is Buildertrend, which offers seamless task scheduling, document sharing, and permit tracking. Regular updates and backups of this platform prevent data loss and ensure access to vital project information at all times.
Implement Routine Maintenance Checks
The longevity of your tools and systems depends on scheduled maintenance. For hand tools and equipment, I perform quarterly inspections—checking for rust, wear, and calibration issues. Power tools, especially saws and drills, benefit from blade sharpening and battery maintenance, which I schedule monthly. For digital tools, I routinely clear cache, update software, and review permissions to guard against security vulnerabilities. This approach not only prevents unexpected breakdowns but also keeps workflows uninterrupted. As the trend in homebuilding evolves, integrating smart maintenance alerts within software can forecast issues before they escalate, making your process more proactive than reactive.
Streamline Permitting and Inspections with Tech
One of the most frustrating parts of home improvement projects is permit delays and inspection hiccups. Modern tools can help mitigate these delays. I recommend using online permit portals provided by many local jurisdictions—these allow you to submit documents, check application statuses, and receive feedback without the need for endless visits to city offices. For example, my experience with permit acquisition strategies highlights how digital submission and real-time updates can save weeks. Maintaining digital copies of permits, inspection reports, and correspondence ensures that you always have access to critical documentation—use cloud storage solutions like Dropbox or Google Drive for easy access across devices.
Enhancing Long-Term Results and Scaling Up
Developing a habit of diligent maintenance and utilizing the right tools can prepare your project for scalable growth. As you add more projects, these systems become multipliers of efficiency, reducing downtime and preventing costly reworks. Investing in quality equipment now, coupled with routine updates and strategic planning, sets a solid foundation for future success. The future of homebuilding will likely see an increase in automated reporting and AI-driven project management, making proactive maintenance even more vital. For nuances specific to expanding your projects or upgrading systems, reviewing adding value with strategic tools can provide insight into scaling wisely.
How do I maintain my tools and systems over time?
Making maintenance a regular habit ensures your tools, software, and permit processes continue to serve you well. Set scheduled check-ins every few months, update everything systematically, and keep detailed logs of service history. This proactive approach prevents breakdowns and keeps your project timeline on track, even as complexity grows. I recommend prioritizing high-use equipment and digital platforms, as these are most susceptible to wear and obsolescence. Start today by scheduling a comprehensive review of your most critical tools—your future self will thank you for the smooth process that follows. Remember, staying ahead with updates, cleanings, and backups is the key to delivering high-quality results without unnecessary delays or failures.
Lessons From the Trenches: What I Wish I Knew About Permitting and Estimating
One of my biggest lightbulb moments was realizing how critical early permit planning is—waiting until the final stages can cause costly delays. Starting permit conversations early allowed me to avoid surprises and rework, highlighting the value of proactive communication. Additionally, I learned that accurate estimation isn’t just about numbers; understanding regional nuances and permit complexities directly impacts my project’s success. Overestimating costs to include contingencies proved far more effective than underestimating, saving me from sleepless nights. Lastly, slipping up on venting requirements taught me that missing a detail here could mean the difference between a smooth process and weeks of frustration—attention to detail makes all the difference.