The Insulation R-Value Rule That Stalls New Builds
It was a cold winter morning when I finally realized my latest project was hitting a wall—literally. I had poured hours into designing what I thought would be a perfect, energy-efficient new home, only to be stymied by an obscure government regulation: the Insulation R-Value Rule. At first, I thought it was just a bureaucratic hurdle, but soon I understood that this rule was a silent saboteur, pushing my timelines and budgets into chaos.
The Hidden Trap Stalling Modern Builds
This rule mandates specific insulation standards that, while essential for energy efficiency, often become a stumbling block, especially for first-time builders. I learned this the hard way—by making early assumptions about insulation and misjudging permit requirements. The insidious part? The rule isn’t necessarily about better homes; it’s about navigating a maze of regulations that threaten to slow your progress unnecessarily.
If you’ve faced similar frustrations—delayed permits, skyrocketing costs, or design compromises—you’re not alone. Commonly, builders consult costly experts or spend endless hours troubleshooting permit issues, only to find that the real barrier is understanding how the R-Value regulation interacts with local codes. That’s why I’m sharing my experiences and insights—so you can sidestep these pitfalls.
Ready to break down this barrier? Today, I’ll show you how to understand the R-Value rule, avoid its common traps, and streamline your project from conception to completion. For a broader understanding of project estimations, which can help you prepare more accurate budgets and avoid surprises, take a look at [this step-by-step guide](https://constructionedgez.com/estimating-home-additions-a-step-by-step-guide-for-2025). Now, let’s dive into why this seemingly simple regulation can derail entire projects and how to navigate it like a pro.
Is the R-Value Rule Actually Worth the Hype?
Early on, I made the mistake of thinking more insulation meant better insulation—and that more was always better. I believed that pushing for the highest R-Value would guarantee compliance and long-term savings. That was a costly misjudgment. According to the U.S. Department of Energy, over-insulating can lead to diminishing returns and unnecessary costs, especially if your local climate doesn’t demand it. This realization helped me refocus on what truly mattered: matching insulation levels to specific climate zones without overpaying.
By learning to balance insulation quality with project scope, I could keep the build on track without sacrificing energy efficiency. And if you’re worried about whether this rule is just another bureaucratic hoop, I get it. But ignoring it can cause delays, fines, or the need for costly redesigns. The key is understanding its nuances—something I’ll explore in detail to help you avoid the mistakes I made early on.
Stay with me, and I’ll share essential strategies to make the R-Value rule work for you rather than against you. From permit processes to selecting the right materials, this is about turning a stumbling block into a stepping stone for your project’s success.
Assess Your Climate Zone Carefully
Start by pinpointing your geographic location’s climate zone. This determines the minimum insulation R-Value needed for your project. Use local building codes or online tools to verify requirements. When I built my first extension, I double-checked this detail, preventing unnecessary insulation overinvestment and permit issues.
Select the Right Insulation Materials
Choose materials that meet or slightly exceed the required R-Value without overdoing it. Fiberglass batts, spray foam, or rigid foam boards all have different R-values per thickness. I personally found that rigid foam offered better compliance with local codes and easier installation—saving time during inspections.
Tip:
Don’t forget to verify third-party certifications of your insulation products. This step avoids overruns or failed inspections later. For a comprehensive understanding of cost-effective strategies, consult this guide.
Calculate Material Quantities Precisely
Estimate the total square footage of wall cavities or roof spaces and multiply by the R-Value requirements. Use a calculator to avoid over-purchasing or shortages. I made a spreadsheet for this purpose, which streamlined my ordering process and reduced waste.
Coordinate with Permitting Authorities Early
Submit your insulation plans with detailed calculations to the permit office. Clarify how your chosen R-Value aligns with code requirements. When I first applied, including detailed datasheets and third-party test reports sped up approval—keeping my project moving smoothly.
Engage Certified Inspectors for Verification
During inspection, ensure your insulation installer provides proper documentation and verbal explanations. Having an inspector review before final approval avoids costly rework. My experience taught me that proactive communication and third-party verification prevent delays.
Document Everything for Future Projects
Keep records of all calculations, certifications, and permits. This habit simplifies inspections for subsequent builds and reduces surprises. I now maintain a digital folder for each project, which has saved me hours during audits or future permit renewals.
Remember:
Balancing insulation needs with compliance is crucial. Over-insulating can lead to unnecessary costs and delays, while under-insulating risks non-compliance. Following these concrete steps will help you stay on top of the R-Value rule, ensuring your project progresses without avoidable holdups.
Many homeowners and builders operate under misconceptions about the process of adding space or undertaking new builds. A common myth is that estimating costs is straightforward—simply tallying square footage and multiplying by a standard rate. However, as I discuss in this guide, accurate estimation involves understanding local regulations, material fluctuations, and permit complexities. Mistaking this simplicity can lead to significant budget overruns.
Another widespread belief is that permits are a bureaucratic hurdle to be circumvented. In reality, savvy builders recognize that permits are vital for legal compliance and streamline inspections. Overlooking their importance often results in costly fines, delays, or even demolition orders. The secret is mastering permit processes early in your project.
A less obvious nuance is that not all builders consider the long-term value of their estimations and permit strategies. Investing time in understanding the intricacies, such as the influence of specific codes or potential variances, can save substantial money and stress down the line. For example, knowing how your local regulations evolve can prevent surprises.
Let’s also address one advanced misconception: that all estimating tools and software are equally accurate. In fact, many overlook the importance of local data and jurisdiction-specific rules. Relying solely on generic calculators often results in underestimating costs, particularly in unexpected areas like permit fees or specialty inspections. To improve accuracy, I recommend integrating region-specific data, as detailed in this step-by-step guide.
Finally, a crucial yet underappreciated point is how improper planning around the permit timeline can cause delays and increase costs. Trying to rush permit submission without thorough preparation is a classic mistake. Instead, aligning your planning with local authority timelines—something I emphasize in this resource—can give you a strategic advantage.
**Have you ever fallen into this trap? Let me know in the comments.** Let’s dig deeper into how these misconceptions can be avoided and your projects can move forward smoothly.
Essential Tools to Keep Your Projects Running Smoothly
Maintaining your construction projects over time requires the right set of tools and strategies. From software that streamlines estimating to equipment that ensures precision, I rely on specific resources that have proven their worth during my years in the field. In this segment, I’ll share the tools I personally trust to keep projects on track and how they can benefit your builds.
AccuEstimate for Precise Cost Management
This software has revolutionized the way I handle project budgets. What sets AccuEstimate apart is its ability to integrate regional data and permit requirements—saving me countless hours. Using it, I can quickly generate accurate estimates that consider local codes, including detailed permit fee calculations. For example, when planning a new build, I input site-specific parameters, and the tool adjusts cost estimates accordingly. Its built-in database of regional regulations, combined with features found in this guide, ensures my estimates are both reliable and compliant.
Digital Blueprints with Revit
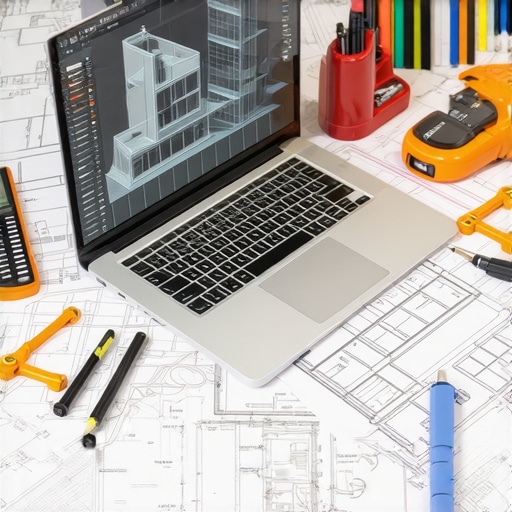
For long-term project management and updates, Revit offers comprehensive digital modeling. Its parametric capabilities allow me to simulate additions, permits, and scaling without costly rework. A recent project benefitted greatly from Revit’s ability to model structural components, ensuring compliance with evolving codes—something highlighted by industry experts in this article. This approach not only minimizes errors but also facilitates smoother permit approvals and inspections.
Portable Laser Distance Meters for Quick Measurements
When it comes to scaling and site adjustments, I swear by laser distance meters like the Leica D-Lux. Unlike traditional tape measures, these devices provide instant, precise measurements up to hundreds of meters, even around obstacles. This accuracy is crucial for estimating expansions and ensuring structural fit during rescaling efforts. As projects evolve, having reliable measurements directly impacts permit accuracy, as discussed in this guide.
How do I maintain these tools over time?
Regular calibration and software updates are key. For digital tools, I schedule quarterly checks and stay updated with the latest versions to benefit from new features and regulatory changes. Physical tools like laser meters require annual calibration to maintain precision. Additionally, backing up digital plans and estimates ensures that in case of hardware failure, I can quickly resume work without losing data.
Looking ahead, I believe integration of AI-driven project management software will become the norm, helping predict delays and optimize resource allocation automatically. To adopt these advanced strategies today, start by integrating an estimate management platform like AccuEstimate into your workflow, and see how it transforms your project’s efficiency.
If you haven’t tried a dedicated estimating tool that considers local permits and regulations, I highly recommend giving AccuEstimate a shot. It’s a game-changer for anyone serious about maintaining quality and compliance over the long haul.
What I Wish I’d Known Before Diving In
One of the toughest lessons I learned the hard way was the importance of early and thorough research into local regulations, especially when it comes to insulation R-Values. I underestimated how much a small oversight could snowball into project delays. Now, I always double-check with local authorities and get expert opinions upfront, which has saved me countless headaches.
Another insight is the value of detailed documentation. Keeping meticulous records of every calculation, permit, and certification not only streamlines inspections but also gives peace of mind for future projects. It’s a habit I wish I adopted sooner, but better late than never.
And finally, understanding that not all permits are equal changed my approach entirely. Some are straightforward; others can be complex and require strategic planning. Recognizing this has allowed me to allocate time and resources more effectively, avoiding unnecessary surprises.
Tools That Transformed My Building Process
AccuEstimate quickly became my go-to tool for precise, region-aware cost estimation. Its incorporation of local permit fees and building codes made my budgeting much more reliable, reducing unexpected expenses and project delays. I highly recommend integrating it into your workflow for peace of mind.
Revit revolutionized my planning, letting me model structural components and simulate permits and inspections. This proactive approach helped catch potential issues early, saving time and money during construction.
The Leica D-Lux laser distance meter is indispensable for accurate measurements in the field. It’s fast, reliable, and essential for precise site adjustments, especially when dealing with complex or unusual layouts. Having such tools boosts confidence and reduces costly errors.
The Spark to Take Action Now
Building or adding space is an exciting venture, but navigating permits and estimations requires knowledge, patience, and preparation. Every challenge I faced taught me the importance of proactive planning and continuous learning—skills that will serve you well regardless of project size. Don’t let misconceptions or overlooked details hold your project hostage—the right tools, strategies, and mindset are within your reach. Take the first step today, and transform obstacles into stepping stones toward your dream build.
What unexpected hurdle taught you the most during your construction journey? Share your story in the comments—I’d love to hear how you overcame it!