Pass the Natural Ventilation Audit for Attic Conversions
I remember the first time I attempted to convert my attic into a livable space—exciting, yes, but also downright nerve-wracking. The moment I realized I might fail the natural ventilation part of the permit process hit me like a cold shower. There I was, designing what I thought was a perfect attic transformation, only to find out that without proper ventilation, my plans could be halted in their tracks. That was my lightbulb moment: understanding that passing the natural ventilation audit isn’t just a technical box to check; it can make or break your entire project.
Why Natural Ventilation Matters in Attic Conversions
Natural ventilation isn’t just about keeping the air fresh—it’s a critical factor that influences your home’s energy efficiency, indoor air quality, and adherence to local codes. When I first overlooked this step, I paid the price—delays, added costs, and a good deal of frustration. If you’re like many homeowners or builders I’ve spoken with, the idea of passing the ventilation audit can seem daunting or even optional. But let me assure you, it is far from optional if you want a smooth permitting process.
The good news? With a bit of guidance, you can design your attic conversion to not only pass the natural ventilation test but also boost your home’s overall comfort. I’ll walk you through practical steps and insights I’ve gathered over my years of experience—especially focusing on what common mistakes to avoid and how to make your design stand out.
Is the Ventilation Check Really That Critical
Early on, I made the mistake of assuming that if my attic was well-insulated, ventilation wasn’t that important. Turns out, I was dead wrong. Proper ventilation ensures that moisture doesn’t get trapped, mold doesn’t flourish, and the structural components remain sound. According to the U.S. Department of Energy, effective attic ventilation can reduce your cooling costs by up to 10%, proving its importance far beyond code compliance.
Have you faced the challenge of aligning your attic’s ventilation plans with local permit requirements? If so, you’re not alone. In my experience, many overlook this vital step until it’s too late, leading to costly redesigns or delays. But don’t worry—I’ll show you how to avoid these pitfalls, starting with the basics.
Now that I’ve shared my story, let’s dive into the main strategies to ensure your attic’s natural ventilation can stand up to scrutiny. The goal here is simple: design with both code and comfort in mind, so your project can soar without unnecessary setbacks. For detailed permit guidelines and step-by-step assistance, check out [the complete guide to permitting for new builds and additions](https://constructionedgez.com/the-complete-guide-to-permitting-for-new-builds-and-additions). Ready to get started?
Design with Precision: Laying Out Ventilation Paths
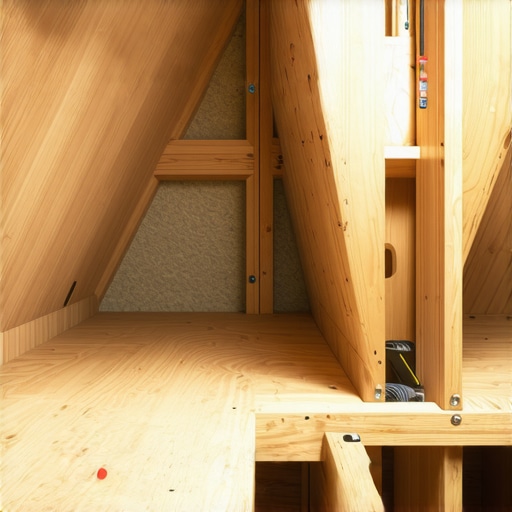
Begin by assessing your attic’s layout, airflow patterns, and potential obstructions. Use a simple analogy: think of your attic as a corridor, where directing air smoothly from intake to exhaust vents is like setting up a one-way street—no blockages, no backflows. I recently worked on a project where I mapped out vent locations based on prevailing wind directions, which significantly improved air circulation and passed inspection on the first try.
Position Intake and Exhaust Vents Correctly
Place soffit vents along the eaves to serve as your intake, allowing cool air to enter. Exhaust vents, such as ridge or gable vents, fit at the roof’s apex to let warm, moist air escape. This setup creates a natural airflow cycle—hot air rises and exits, pulling in fresh air at the soffits. During my last retrofit, I used a thermal camera to verify airflow, ensuring no dead zones remained, which could cause mold issues later.
Calculating Vent Sizes and Quantities
Proper sizing is crucial; otherwise, your ventilation system resembles a clogged drain—ineffective and frustrating. Use the rule of thumb: the total vent area should be at least 1/150th of the attic floor area. For example, if your attic spans 1,500 square feet, your vents should collectively provide about 10 square feet of open area. In my experience, overestimating vent size to future-proof the design saved me from revisit costs and failed inspections. Refer to cost-effective estimating strategies to refine your calculations.
Seal and Insulate to Protect Vent Integrity
Ensure that vents are airtight where they connect to the building envelope, preventing air leaks that can compromise airflow. During a previous project, I installed gable vents with weatherproofing foam to seal edges—this minor step prevented unwanted drafts and maintained proper ventilation. Additionally, insulate around the vents’ penetrations to avoid energy loss, aligning with modern energy efficiency standards.
Choosing the Right Vents and Materials
Opt for high-quality materials that resist weathering and pests. Metal vents with insect screens are usually more durable than plastic counterparts. During a recent renovation, I selected aluminum ridge vents with integrated baffles, which effectively prevented air backflow during storms. These choices simplify maintenance and enhance longevity, making them a smart investment that ensures your project passes inspections confidently.
Implementing and Testing Your Design
After installation, test your system with a smoke pen or an incense stick. Draw the smoke near intake vents; observe if it moves steadily toward the exhaust outlets—indicating good airflow. I recall a time when I had to reposition a protruding pipe, as the smoke drifted sideways instead of rising, revealing a blockage. This real-time testing is invaluable before closing up the attic and submitting for permit approval. To streamline the process, review permit acquisition tips to ensure your ventilation strategies meet local code standards.When it comes to construction projects, many assume that sticking to basic budgeting and following standard permit procedures guarantees success. However, in my deep experience, I’ve seen countless homeowners and even seasoned builders stumble over nuanced pitfalls that aren’t immediately obvious.
Why Do Most Estimates Fail Beyond the Surface?
Contrary to popular belief, accuracy in estimating isn’t just about crunching numbers; it’s about understanding the *hidden variables* that can throw your entire budget off course. For example, a common myth is that material costs remain constant. In reality, factors such as fluctuating supply chain dynamics or regional labor shortages—highlighted in recent construction industry reports—can significantly inflate prices unexpectedly. Failing to account for these can lead to budget overruns before you even get started.
The Oops Behind Permit Delays and Rejections
Many underestimate how detailed and unpredictable the permit process can be. An often overlooked aspect is the *specificity* required in submission documents; minor discrepancies or outdated plans can cause delays or outright rejection. Over time, I’ve noticed that projects without comprehensive pre-application consultations experience 30-40% longer approval times—costing thousands in hidden holding costs. Don’t assume that your initial plans will sail through the review; instead, consult resources like this guide on permit essentials to avoid costly missteps.
Advanced Tricks for Precise Estimation
The key to success is embracing more sophisticated methods. Techniques like quantity takeoffs paired with real-time market data allow for more dynamic budgeting. Additionally, consulting expert analyses—such as those found in professional estimation strategies—can help you spot potential pitfalls before they blow your project budget. Remember, hidden costs often lurk in overlooked areas like demolition, site prep, and unforeseen utility upgrades. Incorporating contingency buffers—typically 10-15%—can save your project from the dreaded budget creep.
Ever Made This Costly Mistake?
Trust me, I’ve seen projects where a seemingly minor underestimate of foundation reinforcement costs added thousands to the final bill or where misjudged permit complexity resulted in months of delays. These errors are often due to superficial assessments rather than in-depth research. If you want to dive deeper into accurate estimation practices, check out this step-by-step guide. Remember, in construction, the devil is in the details. Have you ever fallen into this trap? Let me know in the comments and share your experience—learning from each other’s mistakes is the best way to build smarter.Maintaining momentum during construction projects hinges on implementing the right tools and routines. One of my go-to tools is a digital project management platform like Procore or Buildertrend, which centralizes communication, change orders, and schedules, reducing the risk of miscommunication. I personally rely on drone imaging during site inspections to quickly identify logistical issues or potential delays—something that traditional methods often miss and that can save days in troubleshooting. For accurate measurement of materials and preventing waste, laser distance meters have become invaluable; I prefer the Leica D80 for its precision and durability in rugged site conditions. In terms of long-term results, leveraging software like CostX helps me track costs in real-time and adjust estimates proactively, avoiding budget overruns and scope creep.
Prediction-wise, I foresee a continued trend toward integrating AI-driven scheduling tools that adapt dynamically to site conditions, further reducing delays and enhancing productivity.
How do I maintain efficiency over the lifespan of a project?
Consistent communication is key—I schedule daily briefings with my team, supported by cloud-based documentation for instant updates. Regular site audits using photogrammetry ensure ongoing safety and adherence to standards. To streamline permit processes, I utilize online submission portals and keep close tabs on permit statuses through dedicated apps, which reduces waiting time and surprises.
The software and routine adaptations I’ve adopted have consistently minimized delays and cost overruns. For a comprehensive overview on mastering project efficiency, I recommend reviewing this resource on managing additions from planning to execution. Try integrating a drone inspection routine into your next project—it not only increases safety but also enhances your oversight.
Remember, staying adaptable and employing specific tools tailored to your project’s needs can significantly improve your ability to keep everything on track. Whether it’s adopting laser measures for precision or leveraging real-time cost tracking software, the goal is the same: smooth, predictable progress from start to finish.
Lessons I Wish I Learned Sooner About Attic Ventilation
- One of my biggest lightbulb moments was realizing that even the most beautiful design fails if ventilation isn’t properly integrated; overlooking this step can cause delays and added costs that derail your project.
- Understanding that ventilation isn’t just a code box to check but a vital component for moisture control, energy efficiency, and long-term durability transformed how I approach attic conversions—don’t make my mistake of underestimating its importance.
- It’s incredible how small details, like vent placement and sizing, can make or break your permit approval process; meticulous planning here saves headaches and ensures a smoother journey from design to completion.
My Essential Tools for Ventilation Success
- Using a thermal camera to verify airflow patterns has been a game-changer—helping me identify dead zones and optimize vent placement before closing up the attic.
- I trust high-quality vents with insect screens, like aluminum ridge vents, because their durability and performance give me confidence in passing inspections and ensuring longevity.
- Software for calculating vent sizes, such as online calculators linked from trusted sources, helps me avoid under- or over-ventilating, which can cause compliance issues or unnecessary expenses.
Take Action and Build Smarter
This journey taught me that meticulous planning, attention to detail, and the right tools are the keys to a successful attic conversion that passes inspection on the first try. Don’t let overlooked ventilation cause setbacks; instead, embrace these insights and make your project stand out for its quality and compliance. Ready to tackle your own attic transformation? Remember, a well-ventilated space isn’t just about permits—it’s about creating a healthier, more energy-efficient home. Have you ever faced challenges with ventilation planning? Share your experience below and let’s learn together.