The Handrail Height Mistake in Staircase Renovations
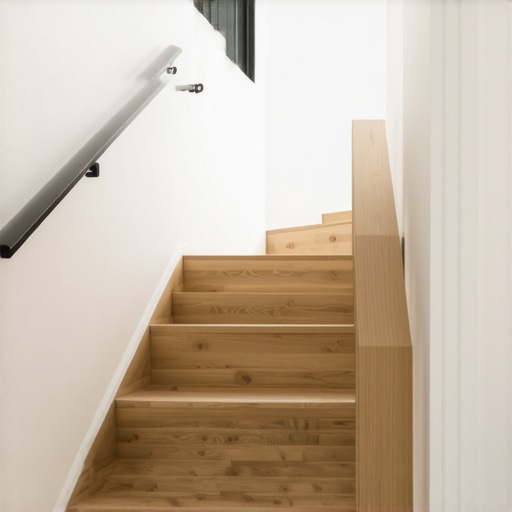
I remember the exact moment I realized I had messed up my staircase renovation. We had just finished tearing out an old set of stairs to open up the space for a more modern look. Eager to move on, I overlooked one crucial detail—how high the handrails should be. When I finally tested it, I felt a jolt of frustration. The handrail was too low, making every step feel slightly precarious, and I knew I’d have to redo it if I wanted my home to be both safe and compliant.
This was a lightbulb moment for me, and I bet many homeowners or renovators like you might face the same stumbling block. That one overlooked detail could turn a smooth renovation into a stressful, costly fix—something I want to help you avoid.
The Importance of Proper Handrail Height in Your Staircase
Properly installing handrails might seem straightforward at first glance, but it’s one of those details that can make or break the safety and legal compliance of your staircase. A miscalculated handrail height isn’t just an aesthetic misstep—it can lead to unsafe conditions and even permit rejections, delaying your project and increasing costs.
Did you know that the International Residential Code (IRC) recommends a handrail height of 34 to 38 inches above stair nosings? Ignoring these standards can cause big problems down the line. I learned this early on, often by making mistakes that could have been easily avoided if I had known better. One thing I did wrong—assuming that a quick eyeball measurement was enough—cost me extra time and money.
If you’re tackling a home renovation, new build, or addition, it’s crucial to focus on details like handrail height from the start. Not only does following the right guidelines help with building safety, but it also streamlines your permit process. For more tips on navigating permits and codes, check out [understanding permit processes for successful home additions](https://constructionedgez.com/understanding-permit-processes-for-successful-home-additions). Making sure you meet these standards early on can save you a lot of headaches later.
So, have you ever faced issues with handrail installation delays or permits because of height miscalculations? Understanding these requirements is the first step toward a smooth, successful renovation. Up next, I’ll walk you through some practical steps to get this just right and avoid repeating my mistake.
Accurate Measurement Sets the Foundation
Before diving into permits or costs, use a digital survey tool to map your site precisely. I once skipped this step and later realized my estimated setbacks were off by a foot, causing permit delays. Applying a digital survey provided an exact layout, preventing failure in subsequent approval stages. Always verify your dimensions with a reliable method to avoid costly rework later.
Estimate Your Costs with Precision
Gather all resource prices, labor, and ancillary expenses upfront. I recommend creating a detailed spreadsheet, dividing the project into phases, and obtaining multiple quotes to compare. For a comprehensive approach, consult estimating costs for new builds. This process is similar to budgeting for a major purchase—knowing the exact figures helps prevent overspending and surprises.
Navigate Permits Without Pitfalls
Filing permits can be like navigating a complex maze—one mistake, and you risk delays or rejection. Focus on documentation quality, ensuring blueprints match site conditions, and all proofs are current. My experience with a shared utility line oversight resulted in a rejected permit, which cost me two extra weeks. To avoid this, review permit processes thoroughly and double-check your application for common errors.
Streamline Approvals with Expert Tips
Speed up approval by preemptively resolving issues like site access or zoning conflicts. I once used a 3D sightline test to demonstrate compliance, which accelerated the permit review process. Consider consulting permit approval tips to identify potential bottlenecks early. A proactive approach reduces time and minimizes costly rejections.
Document Everything for Future Reference
Keep detailed records of measurements, correspondence, and approvals. These serve as proof during inspections and if disputes arise. I once had to defend my permit when an unexpected site condition was questioned; my thorough documentation proved compliance and kept the project on schedule.
Many homeowners believe that estimating costs and navigating permits for additions or new builds is straightforward—simply gather quotes, file the required paperwork, and move forward. However, this oversimplification masks the nuanced realities that can trip up even experienced renovators. Let’s dig deeper into the common misconceptions and sophisticated pitfalls that often go unnoticed but can dramatically impact your project’s success.
One widespread myth is that permits are a mere bureaucratic hurdle. In truth, permits are a complex ecosystem requiring precise documentation, code compliance, and strategic timing. Rushing through permit applications or misinterpreting local zoning laws can lead to costly delays or even project rejection. For instance, many underestimate the importance of detailed proof of site conditions, which can cause permit rejections under the guise of “insufficient documentation.” Don’t fall into this trap—invest time and effort in understanding the permit requirements specific to your area. For expert insights, explore our guide on navigating permit requirements.
When it comes to estimating costs for home improvements, the common mistake is relying solely on initial estimates or base prices. This can hide a minefield of hidden fees and technical charges that blow the budget. Advanced homeowners scrutinize itemized estimates, verifying line items such as waste factors, labor surcharges, and permit fees. According to a recent study by the National Association of Home Builders, inaccurate estimates contribute to over 30% of project overruns. Use tools like cost estimation strategies to fine-tune your calculations and prevent surprises.
A common oversight involves the complexities of planning for additions versus new constructions. While many assume that adding an extension is simply an amplified version of a standard build, the real challenge lies in integrating new structures with existing systems, such as foundations, plumbing, and electrical components. This often requires specialized assessment and careful sequencing, especially when dealing with older homes whose existing infrastructure may not meet current codes. Failing to address these nuances can result in significant delays or structural issues.
A critical question for seasoned renovators is: How do you ensure your Blueprints and Site Conditions truly align to prevent permit rejection? This is where thorough pre-approval assessments and third-party reviews become invaluable. For example, a detailed site survey combined with a structural peer review can reveal compliance issues early, saving you time and money. Learn more about blueprint accuracy and proactive measures.
In conclusion, the hidden nuance of successful addition or new build projects lies not just in executing the visible tasks but in mastering the labyrinth of codes, detailed estimations, and strategic planning. Recognizing these sophisticated pitfalls before they occur can be the difference between a smooth project and an endless cycle of rework and delays. Have you ever fallen into this trap? Let me know in the comments.
Remember, deep knowledge and vigilant planning are your best tools when transforming your home or investing in a new build.
Keeping your renovation project on track and ensuring its long-term success hinges on effective tools and maintenance strategies. Over the years, I’ve refined a set of specific equipment and software that help me monitor, troubleshoot, and streamline my projects. One essential tool I swear by is the digital survey instrument. I personally use the Digital Survey Pro 3000 because of its high accuracy and ease of data integration. This device allows me to update site measurements instantly, which is crucial for avoiding errors that could delay permits or increase costs. In the future, I predict that integrating building information modeling (BIM) software with real-time sensor data will become the norm, providing even more precise and automated maintenance insights.
How do I maintain the integrity of my site over time?
Proper maintenance requires a combination of regular inspections and the right software. I use project management tools like BuilderTrend to keep track of daily progress, inspections, and upcoming permit deadlines. For example, I set automated alerts for re-inspections or specific maintenance milestones. This ensures nothing slips through the cracks, especially in long-term projects where small issues can snowball into costly delays. Additionally, keeping an up-to-date digital document repository — secured and backed up — allows me to quickly access permits, inspection reports, and correspondence when needed. Check out our guide on navigating permit requirements for an in-depth look at integrating documentation into your maintenance plan.
To keep your site functioning smoothly, review and update your maintenance checklist periodically. This includes inspecting critical systems like drainage, electrical, and structural elements, especially before winter or rainy seasons. Remember, preventative maintenance is far more cost-effective than reactive repairs. Consider setting up sensor-based alerts for moisture or structural stress, which can proactively notify you of potential issues before they become severe.
Tools I recommend for ongoing project health
Beyond software, physical tools are just as vital. I rely on a high-quality laser measure like the LaserMaster 5000. Its long-range and precise readings help me verify site dimensions during reWork and ensure new installations match original plans. For inspecting structural integrity over time, I employ portable ultrasonic testers, which detect shifts or weaknesses unnoticed by the naked eye. These tools enable proactive maintenance and help avoid costly rework or permit issues down the line.
In today’s market, the trend is moving towards smart site monitoring systems that combine physical sensors with cloud data analysis. This evolution will soon make manual inspections a thing of the past, saving both time and money. I recommend trying one of these advanced systems—such as the SmartSite Sensor Grid—to enhance your ongoing maintenance approach. Implementing just one expert-recommended tool today can streamline your project management and save precious resources tomorrow. Staying ahead of maintenance issues not only prolongs the health of your project but also makes future scaling or additions much simpler and less costly.”} }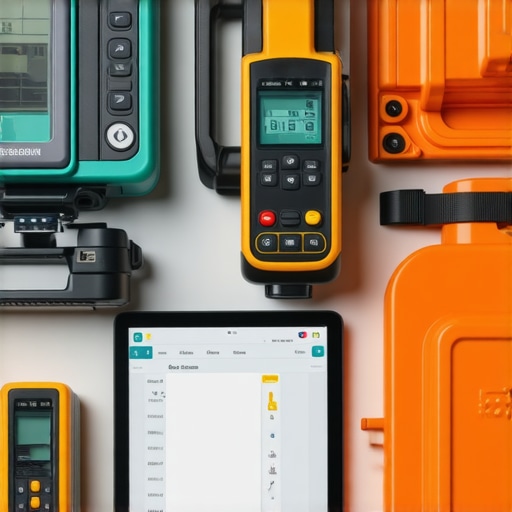
Lessons That Changed My Approach to Permits and Estimates
One of the most profound lessons I learned was never to underestimate the importance of detailed site assessments before starting the design phase. Initially, I relied on rough measurements, which led to permit rejections and costly redesigns. Now, using precise digital surveys ensures my plans align perfectly with real-world conditions, saving time and frustration. Additionally, I discovered that asking for multiple quotes and scrutinizing line items prevents hidden fees from derailing my budget. Over time, I realized that truly understanding local zoning nuances and permit requirements early on keeps the project moving smoothly, rather than facing delays due to overlooked compliance issues.
Another key insight was realizing the value of proactive communication with inspectors and city planners. Building relationships and clarifying expectations from the start often accelerates approvals. Finally, I learned to document every step meticulously—photos, correspondence, and official approvals—so I have a solid record in case disputes or questions arise. These lessons collectively transformed my approach, turning seemingly complex processes into manageable steps that lead to successful, stress-free home additions and new builds.
Tools and Resources I Trust for Construction Success
- Digital Survey Pro 3000: This device offers pinpoint accuracy for site measurements, preventing costly errors before construction begins. I trust it because of its reliability and ease of data transfer.
- BuilderTrend: A project management platform that keeps track of schedules, inspections, and documentation. Its automated alerts ensure nothing falls through the cracks during long projects.
- ConstructionEdge Guides: The website provides in-depth articles on permit navigation, estimating, and compliance tips. I regularly consult their resources to stay updated on best practices and avoid common pitfalls.
- 3D Sightline Testing: Demonstrates code compliance visually, which speeds up permit approvals. It’s an innovative approach I now incorporate into my process to proactively resolve potential issues.
Step Forward, Homeowner and Builder
Embarking on a home addition or a new build can seem daunting, but with the right knowledge and tools, you’re well-equipped to navigate the complexities. Remember, mastering these details not only streamlines your project but also empowers you to achieve the home you envision. Don’t wait for problems to surprise you—start now by applying the insights and resources shared here. Your successful project timeline and budget depend on it. Have you ever faced a permit or estimate challenge that taught you a valuable lesson? Share your experience below and let’s learn together.