How to Appeal a Failed Insulation Inspection Without Ripping Out Drywall
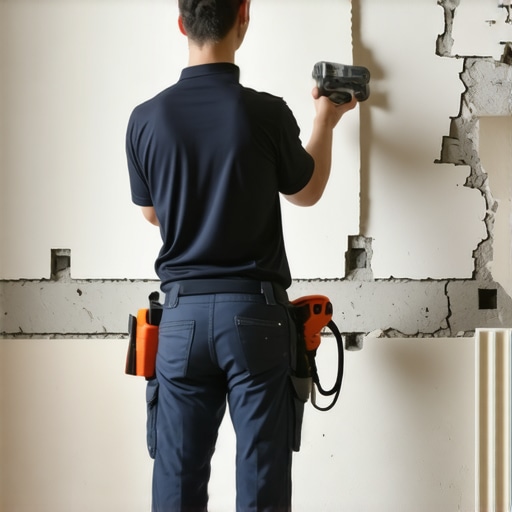
Ever had that sinking feeling when your insulation inspection comes back with fails? I remember the cold shock of realizing I had to tear out drywall just because I overlooked a tiny detail. It felt like stepping into a nightmare where all my careful planning was unraveling right before my eyes. The first time I faced this, I thought my project was doomed, and I was frustrated as hell. But then I discovered something that changed everything: you don’t have to rip out drywall to fix insulation issues—and you definitely shouldn’t face a failed inspection blindly.
Why This Issue Can Make or Break Your Home Project
Here’s the truth: inspections are the final hurdles that test whether your work truly meets local codes. Failing one, especially on insulation, can cause delays, added costs, and endless frustration. And the worst part? Early mistakes in estimating or understanding permit requirements often lead right here. A mistake I made early on was assuming all inspections “sort themselves out.” That was a costly misconception. Instead of panic, I learned that appealing a failed inspection is about knowing your options, not about ripping drywall apart or starting over.
Questioning the Value of an Appeal
Some folks wonder if appealing a failed insulation inspection is even worth the hassle. My experience says yes—if done right. The key is realizing that many failures are correctable without major demolition, saving you thousands of dollars and weeks of project downtime. Plus, the process is less about fighting and more about demonstrating compliance. Did you know, according to experts, that understanding the specific points inspectors flag can make your appeal a smooth process? That’s why getting familiar with the inspection standards beforehand is a game-changer. If you’re considering this route but worried about potential setbacks, you’re not alone. Many enthusiasts fall into the trap of rushing repairs without understanding the root cause. I did, and I paid for it. So, how do you turn a failed inspection into a win? That’s what we’ll explore next—step by step, real-world style.
Assess the Inspection Report Clearly
Start by reviewing the inspector’s notes carefully. Identify exactly which aspects of your insulation failed—was it inadequate coverage, missing vapor barriers, or improper sealing? As I did during my last project, keep a detailed list of these points so you can address them precisely instead of guessing or redoing large sections unnecessarily. Remember, not every failure warrants total demolition. Sometimes, small adjustments can pass inspection after re-evaluation.
Develop a Targeted Action Plan
Once you understand the issues, plan specific fixes. For example, if the vapor barrier has gaps, you might just need to seal those areas with spray foam or specialized tape. This approach is akin to patching a leak rather than replacing the entire pipe. During my repair, I used sealing caulks around penetrations and added insulation to thin spots, which proved effective in passing the re-inspection. Accurate estimation of materials and time is crucial here—consult resources like top estimating strategies to ensure your repairs are cost-effective and on schedule.
Use Proper Techniques for Sealant and Insulation
Apply sealants with precision. For gaps in vapor barriers, use spray foam or foil tape designed for insulation. When adding batt insulation, ensure it fits snugly without compression, which reduces R-value. During my project, I found that properly cutting and fitting insulation saved me from future failures. Think of it like tailoring a garment—precision makes all the difference. If you’re unfamiliar with the proper methods, consider consulting detailed guides or estimating home additions for comprehensive procedures.
Simulate the Inspection Process
Before scheduling your re-inspection, do a mock review. Check for any missed issues, like unsealed penetrations or compressed insulation. This is similar to test-driving a car before buying; it reveals flaws you might have overlooked. During my experience, a second check uncovered a small overlooked gap, which I sealed prior to the official re-inspection. This proactive step can save you time and additional inspection fees.
Document Everything and Communicate Clearly
Keep detailed records of the fixes—photos, receipts, and notes. When you request the re-inspection, provide this documentation upfront to demonstrate your efforts. Clear communication with the inspector can also clarify any ambiguities, reducing the chances of another failure. I learned that being transparent throughout can foster cooperation, leading to quicker approvals. If you’re unsure about permit requirements or inspection standards, visit understanding permit processes.
 When it comes to estimating construction costs and navigating the permit process, many assume that accuracy comes down to simple math and straight-line procedures. However, this oversimplification can lead to costly mistakes and project delays. As an industry veteran, I’ve seen how misconceptions about these aspects can sabotage even the most well-planned projects. Let’s unpack some of these hidden nuances and challenge common beliefs.
A typical myth is that detailed estimates are just about summing up material and labor costs. While basic, this ignores the complexity of real-world conditions, such as site-specific challenges and fluctuating market prices. In truth, effective estimating requires a nuanced understanding of regional construction trends and supplier relationships. For example, many overlook the impact of seasonal availability on material costs. Tools like expert insights highlight how advanced estimates account for these variables to prevent budget overruns.
Another misconception is that permits are merely bureaucratic hurdles that can be cleared with the right paperwork. In reality, permit processes are deeply intertwined with local zoning laws, environmental regulations, and community standards. Many underestimate the time and detail needed to secure approvals, especially for additions or new builds. This can lead to project halts if proper preparation isn’t done. To avoid this, familiarizing yourself with regional requirements through comprehensive guides like understanding permit processes is essential.
**Are permit costs and estimation timelines connected?** Absolutely. Advanced planners understand that permit fees are not static; they fluctuate based on project size, location, and scope of work. Underestimating these fees can eat into your budget. Additionally, permit approval timelines can extend project schedules unexpectedly, especially if applications lack critical details or documentation. An often-overlooked aspect is pre-approval consultations, which can smooth the process—more info at navigating permit requirements.
The real
Invest in Precision Tools for Long-Term Success
When it comes to maintaining the quality and efficiency of your construction projects, having the right tools is non-negotiable. I personally rely on a high-accuracy laser distance meter like the Bosch GLM 50 C to measure space dimensions quickly and accurately. This device not only saves time but also ensures that estimates for additions or new builds are spot-on, preventing costly rework later. In my experience, investing in quality measuring tools pays off by reducing errors and strengthening compliance with permit requirements.
Leverage Software for Better Estimation and Management
Manual calculations have their place, but today’s project complexity makes software indispensable. I recommend using a program like Buildertrend or CoConstruct that specifically caters to small to medium-sized projects. These tools help me track costs, schedule tasks, and manage permit documentation effortlessly. Their integration with real-time data ensures estimates stay accurate as market prices fluctuate, which is crucial for long-term budgeting and scaling efforts.
Establish Routine Maintenance Checks
To keep your tools in top shape, I set recurring maintenance routines. For power tools, I regularly clean and lubricate moving parts and check for cord and battery integrity. For electronic devices, I update firmware and run calibration tests. This discipline prevents unexpected breakdowns during critical phases like permit submissions or inspections. Using manufacturer-recommended maintenance schedules, as outlined on professional guides, extends your equipment’s lifespan and ensures consistent performance.
Adopt a Digital Documentation System
Storing all project records digitally, with cloud-based platforms like Dropbox or Google Drive, keeps documentation accessible and organized. I photograph inspections, store permit approvals, and keep receipts in categorized folders. This habit simplifies the process of providing necessary proof during re-inspections or audits, saving time and reducing errors. As the industry trends toward digital integration, establishing a reliable documentation system now gives you an edge in managing multiple projects and scaling operations effectively.
How do I maintain tools and systems to ensure they serve project goals long-term?
Regularly scheduled checks, proper storage, and immediate troubleshooting are key. Staying updated on the latest versions of estimation and project management software enhances accuracy and security. Forward-looking, I believe the future of construction management will lean heavily on AI-driven tools that automate risk detection and optimize resource allocation—making proactive maintenance even more critical. To get started today, I recommend choosing one area—say, digital documentation or routine calibration—and dedicating time to developing a system that integrates seamlessly into your workflow. For more tailored strategies, consider reaching out via contact us.”} } {
{
Over the years, I’ve realized that the most valuable insights in construction don’t always come from books or formal training—they come from the lessons learned during real projects, often through trial and error. Sharing these hard-won truths can save you time, money, and frustration on your journey through estimating, permits, and home additions. Here are some personal revelations that might change the way you approach your next project.
The Hardest Lesson I Learned About Estimating and Permits
One of my biggest mistakes was underestimating the time and complexity of permit approval processes, which led to unexpected delays and cost overruns. I used to believe a permit was just paperwork, but I’ve come to see it as a vital part of the project’s backbone—neglect it, and you risk costly surprises. Now, I start permit planning early, consulting permit requirements from the get-go, and I never skip the pre-application research.
Another lesson is that accurate estimation isn’t just about summing material costs. It’s about understanding regional supply chains, seasonal fluctuations, and potential labor shortages. I’ve learned to incorporate contingency estimates and to leverage tools mentioned at cost-effective estimating techniques to keep budgets realistic and adaptable.
3 Myths About Home Additions That Held Me Back
- Myth: Ripping out drywall is the only way to fix insulation failings.
Reality: Skilled patching and sealing often suffice, saving time and money. It’s all about precise diagnosis first. - Myth: Permits are a nuisance that can be ignored if I’m careful.
Reality: Ignoring permit details delays projects and can lead to legal troubles. Always stay compliant from the start. - Myth: Estimating is guesswork.
Reality: When backed by data, proper tools, and regional insights, estimating becomes a science—one I now trust deeply for project planning.
What Industry Veterans Won’t Tell You About Construction Planning
Many seasoned builders keep some strategies close to the vest, but here’s a crucial one: build solid relationships with local permitting offices. Regular communication and understanding their priorities can expedite approvals and give you a heads-up about potential hurdles. Additionally, investing in quality tools like accurate measuring devices and management software, as shared at project management guides, substantially improves your accuracy and efficiency.
Where to Go from Here
If you’re ready to elevate your estimating and permitting game, I recommend exploring the resources available on our contact page and the insightful articles linked throughout this post. Remember, mastery comes from continuous learning and embracing the realities of construction, not just the ideal scenarios we hope for. The key is to be proactive, informed, and adaptable—traits that turn setbacks into stepping stones toward success.
The Future of Construction Planning
Looking ahead, I believe that integrating digital solutions and real-time data will revolutionize how we approach estimating, permitting, and managing additions. Tools like AI-driven analytics and instant permit tracking will become standard, making projects smoother and more predictable. So, my advice? Stay curious, stay tech-savvy, and don’t shy away from asking tough questions—your next project depends on it.
Your Turn to Try
Have you ever faced a permit delay or estimate miscalculation that threw off your schedule? How did you handle it? Share your experiences below—I’d love to hear your insights and learn from your journeys!